Saturday, May 13, 2017

Paper Pumpkin Saturday - Sara Thing

Happy Saturday My Blogger Friends!
My blog post for today is Paper Pumpkin Saturday ........... And do I have three SERIOUSLY FUN CARDS to share with you!  These cards were all made with the April Paper Pumpkin kit.  This kit was an exclusive kit designed by Stampin' UP! CEO Sara Douglas and was properly named ....... A Sara Thing.  I'm totally in love with all three of these cards and want to share them with you now.
These cards were based around the watercolor technique that Sara created for this kit.
First up was this QUICK & EASY watercolor wash card.
I created mine for a 'Father's Day' card.......And think it's going to make some special Dad SMILE BIG! 
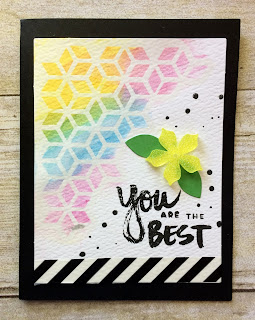
Next up is a multi-colored watercolor resist card.
All I needed to do was scribble some watercolor pencils over the embossed diamond image and then add some water to the top of the color and blend it all in.
And this card just HAS TO BE MY FAVORITE!
The diamond image was colored in quickly with the watercolor pencils and the two flowers came with the kit and were attached with a couple glue dots.
I would say that Sara knocked this kit out of the park and after I created these three cards ...... I went to town designing some alternate cards.  I will share those with you over the next couple of weeks.
 
Thanks for joining me today!  I'll be back tomorrow to share a special Mother's Day project with you .......... Hope you can make plans to stop back and join me for that share.  Keep Living Your Dream!

Friday, May 12, 2017

Friends Friday Picks

Happy Friday My Blogger Friends!
My blog post for today is Friends Friday.  On Friday's, I have the honor of spot-lighting some of the fabulous cards that I received from Friends ....... Fellow Demonstrators ........ and Family.  Each of these card creations are works of art........and it is with great pleasure that I share those card creations with you now.........
First up is this hand painted card that my Saddle-UP! friend Merry made for me.  It is BEYOND GORGEOUS!!!
Next up is this OH SO SWEET card that my friend and fellow demonstrator Judy G. made for me.
This card was made by my downline and friend Gus B.  It SERIOUSLY makes me smile every single time I look at it.
And my final card share for today is this PRETTY PRETTY.....OH SO PRETTY card that my friend and fellow demonstrator Donna F. made for me.  (Of course.......I'm not surprised she remembers how much I LOVE PINK!!!!!)

Thanks for joining me today!  I'll be back tomorrow to share a special Paper Pumpkin Saturday creation with you ........ Hope you can make plans to stop back and join me for that share.  Keep Living Your Dream!

Thursday, May 11, 2017

Paper Pumpkin Promotion

For a limited time.....FIRST-TIME Paper Pumpkin subscribers can enjoy THREE months at 25% off!

Starting TODAY (May 11) and ending June 10, first time Paper Pumpkin subscribers can enjoy 25% OFF their first three months.
 
ALL first-time Paper Pumpkin subscribers will receive an introductory 25% discount on their June, July, and August 2017 kits.
 
CHECK OUT just some of the benefits of becoming a Paper Pumpkin subscriber:
  • The convenience of an all-inclusive kit arriving at your door every month.
  • Paper Pumpkin kits include all you need for a monthly creative fix!
  • Exclusive photopolymer stamp sets and the opportunity to build a collection.
  • Crafting time you can count on without a lot of prep work.
  • Trying new techniques.
  • Creating alternate projects with all the goodies in the box.
  • Getting together with friends to craft every month.
  • Purchasing past kits and refills so the fun never ends.
  • The quality of the products and variety of projects each month.
  • Sharing ideas with a community of online crafters.
  • The surprise factor!
Here are the limitations of this promotion:
  • For first-time subscribers only.
  • You must join by Saturday, June 10, 2017; 11:50 PM (MT).
  • Available for month-to-month subscriptions, not prepaid subscriptions.
  • Discount applied to one kit per month for the first three months of a new subscription. After that, the price for each month’s kit will return to the regular price of $19.95.
  • Enter the promo code, STARTHERE upon checkout.
TO SUBSCRIBE THRU ME, PLEASE VISIT MY PAPER PUMPKIN SITE:
and enter STARTHERE to receive the 25% off promotion.
When you sign up, you’ll be asked to select a demonstrator. 
All you need to do is type in my name.........Kadie Labadie.
 

Tag Thursday Eastern Palace Suite

Happy Thursday My Blogger Friends!
My blog post for today is Tag Thursday.  Today, I will feature a tag I created and show you how easy it is to use minimal supplies to create a SUPER PRETTY THANK YOU TAG.  Now that you have the details for my Tag Thursday creation ....... Let's jump right in with my tag share for today.......
These are my May Customer Order Tag.....
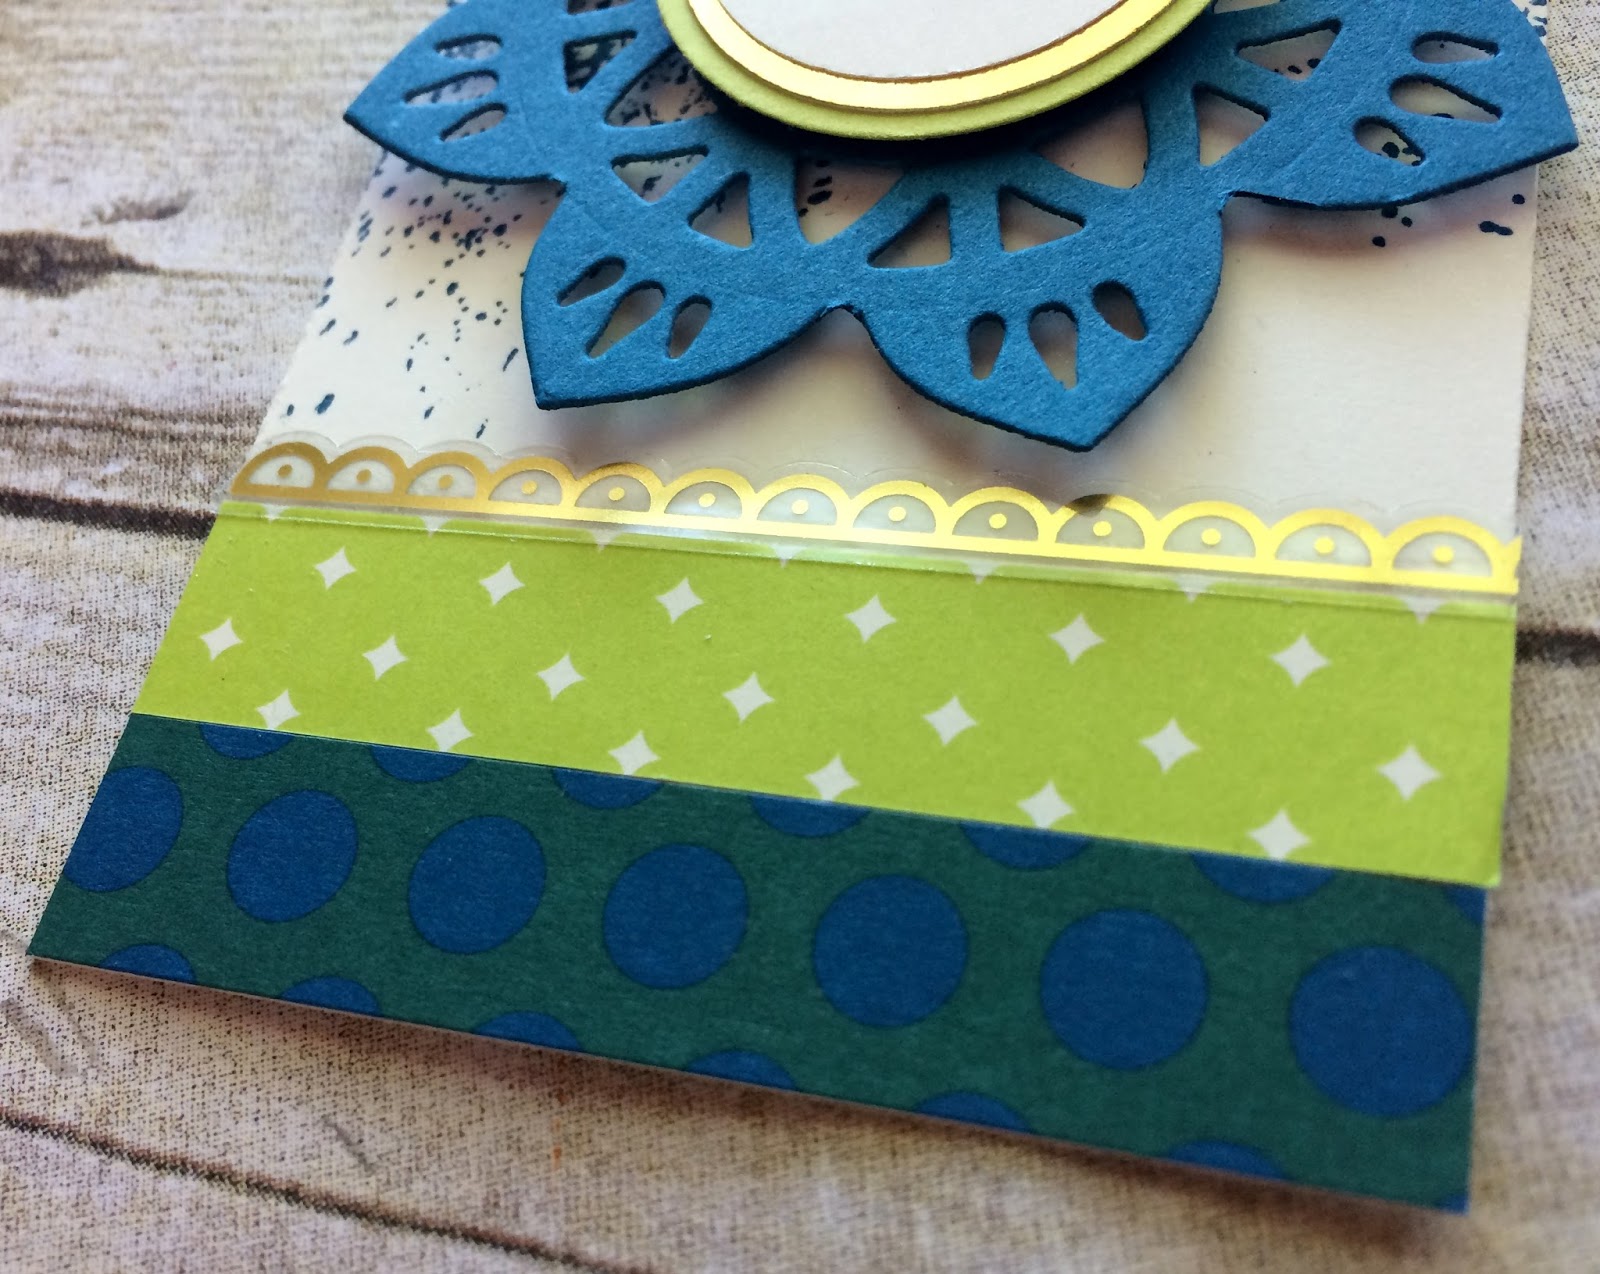
This tag was created with product from the new Eastern Palace Suite.  I began by using the 'Eastern Medallions Thinlits Dies' and creating this beautiful Dapper Denim medallion.  I stamped my thank you sentiment with the help of the 'Eastern Beauty' stamp set.
For the bottom of my Very Vanilla tag, I added some of the 'Eastern Palace Specialty Designer Series Paper' and topped it all off with the 'Eastern Gold Vinyl Stickers'.
My tag was topped off with a piece of Dabber Denim Ruched Ribbon and some (retired) gold cording.
Just couldn't be happier with the way this tag turned out......
What do you think?????
 
Thanks for joining me today!  I'll be back tomorrow to share some Friends Friday creations with you ........ Hope you can make plans to stop back and join me for that share.  Keep Living Your Dream!

Wednesday, May 10, 2017

Beautiful You Bleach Card

Happy Wednesday My Blogger Friends!
My blog post for today is Wine-Down Wednesday.  My middle of the week card feature for today will hopefully offer you some inspiration and provide you with some motivation to keep you moving through your busy week.  Let's jump right in with my card share for today........
Who wouldn't LOVE receiving this card?
I started out by stamping my image from the 'Beautiful You' stamp set with VersaMark ink and sprinkling Black Embossing Powder over the top.  I then grabbed my heat tool and began melting the embossing powder.  This created a beautiful raised image for my dancing girl.  The step of embossing my image was important because next I grabbed some household bleach and an old 'Blender Pen' and began filling the image in with bleach.  (If I hadn't used the embossing powder on my dancing girl image, the bleach would have ran over the edges of the image and leaked over my dancing girl image.)
While I had my Black Embossing Powder out ........ I used that also on my Happy Birthday sentiment.
And to finish my card off ....... I wrapped some Black Baker's Twine around the seam of my Smoky Slate cardstock and 'Falling in Love Designer Series Paper' a couple times and tied it all up in a pretty bow.
Just LOVE LOVE LOVE how my card turned out and think the special friend I'm sending it to will also LOVE IT!

Thanks for joining me today!  I'll be back tomorrow with a Tag Thursday creation to share with you ........ Hope you can make plans to stop back and join me for that share.  Keep Living Your Dream!

Tuesday, May 09, 2017

3D Tuesday - CASE Notecard Holder Gift

Happy Tuesday My Blogger Friends!
My blog post for today is 3-D Tuesday.  That means today I have a fun little 3-D project to share with you.  This project was SUPER FUN to create and the inspiration and video was share by Crafty Caroline on her UTube channel (June 21 2015).  Caroline just couldn't have made it any easier to make this darling little notecard holder.  Let's jump right in with my project share for today..........
 
I made this darling little notecard holder gift for my Saddle-UP! Into Spring 3-D Gift Exchange.  The holder is secured with a ribbon belly band that isn't removed from the holder.......Rather the top flap tucks down behind the ribbon.  That is what keeps this holder closed.
Here is what is on the inside of the holder.
There are four notecards and coordinating envelopes.
I used the Stampin' UP! notecards for the base of my cards ....... And then I used the 'Swirly Scribbles Thinlits Dies' to decorate the top of each card.
The swirly die-cut piece was die-cut using Dapper Denim cardstock....
And I used the 'Large Polka Dots Embossing Folder' on my Marina Mist cardstock panel ...... And that gave each card the little hidden WOW FACTOR I was looking for.
I decorated the front of the box with another swirly die-cut piece and then punched it up with some little Real Red flowers.  The ribbon I used to wrap around my holder was the 5/8" Organza Ribbon from the Annual Catalog.
Turned out to be a pretty easy project to make ....... and the lucky Saddle-UP! guest who received it was VERY HAPPY!  Thank You Crafty Caroline for the amazing video you provided to make this project.
 
Thanks for joining me today!  I'll be back tomorrow to share a Wine Down Wednesday card with you ........ Hope you can make plans to stop back and join me for that share.  Keep Living Your Dream!

Monday, May 08, 2017

Mix-It-UP! Monday Hooray Upgrade

Happy Monday My Blogger Friends!
Today is Mix It UP! Monday and I have an upgraded version of the card I shared with you yesterday.  I used the exact same product that was used to create yesterday's card ....... but added some additional product found in the new 2017-2018 Annual Catalog to bring this card up to the next stamping level.

Here is my Spot Light Sunday card on the TOP.....
And my Mix-It-UP! Monday card on the BOTTOM....
Today's upgraded version added some additional DSP and stamping.
I started out by die-cutting both the fun fox and the banner flag from the 'Birthday Memories Designer Series Paper'.
Here you can see that I added the Hip Hip Hooray sentiment from the 'Birthday Delivery' set right into the die-cut banner.  I also added an additional panel of Designer Series Paper to the top of my Crumb Cake card.
I also added that same Designer Series Paper to the bottom of my card.  To the top of the Designer Series Paper I stamped my birthday sentiment (also from the 'Birthday Delivery' set) on a panel of Pacific Point cardstock.......and then adhered that stamped sentiment directly onto my Designer Series Paper.
I used Crumb Cake ink and the present stamp from the 'Birthday Delivery' stamp set and stamped a row of presents across the bottom portion of my card.  And one final upgrade was adding some of the new 'Glitter Enamel Dots' to the top of each stamped present.
So there you have it friends......
Do you have a favorite?????

Thanks for joining me today!  I'll be back tomorrow to share a 3-D Tuesday project with you ........ Hope you can make plans to stop back and join me for that share.  Keep Living Your Dream!