Thursday, November 30, 2017

Day 7/32 Christmas Extravaganza Tag

Happy Thursday My Blogger Friends!
Today is Day 7 of my 32 days of Christmas Extravaganza projects.  This tag was created using product from the Stampin' UP! 2017 Holiday Catalog and the 2017-2018 Annual Catalog.  It's one of those WOW FACTOR kind of tags that will look GREAT on a gift or even a bottle of yummy wine this holiday season.  Let me share that tag with you now......
This FULL BLOWN 3-D tag is just screaming with
Holly Jolly FUN!!!!
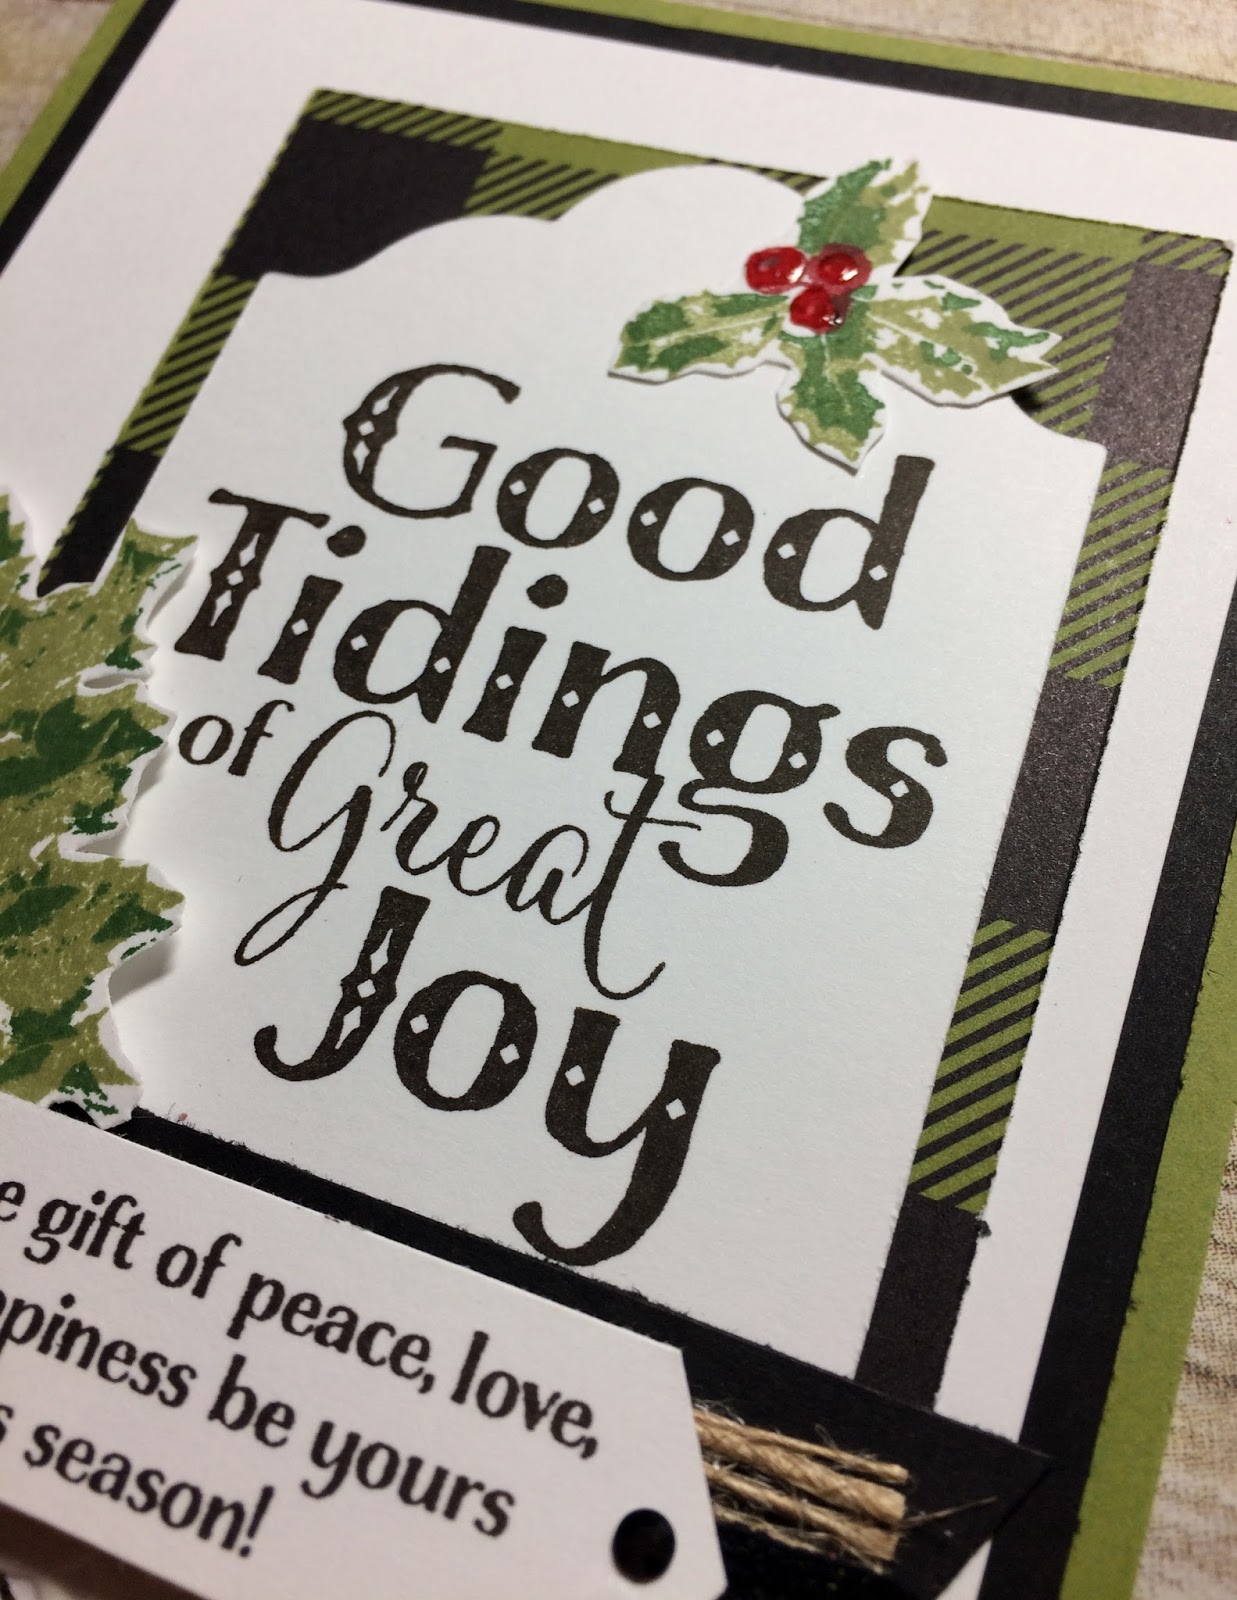
I started out by using the starburst image that is in the Host set 'Seasons of Whimsy' set on a Whisper White tag.  Each starburst image was stamped with VersaMark ink and sprinkled with Silver Embossing Powder and then heat set.
 
Next, I stamped my 'deck the halls' sentiment with the 'Seasons of Whimsy' host set using a Whisper White banner flag and VeraMark ink and Silver Embossing Powder.
After attaching the silver embossed Whisper White banner flag to a Real Red/Whisper White and Silver Foil layered circle piece ............. I tucked two 'Green Sprigs' behind the Whisper White banner flag and then used Stampin' Dimensionals to pop that banner flag onto the layered circle piece.
The final touch to this tag was adding two 'Metallic Enamel Shapes' to each end of the Whisper White banner flag ........ And then tucking one of the 'Year of Cheer Embellishments' between the two Green Sprigs.
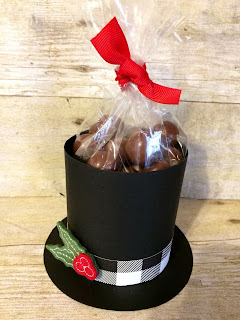
I finished this tag off with a small piece of the 3/8" Silver Metallic-Edge Ribbon at the top of my tag and then added a pretty Whisper White Baker's Twine bow.
I'm just crazy about the way this tag turned out ........ And I already have it ready to be attached to a fabulous bottle of wine for a friend.
 
Thanks for joining me today!  I'll be back tomorrow to share Day 8/32 Christmas Extravaganza with you ........ Hope you can make plans to stop back and join me for that share.  Keep Living Your Dream!

Wednesday, November 29, 2017

Day 6/32 Christmas Extravaganza Snow Drift Card

Happy Wednesday My Blogger Friends!
Today is Day 6 of my 32 days of Christmas Extravaganza projects.  This card was created using product from the Stampin' UP! 2017 Holiday Catalog and the 2017-2018 Annual Catalog.  This card has all the details of a cozy winter scene that anyone from the Midwest could enjoy.  Let me share that card with you now.....
Even though it didn't snow much while I was back in Wisconsin last week, I remember all too well that this card is typically what winter in Wisconsin looks like.  So ...... I made this BEAUTIFUL layered snow drift card for someone very special back in Wisconsin.
I stamped my sentiment with Cherry Cobbler ink using the 'Holly Berry Happiness' set onto one of the Whisper White snow drifts.  Each snow drift was easy to create with a simple tear of the cardstock and my Clear Wink of Stella across the top edge to create some snow sparkle.
The trees were created with the 'Card Front Builder Thinlits Dies' and I inserted that set of trees into one of the snow drifts.
This ADORABLE little deer was created with the help of the 'Carols of Christmas' bundle ....... And he too was tucked into one of the snow drifts.
And the crowning element for this card just has to be the accent die-cut piece that was created on the Cherry Cobbler cardstock.  That die-cut is part of the 'Card Front Builder Thinlits Dies' set and it just frames out this card PERFECTLY!
So there you have it friends ........ My take on what a good old fashion Wisconsin holiday card should look like.
 
Thanks for joining me today!  I'll be back tomorrow to share Day 7/32 Christmas Extravaganza with you ........ Hope you can make plans to stop back and join me for that share.  Keep Living Your Dream!
 

Tuesday, November 28, 2017

Day 5/32 Christmas Extravaganza Gift Stocking

Happy Tuesday My Blogger Friends
Today is Day 5 of my 32 days of Christmas Extravaganza projects.  This project was created using product from the Stampin' UP! 2017 Holiday Catalog and the 2017-2018 Annual Catalog.  Without a doubt ......... If you are giving a small gift or a gift card this holiday season ......... These little stockings are going to be the perfect answer to your packaging needs.  Let me share that project with you now......
How ADORABLE are these!!!!
Stampin' UP! has taken all the WORK out of preparing these darling little holiday stockings for you.  All you need to do is coordinate the 'Tags & Trimmings' stamp set along with the 'Trim Your Stocking Thinlits Dies' and you will have these cute little stockings created in NO TIME FLAT!
I created this one with Garden Green cardstock ....... And the stocking toe and heel portions were created with the 'Quilted Christmas Designer Series Paper'.  For an added touch of WOW FACTOR I used White Embossing Powder on my stamped sentiment.
And HANDS DOWN ....... If the bell isn't FABULOUS enough with Silver Foil Paper ....... The addition of the Silver Mini Tinsel Trim just puts this stocking over the top.
And how about a traditional red stocking......
I just love the Real Red Mini Tinsel Trim on this stocking ....... And couldn't you just SQUEAL over the pom-pom trim die piece.
I'm just in LOVE with the endless possibilities this Tag & Trimmings Bundle has for creating not only smart stockings ...... But also perfect little pillow boxes this holiday season.

Thanks for joining me today!  I'll be back tomorrow to share Day 6/32 Christmas Extravaganza with you ........ Hope you can make plans to stop back and join me for that share.  Keep Living Your Dream!

Monday, November 27, 2017

Day 4/32 Christmas Extravaganza Deck the Halls

Happy Monday My Blogger Friends!
Today is Day 4 of my 32 days of Christmas Extravaganza projects.  This card was created using product from the Stampin' UP! 2017 Holiday Catalog and the 2017-2018 Annual Catalog.  This card DOESN'T TAKE A WHOLE LOT OF TIME to create .... But whoever receives it will think you spent HOURS creating it.  Let me share that card with you now.....
This card is a fast CASE from the Holiday Catalog on Page 10.
It starts out with an Old Olive base card and a panel of the 'Merry Little Christmas Designer Series Paper' was added to the center. 
Next, I stamped the "Deck The Halls" sentiment from the 'Carols of Christmas' set onto a Whisper White banner flag.
I added three little 'Black Rhinestones Jewels' to the top and bottom of my stamped sentiment ....... And added two DSP tails to the bottom of my Whisper White banner flag.
The finishing touch was adding some 'Jute Twine' behind the Whisper White banner flag before adhering that banner flag down with Stampin' Dimensionals.
A FUN & FESTIVE card that is sure to put someone into the holiday spirit when they receive it.
 
Thanks for joining me today!  I'll be back tomorrow to share DAY 5/32 Christmas Extravaganza with you ........ Hope you can make plans to stop back and join me for that share.  Keep Living Your Dream!


Sunday, November 26, 2017

Remarkable InkBig Blog Hop

Remarkable InkBig Blog Hop
Welcome to the Remarkable InkBig Blog Hop for November 2017. This month our theme is Holiday Tags!  You may just be starting the blog hop here at my blog Kards by Kadie or may have come from the person previous to me in the list. If you get off track at any time, the full lineup below will help you move along from blog to blog so you see all the projects.  Here is what I created for this blog hop........
All the product used to create each of my mittens is featured in the Stampin' UP! 2017 Holiday Catalog.  The 'Many Mittens Framelits Dies' were used to create the mittens and the snowflakes ........ And I took advantage of ALL THE FABULOUS Designer Series Paper featured in the holiday catalog to create each mitten.  A real sleeper item in this Holiday Catalog is the 'Jute Twine' (page 13).  I used that wide twine as a hanger element for each of my mitten tags.  LOVE how that accent finished off each of my tags.  Let me share each of those ADORABLE mitten creations with you now........ 
First up is this TRENDY looking mitten using the 'Merry Little Christmas Designer Series Paper'.  I accented this mitten with a bold and beautiful Old Olive snowflake (one of the dies from the 'Many Mittens Framelits Dies) ....... And added some 'Fine Tip Glue Pen' to the top of that Old Olive snowflake to give a real POP of FUN.
My second mitten was created with the TIMELESS 'Christmas Around the World Designer Series Paper'.  This plaid style paper is a classic holiday pattern in my book ....... And the Real Red snowflake just SCREAMS let it snow to me.
And this LITTLE GEM was created with the 'Quilted Christmas 6"x6" Designer Series Paper'.  I just love how using the 'Dazzling Diamond' on the snowflake just created a real WOW FACTOR for the top of this tag.
And on the inside of each mitten ........
I stamped a FESTIVE & HAPPY 'To/From' message using the
'Smitten Mittens' stamp set.
So there you have it friends........
Three little mitten tags that will look FABULOUS
on any package this holiday season!

Thanks for taking part in our blog hop, there are so many amazing ideas and inspiration you don’t want to miss. Remember that currently, you are at my blog Kards by Kadie, so check the blog hop line up list to see who is next on the list.

Saturday, November 25, 2017

Cyber Monday Offer

November 27th FREE SHIPPING offer!!
On Cyber Monday, November 27, Stampin' UP! is offering FREE SHIPPING on ALL Stampin Up! orders. 
 
FREE SHIPPING will be offered the entire day on EVERY Stampin' UP! order placed from 12:00am till 11;59pm on Monday, November 27th.

Use this FABULOUS offer to check everything off your wish list this holiday season.  There is No Minimum purchase required .......... And you can order as much or as often as you want ALL DAY LONG!!!!
 
This FREE SHIPPING offer runs from November 27th ........ 12:00 AM to 11:59 PM MT. 

Day 2/32 Christmas Extravaganza Good Tidings

Happy Saturday My Blogger Friends!
Today is Day 2 of my 32 days of Christmas Extravaganza projects.  This card was created using product from the Stampin' UP! 2017 Holiday Catalog and the 2017-2018 Annual Catalog.  To me ....... this card just has an old fashion traditional Christmas feel to it.  Let me share that card with you now......
I'm totally loving all the pretty elements to this holiday card.
I began by stamping my "Good Tidings" sentiment with the 'Good Tidings' set.  I matted it onto a piece of the Black and Old Olive plaid paper that came with the 'Merry Little Christmas Designer Series Paper'.
Next I stamped my second sentiment from that same 'Good Tidings' set onto a panel of Whisper White cardstock that was punched out using the 'Classic Label' punch.
I matted the second sentiment onto a piece of 5/8" Burlap Ribbon that was topped off with some 'Black Crochet Trim' and a tiny piece of 'Delicate White Doilies' was tucked up behind the sentiment.  All these pieces were then mounted onto a Basic Black banner flag.
The holly berries were stamped using the 'Good Tidings' set and then I used my Paper Snips to quickly cut out each of the holly berries.
If this card looks familiar ....... Check out Page 9 of the Holiday Catalog.  I basically just CASE'd this card from the catty.

Thanks for joining me today!  I'll be back tomorrow to share Day 3/32 Christmas Extravaganza with you ........ Hope you can make plans to stop back and join me for that share.  Keep Living Your Dream!

Friday, November 24, 2017

Day 1/32 of Christmas Extravaganza Top Hat

Happy Friday My Blogger Friends
Today I am kicking-off my 30-Days of Christmas Extravaganza!  Every day ....... for the next 30 days ........ I will be posting a Christmas/Holiday Card - Tag or 3-D project for you to CASE and CREATE yourself.  That's right ....... 30 days of nothing but Christmas Fun!

These projects will be using product that is mostly featured in the 2017 Stampin' UP! Holiday Catalog and along the way ......... I will be using product from the 2017-2018 Stampin' UP! Annual Catalog too.  Hope you are ready for some FUN & AMAZING projects.
To kick off this extravaganza ......... I've created these FUN & FESTIVE snowman treat Top Hats.
They use a 3" x 8" piece of Basic Black cardstock and score it at 1/2" on one long side.  You will want to use your Paper Snips and cut up on the 1/2" side to the score line going all the way across the length of this long side ........ You will be making tabs on this piece of Black cardstock that will form your Top Hat. 
Next use the Layering Circles Framelits and die-cut the largest circle (for the brim) and the 3rd largest circle (for the 3"x 8" black cardstock to be adhered to).
The easiest way I found to adhere the 3"x8" piece of Black cardstock to the 3rd circle is to use your bone folder to gentle soften up the fibers of that piece of cardstock.  This will cause your Black cardstock to start curving and that will make adhering the tabs down onto the 3rd circle so much easier.  Adhere all the tabs down and cut off any excess cardstock from the 8" piece that might be left over.
Once all your tabs are adhered down onto the circle, add adhesive to the two ends of the Black cardstock and secure this piece closed.  Adhere this completed piece to the center of the largest Black cardstock circle and your top hat will take form.  To give your project a completed look on the inside ........ Die-cut one more 3rd largest Black circles.  Add adhesive to the backside and drop it into your formed hat, pressing down to get good contact.
Now take a 1/2" x 8" piece of Designer Series Paper (I used the 'Merry Little Christmas DSP') and adhere that piece to the bottom of your formed Top Hat.  Embellish your hat with a 'Stitched Felt Embellishments' (I used the felt holly) and fill your Top Hat with whatever treat you like.
I grabbed a 6"x8" Cellophane Bag and filled it with candy snow drops (one of my all time favorite Christmas candies).  And after my cello bag was tied up with a pretty red ribbon ...... I used my Paper Snips to cut down any extra cello bag that I had left over. 
All that was to do was gather up all of my Snowman Top Hats and get ready to give them away!

Thanks for joining me today!  I'll be back tomorrow to share Day 2/32 Christmas Extravaganza with you ........ Hope you can make plans to stop back and join me for that share.  Keep Living Your Dream!