Tuesday, September 30, 2014

Christmas Past Part Twelve

Happy Tuesday My Blogger Friends!

I'm at a full run today.....Having coffee this morning with my good buddy Mary Fish.......and then connecting for dinner with my son (who is here on business from St Louis).  So going to jump right in with my card share for today.....

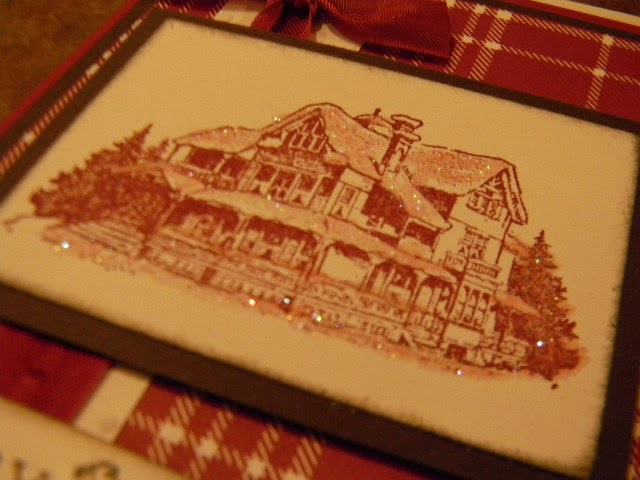
This card has so many elements to it.......
The stamped image has some glitter added to it.....
The ribbon adds some great WOW FACTOR to this card.....but the best part to this card is the AMAZING textured embossing that is done on the Pool Party panel.
And my second card share for today is this SUPER FUN fold over flap card.
When opened up......it reveals a flapped over section and plenty of room on the inside to write a sweet holiday message.
Even though this stamp set is retired.......It will remain in my Holiday Stamping Drawer for many more years!

Thanks for joining me today!  I'll be back tomorrow to begin sharing with you some of my favorite  Halloween projects with you ........ Hope you can make plans to stop back and join me for that share.  Keep Living Your Dream!

Monday, September 29, 2014

Christmas Past Part Eleven

Happy Monday My Blogger Friends!
Today I have two more Stamp Stack cards to share with you........Let's jump right in with this share.....
HOW FUN is this jolly old snowman card?
The sentiment has been curled just enough to give it a fun rippled kind of look......
And the secret to coloring in this jolly snowman.......The shading that was added around the entire image at the end.
And this card was one of my FAVORITE cards in this bunch.
We added just a hint of glitter to the stamped house......
And created a elegant sentiment at the bottom portion of our card!

Thanks for joining me today!  I'll be back tomorrow to share another Christmas past card with you ........ Hope you can make plans to stop back and join me for that share.  Keep Living Your Dream!

Sunday, September 28, 2014

Christmas Past Part Ten

Happy Sunday My Blogger Friends!
Today I have two more cards I made at the Stamp Stack up in Mesa.......
First up is a fabulous DSP card that is perfect for those last minute card giving needs.
A layer of DSP and Cardstock make up the main portion of this card......And then a simple Happy Holiday's sentiment tops it all off.  The real WOW Factor is the "Happy Holidays" message stamped a second time onto Pear Pizzazz cardstock and then trimmed down to create a charming banner flag.
And the second card share for today is also one that has two panels of DSP that is joined together with a fabulous piece of Striped Grosgrain ribbon.
And to finish this card off.........The sentiment has been triple matted for a crisp and bold look.

Thanks for joining me today!  I'll be back tomorrow to share another Christmas past card with you ........ Hope you can make plans to stop back and join me for that share.  Keep Living Your Dream!

Saturday, September 27, 2014

Christmas Past Part Nine

Happy Saturday My Blogger Friends!
Today's cards are two cards made at the Stamp Stack up in Mesa.  Check these ADORABLE card out.......
First up is this GORGEOUS Happy Holiday card.......
That not only used some beautiful ribbon across the center of the card....But also used an embossed Whisper White panel on the top and two DSP panels under the ribbon that were die-cut with a scallop edge.
This is a "TIME-LESS" Season Greetings card......
LOVE the use of the striped ribbon and the embossed striped Real Red cardstock across the bottom of this card.

Thanks for joining me today!  I'll be back tomorrow to share another Christmas past card with you ........ Hope you can make plans to stop back and join me for that share.  Keep Living Your Dream!

Friday, September 26, 2014

Christmas Past Part Eight

Happy Friday My Blogger Friends!
Today I have two very "traditional" holiday cards to share with you.  They are both cards that were made at a stamp stack with Di Gibbs.  Check out these two great Christmas cards.......
First up is a favorite DSP pattern.......Garden Green checked DSP.
We matted our stamped Christmas Tree on a layer of Real Red.....and Garden Green!
What would Christmas be without a FABULOUS holiday stocking.
This punch has since retired ........ but it still holds a spot in my punch cabinet.  I use it every year for at least one or two holiday cards.  When turned upside down.........and punched out with Crumb Cake cardstock.......It makes a SUPER FUN holiday reindeer!

Thanks for joining me today!  I'll be back tomorrow to share with you more Christmas cards with you ........ Hope you can make plans to stop back and join me for that share.  Keep Living Your Dream!

Thursday, September 25, 2014

Christmas Candy Treats

Happy Thursday My Blogger Friends!
I'm still on a roll with my Christmas Past collection......but today......we are taking a walk on the "CANDY TREAT" side.  Check out these four fun treat projects I've made for friends and for my grandchildren's classmates........
These fun little snowmen are really big size Hershey Candy Bars.
I printed the body part of the snowman on Whisper White cardstock and then folded the cardstock around a full size chocolate bar.
All that was left to do was make a cute little fleece hat and a scarf! 
These little cuties came from Dawn Griffins blog.......
And they are a cute little candy cane mouse.
I made them in two colors.  This seriously is a project I've been making since the days I lived in Wisconsin!
My little Kit-Kat snowmen are one of my daughters FAVORITE holiday treats for her peeps.
Just taking a piece of Whisper White cardstock and wrapping it around a mini Kit-Kat candy bar......
And then punching out a black square and black word window punch to create his hat.
I stamped "Let it Snow" on the bottom portion of my snowmen......and then just added a few punched out pieces for his eyes and nose.....and used my black sharpie pen to draw in his little smile.
And my last share for today are this York Peppermint Patty snowmen.
They are done by punching out two scallop circles and drawing in the face......

And then using the same formula that I used to create the top hat for my Kit-Kat snowman for my York Peppermint Patty Snowmen.  Done in a FLASH!


Thanks for joining me today!  I'll be back tomorrow to share with you more Christmas cards with you ........ Hope you can make plans to stop back and join me for that share.  Keep Living Your Dream!

Wednesday, September 24, 2014

Christmas Past Part Seven

Happy Wednesday My Blogger Friends!
Today I have a serious BLAST FROM THE PAST to share with you.  Check out this super fun hostess gift you can make......
This little portfolio of gift tags makes the most amazing gift to bring along with when your going to a Holiday Party.
The portfolio is closed with a small piece of Velcro......
And when you open the package up........There are ten (or more) gift tags that fit perfectly into two clear envelopes (that have been attached to each side of the portfolio).
You can use either top loading or side loading clear envelopes......
And here's a close-up of the tags. SUPER EASY!
Here's some measurements for the front and back flaps......
The Front Flap......
Each flap is scored and attached to the other flap.....
And you use the back flap to scallop the edge and that is the portion that flaps over your front panel.
I created two color combinations for my tag holders.......And you could make these up ahead of time and have them on hand to solve that last minute gift giving need.

Thanks for joining me today!  I'll be back tomorrow to share with you more Christmas past projects with you ........ Hope you can make plans to stop back and join me for that share.  Keep Living Your Dream!

Tuesday, September 23, 2014

Christmas Past Part Six

Happy Tuesday My Blogger Friends!
Today I have one more Holiday Extravaganza Event card to share with you.  Let's jump right in with my card share for today......
This note-file card was made with the Stampin' UP! envelope punch board.
We used some of the yummy Cherry Cobble stitched ribbon that just so happens to be in the Clearance Rack that you can find at my On-Line Stampin' UP! store.
We also stamped this darling Santa and had him peeking out of a Cherry Cobbler frame.
The entire note file card opens up to reveal plenty of room to write (or stamp) your holiday message.

Thanks for joining me today!  I'll be back tomorrow to share with you more Christmas cards with you ........ Hope you can make plans to stop back and join me for that share.  Keep Living Your Dream!