Thursday, May 31, 2012

A Treasure Nest Box

Happy Thursday My Blogger Friends!
Countdown to Grandkids Arriving -  8 days to go!
I post a 3-D box I had my CrafterNooner gals make and after posting that box ...... I received several request to post where I purchased the box from.  So I decorated another one and thought I would share that information with you today.  Here we go...........
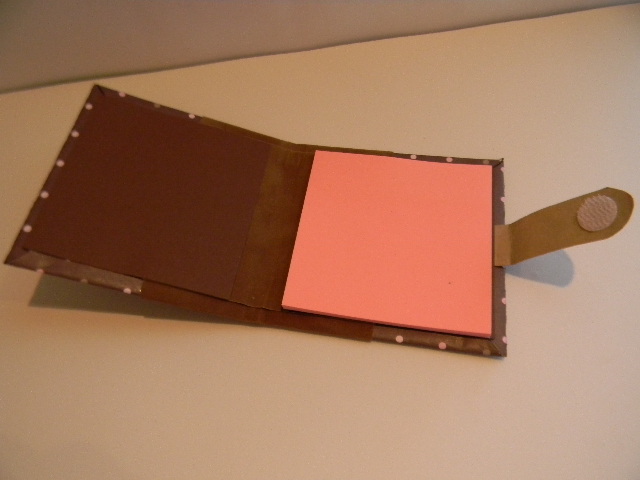
The box itself was purchased from "A Treasure Nest".
 I looked at my packing slip and had purchased these cuties back in June of last year!  I don't have a website .... but can only image that if you goggle "A Treasure Nest" in Houston, Texas.....You will get a hit.
I purchased two versions of this box.  This version is Item #BX908.  The other version I purchased was one that had a drawer opening to the front and that is Item #BX906. 
This one I decorated with some DCWV paper stack that I had........
And used my Cricut Flower Shop for the flowers on top......
I also made sure that I decorated the underside portion of the box - as it will show when your lid is completely pulled back....... 
And all the sides of my box were covered and distressed too.
Hope those who are interested in purchasing these little cuties are able to locate the company - Like I said......I did purchase them last June and seriously hope the company is still in business. 

I'll be back tomorrow to share the fun little "Flat Stanley" creation that I made for my oldest granddaughters class.  She mailed to me about 6-weeks ago her Flat Stanley and asked me to take him on my travels and outings.  I created the cutiest little Arizona Album for her and will be mailing that off to her today........I will share with you tomorrow what I created. 
Keep Living Your Dream!

Wednesday, May 30, 2012

SouthWest Cards Part Two

Happy Wednesday My Blogger Friends!
Countdown to Grandkids Arriving - 9 days to go!
It's official ..... We are down to SINGLE DIGITS!
Today I have the last two cards that we made at the Tucson Little House to share with you.  Let's get this share rolling......
Here's a recap of the three cards we made at the Little House. 
The first card I want to share with you is this FABULOUSLY GORG decorative pot card with a super fun Mexican Rug in the background.
We decorated our pot with watercolor and colored pencils ....... and then used dimensionals to lift the pot off the front of our card.
The decorative plant that we added to the pot was created with a sizzix vine die and then we just cut up a retired Stampin' UP! flower punch for the actual flower to the ends of the plant.
Such a beautiful card! 
 And the last card share is a true SouthWest Ride 'em Cowboy type of card.
 The laced up portion of this card was so super fun to create and the eyelets totally make the look.
 The "HOWDY" was popped up with dimensionals and placed over the cowboy image we created.
Actually love the entire look of this card.  NICE NICE NICE!
Thanks for joining me today - I'll be back tomorrow with more Kards by Kadie creations. 
Keep Living Your Dream!

Tuesday, May 29, 2012

SouthWest GateFold Card

Happy Happy Tuesday My Blogger Friends!
Countdown to Grandkids Arriving - 10 days to go!
Today I will be sharing one of the three SouthWest cards I made last week at the Little House.  Check these STINKIN CUTE cards out......
These were the cards I made at the Tucson Little House with several of my SaddleBrooke girlfriends last Monday. 
This card was by far the most time-consuming card of the three cards we made.  There were several steps in making this card that required lots of explanation from our instructor Susan.
The card opens as a gate-fold card and the left and right hand side of this card fold open.
 Here's what the card looks like when you flip back both the left and right hand side of this card.
We used watercolor pencils to color in this card........
(THANKS MARY for letting me borrow your pencils!)
And we also used lots of dimensionals to bring depth to this card.  This really was one of my favorite cards that we created that day.  SERIOUSLY GREAT CARD!

I'll be back tomorrow to share the other two cards that we made that day - Hope you can join me for that share. 
Keep Living Your Dream!

Monday, May 28, 2012

Happy Memorial Day Monday My Blogger Friends!
Countdown to Grandkids Arriving - 11 days to go!
Today I would like to share the cards I made at our SaddleBrooke Stampers Fun Shop.  On Saturday about 15 of the SaddleBrooke Stampers met and learned how to use KiwiLane Templates.  Jan taught the Fun Shop that showed us the KiwiLane Templates ...... and how these plastic templates make some pretty amazing cards.  Let me share the cards I made on Saturday........
 Here are the three cards we created.........
First up is my FAVORITE CARD from the day.  We were asked to bring a paper pack and I grabbed up three that I had in my stash and this paper just jumped at me for a birthday card.  YIKES IT SCREAMS ...... LET'S CELEBRATE!
Jan had us use one of the templates to create a bracket border at the bottom of our card and then we used an extra strip of our DSP for the inside edge of our card.
The KiwiLane templates have lots of border edges and a ton of shapes and designed edges that you can use to take ordinary DSP and combine several different coordinating patterns to create some pretty amazing cards.
This card Jan provided all the material for ....... She ran all the cardstock through five different embossing folders and came up with this fun embossed card.
By embossing all the cardstock you not only come up with some pretty amazing design for your cards - but you also bring several layers of texture to your card without adding extra weight.  SO FUN!
The only thing I would done differently was add a lighter destress ink to the edges of my cardstock.  I grabbed a walnut stain distress ink and wish I had a lighter (maybe Vintage Photo) color.  But still ...... LOVE LOVE LOVE how this card turned out!
And the last card we made also required use to grab our paper stack pads and use up four coordinating patterns.  We used two shapes for this card and one edge template to complete what is basically a ten minute card......
The sunshine in the middle of the card is actually one of the templates used to create a big flower - but by tucking it into the bottom layer of DSP .... it actually looks like the sun rising in the sky.  The most difficult part of this card was adding the butterfly to the card.......
Jan had a box of buttons on the counter and you could go over and select three buttons for your butterfly - well.....that was a processing trying to figure out which buttons to use. 
One of the best things about this Fun Shop was KiwiLane had donated an extra packet of templates to Jan for a prize during our Fun Shop ....... Jan put all the names of those attending in an envelope and drew one name when the class started.  She said that the name she drew - would win a set of all the templates that KiwiLane sent her - and guess what -YOU GUESSED IT ........ I WON!  How FUN was that.  I was actually going to send them to my daughter who makes cards for her kids school ..... and then I realized when I got home that they were all actually templates of KiwiLane product that I didn't have - so YIPPPPIEEE FOR ME!  Totally made my day! - Thanks KiwiLane for the generous donation and for making such an amazing product line.

So ........ I'm off to go spend the day playing in my studio - have lots to do before the kids get here.  I'm creating a super fun project for our SaddleBrooke Stampers meeting this month....and I want to put the finishing touches on that today.  I'll be back tomorrow to share some Kards by Kadie that I've been creating......Hope you can swing back and join me for that share.

Keep Living Your Dream!


Sunday, May 27, 2012

CrafterNooners May Projects Part Two

Happy Happy Sunday My Blogger Friends!
Countdown to Grandkids Arriving - 12 days to go!
Today I have the two projects that my CrafterNooner Buddies (Berta and Jan) made at last Friday's CrafterNooners gathering ...... Let's jump right in with the share.......
First up is Jan's SUPER FUN and SASSY BookmarkOH MY GOSH Friends.....this is going to be one of those projects that is going to be super hard to keep from one of my daughters picking up while they come out to visit.  Jan hit this one out of the park with her color challenge of brown and pink......
Honestly.....I have to say of all my friends.....Jan is the QUEEN of product knowledge.  I on the other hand......either love it-or use it.  I typically can't tell you who makes some of the NON SU PRODUCT that I use.  I know what I like and I either buy it....or watch my friends use it.  My product knowledge is TOTALLY STAMPIN' UP! (I can blow you out of the water with product knowledge when it comes to SU).......so exactly what all we used on this bookmark will remain a mystery (unless Jan leaves a comment on this post telling you'all what the product is we used).
We used two stamps and a alphabet stensil for the background of our tag........And we colored it in with some AMAZING paint.  The paint was in a spray bottle....we squirted a small amount on a plastic lid and then used a paintbrush to color our flowers in with this amazing pink paint.  TOTALLY COOL and TOTALLY FUN!
Jan even had us use this fun little "handmade" stamp for the back of our bookmark. 
Honestly this bookmark will get a real workout (till my daughters get here.....then I think I might have to give it up to one of them......).  Many Thanks Jan for having us create this super fun project....I LOVE IT!
And Berta's project is this amazing brag book that is created with a single sheet of cardstock and some clear envelopes.
 She used her cricut to cut out this very pretty embellishment for the front of our book.....
We used a couple eyelets to set the binding of our brag book and then we bound our book with some Soft Suede Taffeta Ribbon.  This was the perfect element for this darlin little book.
The inside of our brag book held six side loading clear envelopes........ 
And all I need to do now is slide in from the back of the envelope a few pictures that I take from my grandkids visit and I will have an amazing keepsake of their visit to Arizona. 

I plan to have each of the kids make one of these brag book while they are here visiting.......We will have some pictures sent down to Walgreens before they leave and one of their final projects will be to make a fun little six page brag book of their visit to Arizona.  Should be fun and know the kids will have a BLAST creating this project.  MANY THANKS BERTA for sharing this project with me.

Thanks for joining me today......I'll be back tomorrow to share the fun cards we made at Jan's Fun Shop on Saturday.  We used the new KiwiLane templates for our cards and I just know you are going to LOVE LOVE LOVE what we created......Hope you can come back and join me for that share.

Keep Living Your Dream!


Saturday, May 26, 2012

May Crafternooners - Part One

Happy Happy Saturday My Blogger Friends!
Countdown to Grandkids Arriving - 13 days to go!
(Only 2-weeks till my home is filled with adoring grandchildren - YAHOOOO.....CAN'T WAIT!)
 
For today's share I have the amazing projects that my fellow Crafternooner GalPals made for May.  Our color challenge was selected by Opal and she wanted Brown and Pink (seriously.....the new BLACK).  She also put a challenge out there ...... Anything but a card ...... Which means 3-D! 
Here's what I created.......
I had purchased these noteholder boxes from some on-line store and thought it was about time to get them decorated.  I gave one to each of my Crafternooner gals - and had them decorate one for their scrappin rooms.
The original concept of these noteholder is to have a window in the top of the holder - but I opted to cover the entire surface and decorate the lid portion with flowers.
Here's a close-up of the flowers I cut from my Flower Shoppe cartridge......I cut the largest flowers at 3inches and went down every 1/2inch till I got to the smallest flower at 1-1/2inches.
Here's a view of the back of the holder....... 
 And the top of my noteholder.......
I used some retired buttons from my SU stash to decorate the centers of my flowers and by simply curling up the edges of my flowers......I was able to bring some life to these little cuties!
Love how this project turned out.......and just know it will get lots of use on the desk of my CrafterNooner Friends.
And my second share for today is the 3-D project that Opal made. 
She made this yummy post-it-note holder........ 
She used some super yummy chocolate suede paper for the spine and flap closure of her holder...... 
And a little circle of velcro helps to keep our holders closed when they are not in use.  LOVE how Opal even carried the pink color challenge through to her post-it-notes.  They too were PINK.....LOVE IT!  Many Thanks Opal for creating this fabulously fun holder for us.......It has already found it's home in my purse.  THANK YOU!
 
THANKS for joining me today ....... I'll be back tomorrow to share the 3-D projects that both Jan and Berta made at our Crafternooners gathering on Friday - Hope you can join me for that share. 
Keep Living Your Dream!