Friday, September 30, 2011

September FU Card Exchange

Hi My Blogger Friends and HAPPY FRIDAY to you!
Today I will be sharing my FU (Fabulously Unique) card exchange for September with you.
First up is the card I received from my good stamping friend Ann LaPerre.  Our color challenge was to use fall colors and our optional challenge was to incorporate diecuts or punches onto our card.  Ann nailed both of these challenges onto her September card.
Here's a close-up of her diecut leaves......How beautiful are these little babies?  LOVE LOVE LOVE how Anne used her distress ink to bring the veins to life.....EXCELLENT JOB Anne!
And true to Anne's form......she decorated the inside of her card.  Thanks Anne for this amazing creation!
The next card up is from my good friend AND stamping buddy Debbie Hill.  When I was at Debbie's house the other night and she put her exchange card into my hand - I FLIPPED out over this one.
I first of all LOVE LOVE LOVE the felt leaves she used (I actually told her that I MUST buy some of these when we head up to Mesa this fall)......but what really made me gasp was the amazing paper she used on her card........And it's not even paper!
Debbie actually used thin cordboard on the top and bottom panel of her card.  She tore it to give it just one more level of dimension and the rippled brown paper she used in the center of her card just put this little creation over the top (in my book).  WELL WELL DONE Debbie - You seriously have this business of cardmaking down to a science.
And my last card for our FU Card Exchange is my card (THANK YOU Kris for the reminder)!  I took my colors from the Stampin' UP! "Just Add Cake" DSP pack. We actually weren't suppose to use the color brown in our September challenge ...... so I get the GOLD STAR for this month
I used the Pennant Parade (#122742) stamp set for my inside banners.  I stamped them on Pumpkin Pie, Wild Wasabi and Daffodil Delight.  I then used the Petite Pennants Builders punch (#122361) in each of the above colors to create the background for my pennants.  I also used some Baker's Twine to tie a little bow onto my string of the hanging pennants.
I added a "celebrate" stamp that was layered with two oval punches and a small piece of bakers twine tucked behind it and popped up with a dimensional.  Totally FUN card to make an seriously could be changed up for different color combination. 

Thanks for joining me today - I'm off to join several of my fellow SaddleBrooke Stamping Buddies for a day of play at our good stamping friend Maureen's house.  Maureen is hosting the Third Annual Bill Baughn Memorial/Card Making for the Troops event.  I will report in tomorrow with more details and the card I will be making for that event.  Hope you can return tomorrow - Keep Living Your Dream!

Thursday, September 29, 2011

Calendar Project From Kris

Happy Thursday My Blogger Friends and THANKS for joining me today.  I have an extra special post to share with you today and it's from my good friend Kris Holmes.
Check out this amazing calendar project that Kris made for me as part of our September FU (Fabulously Unique) Card Swap.  Our color combination was fall colors and our optional technique was DieCuts/Punches.  Kris managed to achieve both the color and optional technique on her card. 
Kris used the Heidi Grace Designer Mini Albums template project pack that is available at Joann's to complete her project.  She used the Album #7 in this template project pack and she said it seriously was a snap to make once she got all her pieces together.
The entire calendar card has been bound together with some linen thread and all her pages are distressed with Tim Holtz distress inks......
Kris used her computer to run a 2012 desk size calendar and then adhered each of the calendars to the actual base template of this project.
Here's the awesome die-cuts that Kris used.......They are the Tim Holtz dies and Kris distressed each of the leafs along with what looks like shimmer paint to the top leaf.
Here's what the back of the calendar book looks like......
And one final peek at the front of this amazing and cute project.  I have secured a spot right next to my computer for this darling project......This will help me be able to keep track of the days when 2012 rolls around.  THANK YOU Kris for this amazing project.

I'll be back tomorrow to share more Kards by Kadie creations.....Hope you can join me.
Keep Living Your Dream!

Wednesday, September 28, 2011

CraftJunkieToo Autumn Project

Hi My Blogger Friends and CraftJunkieToo Visitors - Welcome to my blog.  Today I have a special post as part of the design team for Tracy over at CraftJunkieToo (http://craftjunkietoo.blogspot.com).  We were asked to create a project using the changing colors of fall as our inspiration ..... AND....It needed to be ANYTHING BUT a card.  I decided to make these fun "Fall" blocks for my studio.  Let me share with you how I created this project............
I started out with some lumber that my neighbor cut down with his power saw (I asked my neighbor to do this......Mainly because......those industrial tools ARE NOT ALLOWED in our house - *W*I*N*K W*I*N*K Honey!......).  After the lumber was cut and sanded, I grabbed some DSP and my acrylic paints and started painting all my blocks and the edges of my DSP.
I used "Craft Smart" acrylic paint in Brown, Pure Pumpkin, Golden Brown and Spanish Olive.  My DSP is from a paper pack that was purchased from Hobby Lobby and I just used my Brown acrylic paint to distress the edges of each piece of DSP.
I basically worked in an assembly line to get all my blocks painted.......and then I just used my white glue to attach the DSP to the front of each block.
 Here's what the blocks looked like when I got them all painted and distressed.
I even added matching DSP to the backside of each of the blocks..........I wanted to make sure that the back was going to be just as pretty as the front.
I arranged the DSP so my pattern was random and there was no right or wrong order being put into how this was all going to play out.
I attached my letters which I cut out using my Cricut.  I used the "Learming Curve" cartridge and cut the "F and two l's" out at 3-1/2" and the "a" was cut out at 2-1/2".  The shadow was cut out 1/4" larger and then I just layered all the pieces together and with the help of dimensionals - this came together in a snap.
 Here's a close-up of the "F"........
 The "a"........
 One "l".........
 And the other "l".........
The entire project took me NO TIME to put together......the most time I spent was waiting for the paint to dry......and even that.....I was able to put the letters together and work on attaching ribbon and fibers to each letter as the paint was drying.

My inspiration for this project came from my BFF (Jan) who had a similar project in her studio last year and when I saw it I just fell in love with it (last fall).  The plan was to do this project LAST YEAR....but as things go with me sometimes......It got put on the back burner and other things got done instead.  SO - When Tracy gave her design team our Fabulous Fall Challenge - I just knew ..... THIS YEAR would be the year I got this project done.  (I'm sure none of you can relate to that situation now can you.......)

Thanks for joining me today and if your a new visitor......check out my subscribe button at the top of my blog to receive daily post from me.  Appreciate you stopping by and hope you can return tomorrow for more Kards by Kadie creations.  Keep Living Your Dream!

Tuesday, September 27, 2011

Crafternooners September ShoeBox Swap

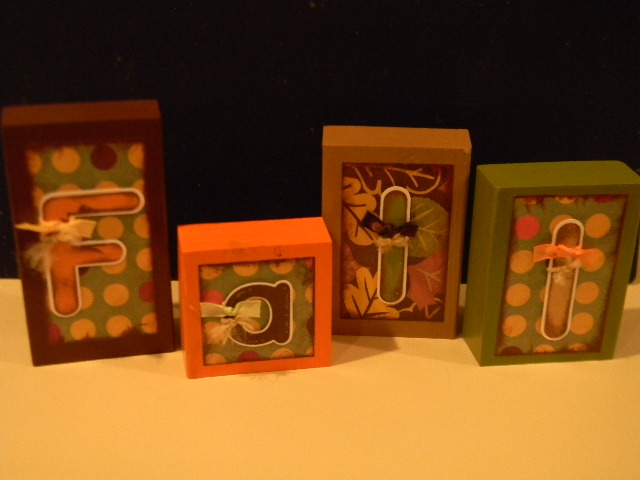
Happy Tuesday My Blogger Friends...... Today I have the two projects that my Crafternooner Buddies (Opal and Jan) made last Friday during our Crafternooners gathering - Let me share those two projects with you right now.............
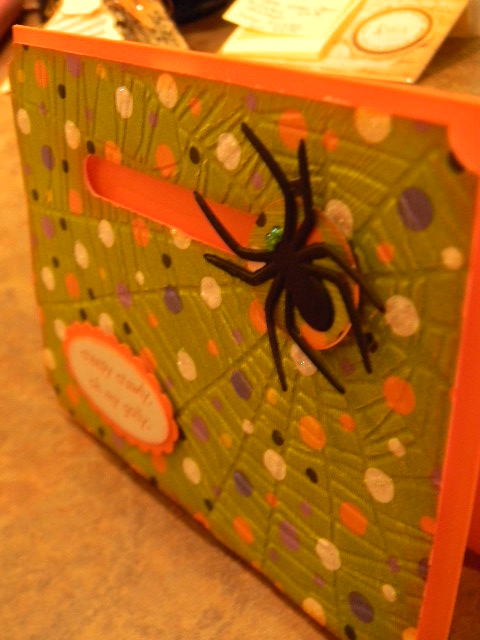
First up is this FABULOUSLY FUN Spinner card that Opal taught me how to make.  I have seen these types of cards from "WAY BACK" but have never made one until this past Friday.  HOW FUN and EASY is this card to actually make!  It came together in a SNAP and let me tell you - mine seriously did some twirling and spinning!
Opal had us use the Spider Web embossing folder on our DSP and before we adhered the DSP to the front of our card we built our spider component to our DSP.....which meant we used the Word Window punch (twice) to create a long word window punch slot to the top portion of our DSP.
We then secured our spinner onto two pennies that have been sandwiched between the open slot with a small piece of dimension between the two pennies.  We added our circle with our spider to the top of the penny and now our spider was able to freely spin (and twirl) from one end of our word window punch channel to the other end.
Opal had used her computer and printed out this adorable "creepy crawly, oh my golly" sentiment (in orange no less) and we used the small oval punch and layered it with the scallop oval punch (in orange) to create this amazingly cute sentiment to the front of our card. 
THANK YOU Opal for teaching me how to make a spinner card - Totally COOL and Seriously EASY!  I still can't believe how smooth my spider spins across the front of my card.  AND THANK YOU Opal for letting me borrow your spider die so I can create a few of these cards for my grandkids!
Amd that brings me to Jan's card/project.......I only wish you could see this little creation in person - It would SERIOUSLY ....... BLOW YOU AWAY!  The over-all size of this project fits into an A2 envelope and is one of those projects that looks complicated - but once you break it down and make one for yourself.......You realize how EASY PEASY it is to make.........
Jan overlapped three 4"x4" squares of cardstock (which were each scored and folded in half) and added triangle DSP to one of the triangles and did a TON of distressing of the edges to create a T-P type card.  The real magic comes from how you decorate your T-P creation!  We chatted at our Crafternooners gathering and thought this would make a fabulous FunShop for our SaddleBrooke lady friends - so Jan is going to demo this project with a follow-up Funshop sometime in October.
For those of you that can't wait (or aren't going to be at the Fun Shop) here is what the project looks like when opened up.  You can see that the left and the right side 4"x4" squares (black cardstock) are connected with the center 4"x4" square (Very Vanilla cardstock).  All you need to do to the Very Vanilla center piece is turn it 90 degrees and adhere that panel to the two black panels next to it.
And here is what the other side of the above picture looks like.  The paper Jan used is Black on one side and Orange on the other.  (So instead of your panels being 4"x4" Black and Very Vanilla - your panels are 4"x4" Pumpkin Pie and Very Vanilla)
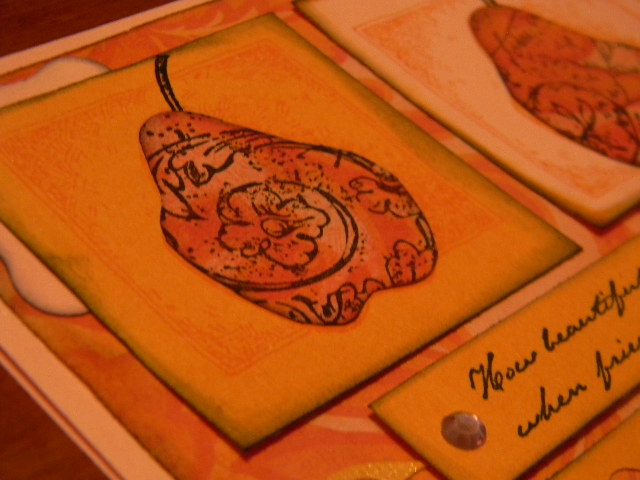
Here's a close-up of the FUN little saying we added to the center panel of our card.  We ended up waiting until our card was completely built and we secure the tiny paperclip to the back panel before we attached our "Happy Haloween" image to our card - and this ensured that the placement of our sentiment was lined up.
And here's one last look at this AWESOME creation.  THANK YOU Jan for teaching us how to make this fun project......And can't wait for you to demo this project at our upcoming SaddleBrooke Stampers meeting.  I know the ladies will completely enjoy this project.  (I just might have to make this a project for my upcoming Stamp Camp)

Thanks for joining me today and remember you can subscribe to my blog by heading up to the upper right hand corner of my blog and selecting "Sign Up To Follow My Blog by Email" button.  All you need to do is enter your email address and press the "Select" button. You will then begin receiving my daily post of "Kards by Kadie" directly to your In Box.
Tomorrow my fellow Design Team Members of CraftJunkieToo (http://CraftJunkieToo.blogspot.com) will come together to do a FUN Autumn "Anything BUT a Card" Blog Hop for you.  Can't wait to share with you my AWESOME project.  I hope you can join me and my fellow SUPER TALENTED Design Team members for this CREATIVE and FUN Blog Hop
Keep Living Your Dream!!!!!!

Monday, September 26, 2011

Crafternooner September Card Exchange Day Two

Happy Monday My Blogger Friends and Thanks for joining me today.  I want to share the last two cards that Opal and Jan made for our September Crafternooners swap.  Let's jump right in.....
 First up is a fabulously yummy card that Opal made.  SERIOUSLY.....I love this card.  It has all the color and elements that I LOVE LOVE LOVE in a card. 
 Opal not only embossed this fun card - but she inked over the top of the embossing and then.....get ready.......she embossed over the entire card.......Check it out......
 The shine that this card holds is amazing.......It is sooooo much more beautiful in person - I was able to capture the luster of the embossing shine.....but the true color is somewhat lacking from what it looks like in person.
 I know that Opal worked hard to put this card together and I SO APPRECIATE every single second that Opal put into making this card for me.  THANKS OPAL!
 And my last card was made by my BFF Jan.......She outdid herself with the fun and happy DSP paper that she used.....and adding all the circle border punches really gives this little card a WOW factor that just keeps on giving.

 The dress has a fun little vellum apron over the top and I just fell in love with all the pleads and layering action that Jan put into her card.
The apron has a fun little lace piece that Jan added to the top and even found a fun little pink button to top the handmade apron off.  LOVELY JAN!

I'm off to go join my BFF for a day at our local scrapbook store.....we are taking a Vintage Box class and can't wait to share the end results with you later in the week. 

For tomorrow I have the cards that my Crafternooners gals made on Friday when we met to do our September ShoeBox cards........You are seriously going to flip out when you return to see those.  Keep Living Your Dream!

Sunday, September 25, 2011

Crafternooner September Card Exchange

Happy Sunday My Blogger Friends - Hope you are having a fabulously delightful weekend.......I AM.  Yesterday I spent the day with two of my Bestie Gal-Pals Kris and Debbie - and OHMYGOSH - What a BLAST we had.  We did some serious shopping and even sneaked in a super YUMMY Lunch - TOTALLY ROCKIN FUN!  Today I will be heading up to Mesa to attend a fun little 10/10/20 Christmas Card Class that my Stampin' UP! demonstrator friend Di Gibbs is putting on.  Di always has some amazing ideas and she is one of those gals that just inspires you when you are near her - I'll be sharing those cards with you later next week.  For today, as promised, I will be sharing TWO of my September Crafternooner cards with you......Let's get started......
First up is Berta's card.......We were asked to create a card using pink and orange as our colors and our optional technique was paper piecing.  Berta mastered both the color challenge and the technique challenge with this amazing card she submitted.  I think what totally finished Berta's card off was the distressing she did to her edges.  With that simple technique.....she was able to soften her card and give it a total "Berta" look......
Here's a close-up of the paper piecing that Berta did......
And I love how Berta used the Curly Label Punch (page 209) to create photo corners for her two stamped images to rest in.......Totally a WOW factor for this card.  Thanks Berta for your truly amazing card design....LOVE IT!
Next up is my little card share.  Have to say that I had a BLAST creating this card.  The color combination is totally ME (oooppppss - wait a minute - I picked out these colors didn't I.....SURPRISE - SURPRISE!).  I used Melon Mambo (my FAVORITE SU color) and added Just Add Cake DSP (page 185) along with creating a fun little lace border to the top and bottom of my Melon Mambo cardstock by using the Lace Ribbon Border Punch (page 211).
I also added a small piece of Pink Piroutee 3/8" Taffeta Ribbon (page 195) around the top of my card and that added the soft little wow-factor I was going for with this card.
My stamp set is a retired SU set (I think it's called "One of a Kind").  I punched out pink and orange cardstock and DSP circles to create a fun and playful caterpillar.  LOVE THIS CARD.

I'll be back tomorrow to share the other two cards my Crafternooner team members made - I know you won't want to miss what they had to make by using this awesome color and technique challenge.  Hope you can join me......Keep Living Your Dream!