Tuesday, February 28, 2023

Mini Gift Bag

Happy Tuesday My Blogger Friends!
My blog post for today is '3D TUESDAY'.  That means today I have a fun little 3-D project that I created and want to share with you.   This project was SUPER FUN to create, and I want to jump right in and share that project with you now.
My Mini Gift Bag creation for today was inspired by Tricia Morris at Club Scrap.  She posted this video (107) How to Make a Mini Gift Box - YouTube about 8-years ago and this is my upgraded version of that share.
I used the 'Fitting Florets Designer Series Paper' to create my bag.  The bag uses a 8-1/2" x 11" piece of DSP.  On the small side you score at 2 and 6-1/2" and then turn to larger side and score at 4-1/2", 5-1/2" and 6-1/2".
Here is a picture of how your DSP will look with the Score Line (solid lines) and gusseted lines (dotted lines).
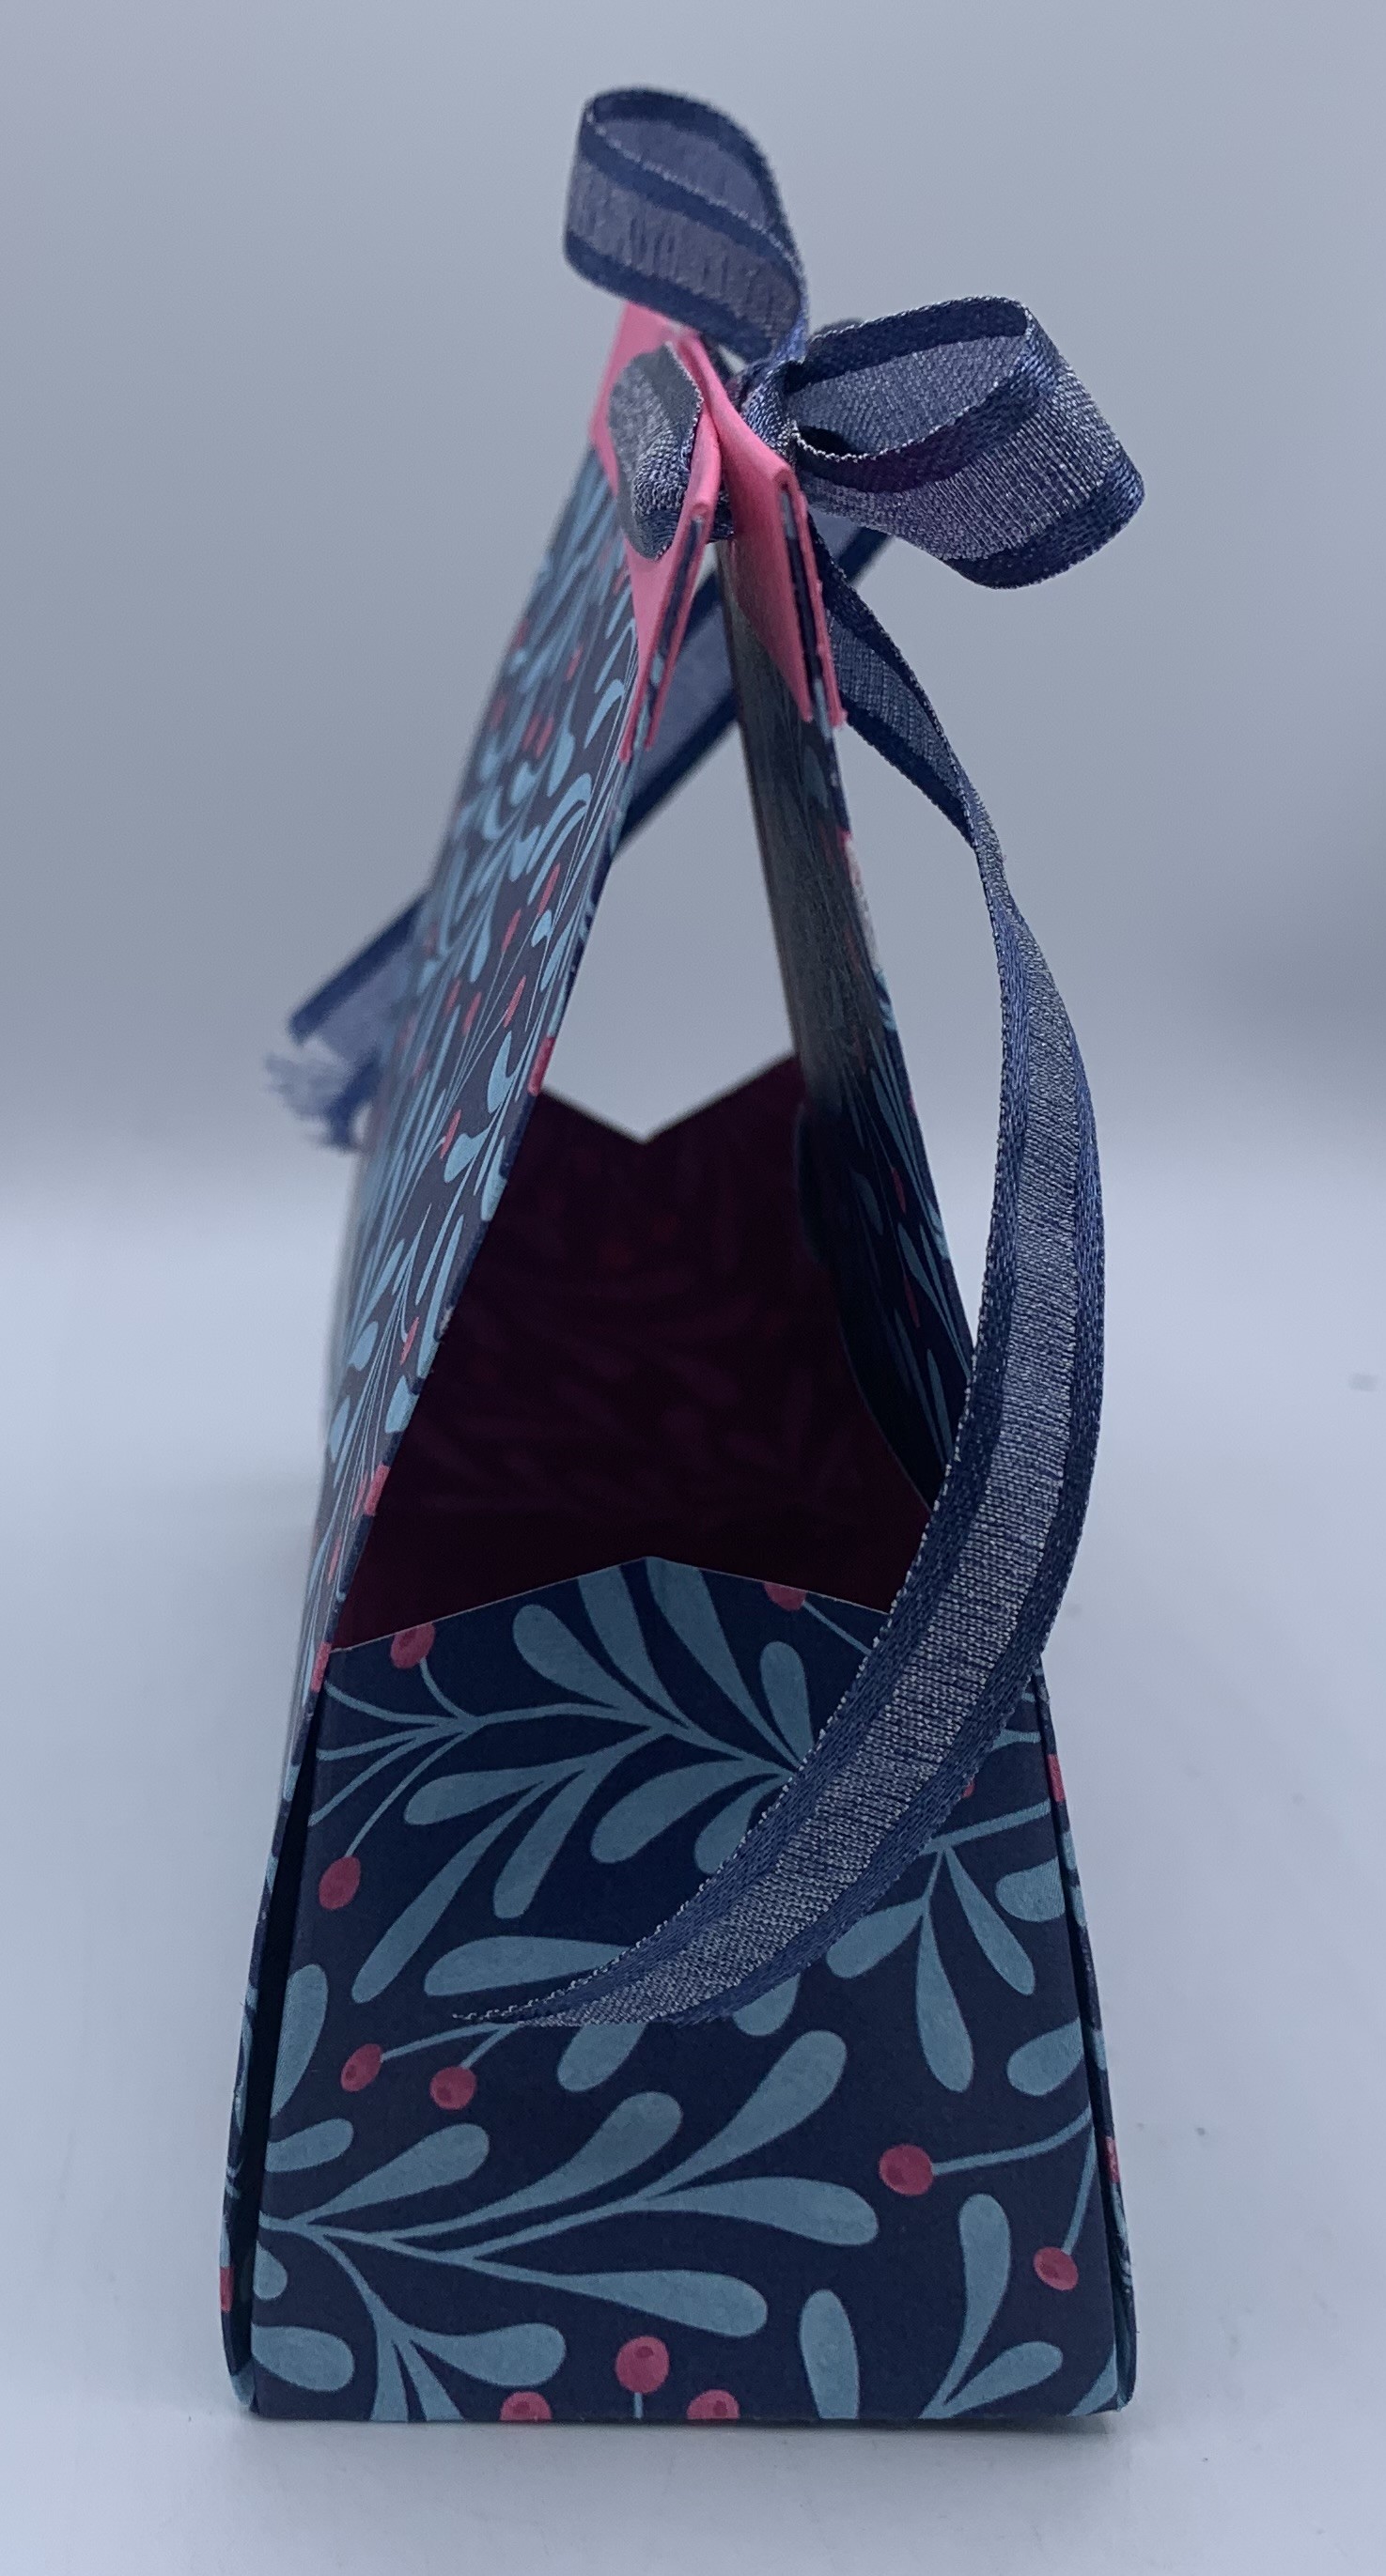
Here is how the bag looks from the side.
I topped my bag off with a Polished Pink topper.  That piece measures 1" x 4-1/2" and is scored at 1/2".  I added two of these toppers to each edge of my DSP.
And my sentiment is from the 'Best Day' set and it is layered onto two pieces of the 'Somthing Fancy Dies'.
And the finishing touch was adding some 'Night of Navy Bordered Ribbon' to the top of my bag and this project was called DONE!!!!

Thanks for joining me today!  I'll be back tomorrow to share a Wine Down Wednesday card with you ........ Hope you can make plans to stop back and join me for that share.  Keep Living Your Dream!

Monday, February 27, 2023

Just Love Upgrade

Happy Monday My Blogger Friends! 
Today is Mix-It-UP! Monday, and I have an upgraded version of the card I shared with you yesterday.  I used the exact same product that was used to create yesterday's card ..... But I changed things up to bring this card up to the next stamping level.
Here's my Spotlight Sunday card from yesterday on the TOP....
And my Mix-It-UP! Monday upgraded card for today on the BOTTOM....
The upgrade I made to my card for today was changing up the Blackberry Bliss base to a 4-1/4" x 7-1/2" base and scored that piece at 5-1/2".  I created a topper section on the front of my card that was covered with a panel of White cardstock and 'Favored Flowers Designer Series Paper'.  Then I attached a flap-over panel that was a panel of Blackberry Bliss cardstock that measures 2-3/4" x 4".  That piece was also layered with White cardstock and 'Favored Flowers Designer Series Paper'.
When you lift up the flap-over front piece ..... It has a fun little SURPRISE center panel ..... that was also created with Blackberry Bliss cardstock along with White cardstock and more 'Favored Flowers Designer Series Paper'.
My sentiment uses the same 'Something Fancy' stamp set .... And for my upgraded version .... I layered that piece with several 'Stylish Shapes Dies' circles.
And the finishing touch for my upgraded card was adding more 'Iridescent Pastel Gems' that were colored in using my 'Blackberry Bliss Stampin' Blends'.
So, what do you think my friends....
Do you have a favorite???

Thanks for joining me today!  I'll be back tomorrow to share a Wine Down Wednesday card with you ........ Hope you can make plans to stop back and join me for that share.  Keep Living Your Dream!

Sunday, February 26, 2023

Just Love

Happy Sunday My Blogger Friends
Today is Spotlight Sunday ....... And I have a card I created using product from the 2023 Stampin' UP! Mini and Sale-a-Bration Catalog.  This card uses several products from both of those catalogs ........ And I'm thrilled with the way it turned out.  Let's jump right in with my card share for today..........
My card base starts off with a 4-1/4" x 11" piece of Blackberry Bliss cardstock.  That piece is scored at 5-1/2".
Next, I used two layered sections of the Sale-a-Bration 'Favored Flowers Designer Series Paper' to cover the front of my card.
My sentiment is from the 'Something Fancy' set and I stamped that onto a White 'Stylish Shapes Die' circle piece .... And then created two additional layers of square pieces behind that sentiment.
I decorated the inside of my card with a White panel and more 'Favored Flowers Designer Series Paper'.
So, there you have it friends.....
What do you think???

Thanks for joining me today!  I'll be back tomorrow to share an upgraded version of this very card with you ...... Hope you can make plans to stop back and join me for that share.  Keep Living Your Dream!

Saturday, February 25, 2023

Ferrero Rocher Treat Holder

Happy Saturday My Blogger Friends!
Today I have another Saturday Sweet Treat packaging idea to share with you.  This project is a SUPER YUMMY, sweet treat packaging.  Let me jump right in with my share.
How SWEET are these QUICK and EASY little Ferrero Rocher treat holders.  They are SUPER easy to create and they are the PERFECT way to give a tiny bit of HAPPY to someone special.
These holders start off with a piece of 10" x 1-15/16 Thick White cardstock.  That piece is scored at 4", 6", 7" and 9".
I used a 1-3/8" circle punch to crop out a spot for my candy to sit in ..... And that is cropped out at the 7" and 9" section.
I used the 'Beautifully Happy' stamp set and that is stamped with Sweet Sorbet ink.
My flowers were created using the 'Petal Park Builder Punch' and I just arranged three sets of flowers to the top section of my holder.
All that was left to do was finish my holder off with some 'Pale Papaya Faux Velvet Trim'.  And I secured that with some 'White Bakers Twine'.
Hope you liked my share for today......
Thanks for stopping by.

Thanks for joining me today!  I'll be back tomorrow to share a Spotlight Sunday creation with you ........ Hope you can make plans to stop back and join me for that share.  Keep Living Your Dream!

Friday, February 24, 2023

No One Like You

Happy Friday My Blogger Friends!
Today is Fun Fold Friday and that means I have a special little Fun Fold creation to share with you. Let's kick off this Fun Fold Friday share right now.........
My Fun Fold creation for today has been around for YEARS!!!!!!  I created mine with the 'Fitting Florets Designer Series Paper'.  It starts with a 5-1/2" x 11" piece of DSP and it is scored at 2", 4", 8" and 10".
To create the left and right angled section of your base ..... You will measure from the top fold down 2-3/4" and remove that section from both top sides of your base.  
You will want to save the angled sections that you cut-off ..... because those will be adhered to the bottom section of the front of your card.
Here is how those angled cut sections look when adhered to the front of your card.
My sentiment is from the 'Happy Labels' set ..... And that is stamped onto a White 'Stylish Shapes Die' piece and layered with the 'Layering Circles' scallop piece.
Here is how the card looks when opened.....
And I added a layer of Evening Evergreen and White cardstock to the inside of my card .... And finished that off with a 3-1/2" x 3/4" piece of the 'Fitting Florets Designer Series Paper' along the bottom.
Remember when you are adhering your sentiment to the front of your card .... To only add adhesive to one side of the back scallop piece.
I finished my sentiment off with six 'Flat Adhesive Backed Pearls' that were colored in using my 'Evening Evergreen Stampin' Blends'.
And there you have it friends.....
Just doesn't get any EASIER.
Hope you have fun making one of these!!!

Thanks for joining me today!  I'll be back tomorrow to begin sharing a special new Sweet Treat Saturday release with you ........Hope you can make plans to stop back and join me for that share.  Keep Living Your Dream!

Thursday, February 23, 2023

Thanks

Happy Thursday My Blogger Friends!
My blog post for today is Tag Thursday.  Today, I will feature a tag I created and show you how easy it is to use minimal supplies to create a SUPER PRETTY TAG.  Now that you have the details for my Tag Thursday creation for this week ........ Let's jump right in with my tag share for today........
I started my tag share for today off with a 2-1/2" x 4-1/4" Mint Macaron base.
I added a 2-1/4" x 3-1/2" panel of the 'Country Gingham Designer Series Paper' to the top portion of my tag and a sentiment panel below that.
My sentiment piece is a White cardstock piece that measures 2-1/4" x 1/2".  I used the 'Thanks A Bunch' set to stamp my sentiment.  I added two 'Iridescent Pastel Gems' that were colored in using my 'Calypso Coral Stampin' Blends'.
I used the 'Medium Daisy Punch' to add two Calypso Coral and White daisies ..... And added a couple 'Bough Punch' pieces for some WOW FACTOR.
My tag was topped off with some 'Pale Papaya 3/8" Open Weave Ribbon' ..... And I used my Calypso Coral Stampin' Blends to create a PRETTY coordinating look.
So ..... There you have it friends.
Don't you just LOVE it???

Thanks for joining me today!  I'll be back tomorrow to share a Fun Fold Friday creation with you ........ Hope you can make plans to stop back and join me for that share.  Keep Living Your Dream!

Wednesday, February 22, 2023

All About YOU!

Happy Wednesday My Blogger Friends!
My blog post for today is Wine-Down Wednesday.  My middle of the week card feature for today will hopefully offer you some inspiration and provide you with some motivation to keep you moving through your busy week.  Let's jump right in with my card share for today........
I started my card off with a White base .... and that measures 4-1/4" x 11" and is scored at 5-1/2".
Next, I began adding layers of Cherry Cobbler cardstock and 'Day at the Farm' Designer Series Paper'.
My Cherry Cobbler piece measures 3/4" x 4-1/4" .... And my two DSP pieces measure 1-3/4" x 5-1/4" and 2-1/2" x 3-1/4".  I topped my card off with a Cherry Cobbler 2-1/2" circle that was cropped out using the 'Stylish Shapes Dies'.
My sentiment is from the 'Best Day' set .... And I stamped that onto a 'Stylish Shapes Die' banner flag with Cherry Cobbler ink.
The finishing touch was adding some black stitching lines around the outer edge of my DSP and cardstock and this card was called DONE!!!!  What do you think my friends.

Thanks for joining me today!  I'll be back tomorrow with a Tag Thursday creation to share with you ........ Hope you can make plans to stop back and join me for that share.  Keep Living Your Dream! 

Tuesday, February 21, 2023

Gift Bag

 Happy Tuesday My Blogger Friends!
My blog post for today is '3D TUESDAY'.  That means today I have a fun little 3-D project that I created and want to share with you.   This project was SUPER FUN to create, and I want to jump right in and share that project with you now.
I spotted this DARLING gift bag on YouTube and fell in LOVE.  It was done by Julie Comstock about 12-years ago ...... And I just put a fresh new spin on my version.  Here is the video Julie shared:  (107) Cosmo Cricket Treat Box - YouTube
This bag uses a 12" x 12" piece of 'Enjoy the Journey' Designer Series Paper ..... And takes just a few simply folds to bring it all together.
All you do is score on one side at 3" and 9" ..... And then turn your DSP one turn and score at 5" and 7".  I have shared a picture above to show you how your score lines (solid lines) will look and how to get the side gussets to fold in (dotted lines above).
The topper portion of my bag uses a 4" x 6" piece of Mango Melody cardstock.  And that piece is scored at 2".  I used the 'Basic Borders Dies' and cropped out a pretty zig-zag pattern along the edge.  I used the 'Black and White Gingham Ribbon to close my bag up ..... And the 'Mattee Black Dots' added that little extra pop of WOW FACTOR along each section of edges.
My sentiment is from the 'Blessings of Home' set and I stamped that onto two layers of the 'Something Fancy Die' tags.  The finishing touch was adding one little 'Dragonfly Trinket' to the bottom of my tag.
Just couldn't be HAPPIER with the way this bag turned out.
What do you think my friends???

Thanks for joining me today!  I'll be back tomorrow to share a Wine Down Wednesday card with you ........ Hope you can make plans to stop back and join me for that share.  Keep Living Your Dream!