Monday, October 31, 2011

Halloween Treats from Kris and Debbie

Happy Halloween My Blogger Friends.......I hope you have some AMAZING and SPOOKY plans for today!  I have plans to head up to the Ranch with my BFF to spend the afternoon scrapbooking.  It's always FUN and PRODUCTIVE when I head up to the Ranch to play. 

Today's share is going to be two projects that my girlfriends Kris and Debbie shared with me.....Hang on to your hats friends.....these little projects though small.....Packed a BIG punch for this old gal.
First up is the cello bag treat holder that my girlfriend Kris made for me.  OH MY GOSH....Kris always amazes me with all the details she puts into her projects.....and here is yet another example of the detail that Kris put into her work.  First up.....Kris showed me how you fold a piece of 1"x8" computer paper in half (on the 1" side) and that allows you to slide the computer paper into your cello bag and your candy corn pieces can then be stacked up onto your computer paper and slide into your cello bag........allowing you to not have to touch your candy and the candy corn also stays stacked perfectly as you slide it into your bag.  OH HOW SMART ARE YOU KRIS!
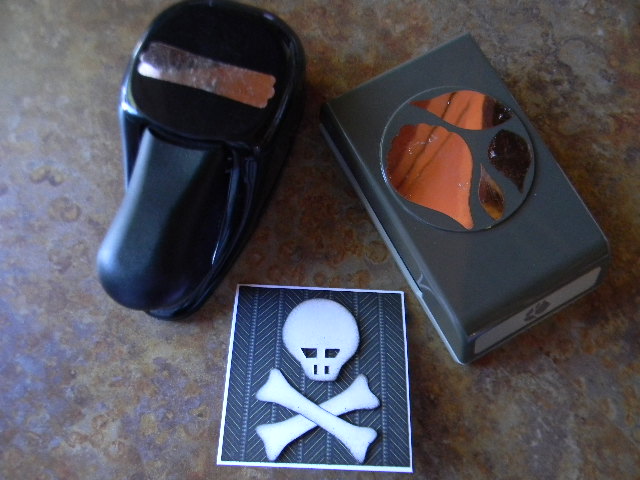
So I have to tell you....that tip alone was well worth my time.......
But what Kris did next was show me how your cello bag doesn't need to have a second
scallop circle punched out for the back of your project (which is what I was doing)......
All you need to do is simple fold over and down your cello bag closure
and this will secure it closed......and then you adhere your scallop circle over the cello bag
and you end up with a nice clean closed cello bag gift.

Sometimes we SERIOUSLY make things WAY MORE COMPLICATED than they need to be. 
I was doing just that ..... and with the help of Kris.....
I was able to complete the cello bag gifts I was making for one of my grandkids in NO TIME! 
MANY THANKS Kris for sharing your amazing little tip with me.
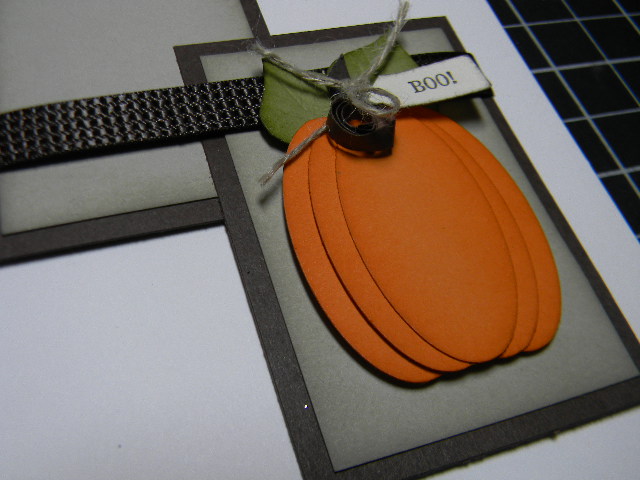
I just fell in love with this Just Right Stamp that Kris used for my Candy Corn Cello Bag project....
It just makes me smile and colors are nothing less than SPOT ON!
Many Thanks Kris for making my ADORABLE Candy Corn Cello Bag Treat.........
Mine of course has a happy home in my studio on my upper cabinets.
And my other Halloween Treat came from my girlfriend Debbie......I seriously SQUEALED when she placed this little baby in my hands.  I LOVE LOVE LOVE everything about this little project.
First of all.....I bought this new SU set and would have probably NEVER thought of stamping it on WaterColor Paper and then coloring it in.....BRILLIANT.  But to make a triangle candy holder is BEYOND BRILLIANT.....This is seriously going to be one of those projects that I have to STEAL and use for one of my grandkids holiday projects.  I fell in love with this project.
Debbie stacked Skittles into one of the new Stampin' UP! cello bags and then wrapped a 4-1/4"x3" piece of Pumpkin Pie cardstock (scored at 1" and 2") around the cello bag forming a triangle shaped wrapper.  AGAIN...isn't this just BRILLIANT!
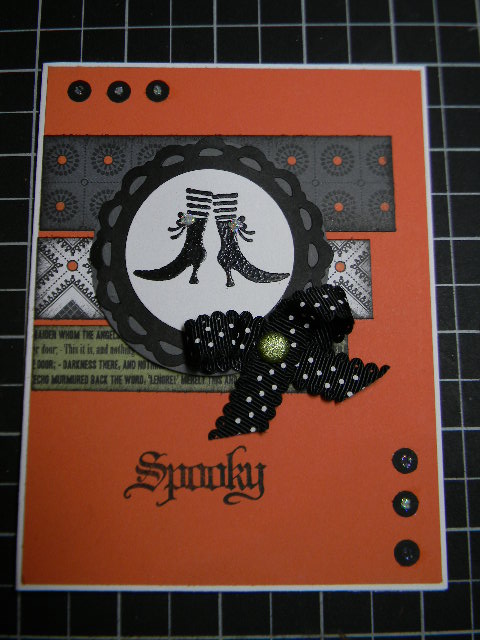
The image was stamped on a piece of 1"x4-1/4" piece of WaterColor Paper and
colored in with a watercolor brush.  The look is shabby chic and spooky all wrapped up together.  AWESOME AWESOME PROJECT DEBBIE! 
This is seriously going to be one of those projects that I be making for my grandkids classmates.
Many thanks for joining me today - I'll be back tomorrow to share the fun little
Halloween treats that I deliveried to my SaddleBrooke Girfriends early this morning...........
Hope you can swing back and join me.
HAPPY HALLOWEEN .... You'All!

Keep Living Your Dream!

Sunday, October 30, 2011

Halloween Treat from BFF

Happy Sunday My Blogger Friends and Welcome Back! 
Today I have plans to catch up on several projects that are beginning to stack up in my Studio. 
My hope is to FINALLY get those projects checked off my (EVER GROWING) To Do List!
Check out this ADORABLE Jar that my BFF gave to me at Stamp Club. 
As if the jar wasn't just yummy enough.......It's filled with a simply YUMMY Scrub
that is seriously yummy enough to eat......(*and you can*)
Jan took several edible ingredients (the two yummiest that I can remember were Sugar and Olive) and brewed up this amazing brown sugar scrub for each of my Club Gals for our October meeting.  Now I know there is some kind of Pumpkin Spice added in this brew because once you open the lid to this little jar - The smell of Pumpkin just jumps out at you (in a good way).
Now seriously.......Don't you wish you had Smell-a-Vision?
I just love love love the little Pumpkin Spice lid decoration Jan made for the top of our jar. 
 This little jar has made a new home on my studio bookcase.....totally adorable!
And if I pull off the lid - It simple fills my studio with an amazing yummy pumpkin spice smell!

Many THANKS to my BFF - You seriously ROCK MY WORLD GIRLFRIEND!

Thanks for joining me today.........I hope you can join me tomorrow as I'll be back 
to share a couple fun Halloween surprises that two of my favorite girlfriends made for me.....
(I just squealed when I saw both of those projects)

Keep Living Your Dream!

Saturday, October 29, 2011

Crafty Halloween Blog Hop!

Welcome My Blogger Friends!  Today I am please to be participating in the Crafty Halloween Blog Hop being put on by Tracy at http://CraftJunkieToo.com/.  Tracy has asked her Design Team Members to participate in this very special Halloween Blog Hop by featuring a fall or Halloween project with our readers.  I am featuring a special 3-D project that I think you will really enjoy. 
Let's get this BLOG HOP started...........
Since I moved into my wonderful new studio.....I have been wanting to create a special Holiday Tree and ...... I finally have created the PERFECT (and yes somewhat SPOOKY) Holiday Tree.
I purchased a spooky Halloween tree and took the base off and repositioned my Halloween tree into a black square base that I filled with a piece of foam and added stones over the top to give my tree a weighted and finished look.
I then set out to create the fun ornaments for my tree - and trust me - that is where the FUN really began!
I grabbed my scallop circle punch - several circle punches and used my "Batty for You" (page 26) stamp set to create the ornaments for my tree.
 I made several tiny cones out of retired DSP and filled each of them with ribbon and lace.........
And by using my retired DSP and lots of Black.....Orange and White Cardstock, I was able to create LOTS of DRAMA and WOW for my Spooky Tree!
 I even embossed several of the images that were stamped using the "Batty for You" stamp set.........
 And by grabbing my Stampin' UP! dimensionals, I was able to create texture and dimension to my ornaments.......
My plan is to change up the ornaments with each new holiday....and since they will be created with DSP and cardstock - I won't be breaking the bank to decorate my tree for each new holiday!

Your next stop on this CraftJunkieToo Designer's Blog Hop is at Kristy's blog

And just in case you have gotten off track....Here's the entire CJToo Designers Blog Hop line-up:  
 Kadie - http://kardsbykadie.blogspot.com/ (YOU ARE HERE)

Many THANKS for joining me today and hope you have an opportunity to visit all my fellow Design Team Members on this FUN CJToo Halloween Blog Hop.

I'll be back tomorrow to share a couple of fabulous Haloween creations that my friends
Debbie and Kris have made for me.......Hope you can join me.
Keep Living Your Dream!

Friday, October 28, 2011

October Stamp Club Day Three

Happy Happy Friday My Blogger Friends - Yahoooo ..... It's time to finish up this week and prepare for a FUN FILLED PACKED WEEKEND.  Hope you have some amazing plans in store for this weekend.  For today - I promised my last Stamp Club project and without fail....Let's get right to it!
As you'all know.....I'm not a Shabby Chic kind of gal - but for my Club Gals......I will stop at nothing to offer them the latest and the greatest of Stampin' UP! goodness.  This little Halloween creation was shared by fellow Stampin' UP! demonstrator Kimberly Van Diepen at http://stampinbythesea.com/

I have to say that Kimberly is the "Queen of Shabby Chic Halloween" and she has even made an amazing video tutorial (http://stampinbythesea.com/halloween-tree-decoration-tutorial) showing how to create the fun "Yo-Yo" that make up the center of this fun little creation.
What my Club Gals did was use the Pick Your Poisin DSP and started with a 1-1/4"x12"  piece and scored it every 1/4".  We then folded up our DSP and secured the ends together with a piece of "Sticky Strip" (P206)......and then folded our DSP strip down to take the shape of a Yo-Yo and secured it onto a 1-3/8" circle with the help of our trusty Hot Glue Gun.
We used the smallest square of the "Scallop Squares Duo" Bigz Die (P223) as our base and stacked our Yo-Yo and ribbon on to the Scallop Square.
We added buttons and retired bat punch to the center of our Yo-Yo and without a doubt.....the 1-1/4" Striped Grosgrain Ribbon (P195) added all the FUN and SPOOKY that this creation needed.
My Club Gals had a BLAST creating this little Halloween piece and a week later - I went up to a Simply Score class at Di Gibbs studio and we actually made a fabulously fun Christmas version of this very fun creation......Which I'll be sharing with you early next week.

I have to give a HUGE THANK YOU to Kimberly for all her AMAZING TALENT and her AWESOME tutorial on how to make this darling little creations. 
You Rock the Universe Kimberly ....and.....
The Stampin' UP! World!

Thanks for joining me today!
 I'll be back tomorrow for the Crafty Halloween Blog Hop

The Crafty Halloween Blog Hop (by Tracy at CraftJunkieToo) promises to be PACKED FULL of
Amazing Creations by Super Talented Design Team Members........
  Hope you can join me.

Keep Living Your Dream!

Thursday, October 27, 2011

October Stamp Club Day Two

Happy Thursday My Blogger Friends and thanks for joining me today.  My card for today is the special fold card we made at our October 15th Stamp Club.  My card was CASE'd from a fellow Stampin' UP! demonstrator Dawn Griffin.  She made this awesome folded card on her blog http://www.dawnsstampingthoughts.net/ and after seeing it, I just knew it was something I would want to share with my Club gals.  Let me share it now with you.....
We started out with a 5-1/2" x 10-3/4" Basic Gray card stock.  We scored this piece at 3-1/2" and 7-1/8".  We then used the 1-3/8" Square Punch (P.212) and punched the first square into the 3-1/2" scored section and another on the opposite scored section (7-1/8").
Because the square hole punch will not punch through three thickness of cardstock - you will need to layer your Black cardstock (cut at 2-1/2" x 5-1/2") and the Pick Your Poison DSP ( 2" x 5-1/2") and punch out your 1-3/8" square punch one at a time before adding your next layer.  You will also want to save your black 1-3/8" punched out square and that will be what you mount the "Spooky Bingo Bits" (P. 25) Spooky and Boo message onto.
We added a piece of "Black Taffeta Ribbon" (P.195) around the front panel of our card and added a "Happy Halloween" message from "Teeny Tiny Wishes" (P.157) which was punched out with the "Word Window Punch" (P.209) and then we mounted that onto the "Modern Label Punch" (P.209) in Basic Black.

This was an amazingly FUN and quick card to put together and it mails perfectly in an A2 envelope.
I think this is one of those card layouts that would be PERFECT as a Christmas card and by using the "Jolly Bingo Bits" (P.40) this card would come together with endless possibilities!

Many THANKS for Dawn Griffin for this AWESOME creation! 

I'll be back tomorrow to share my final Stamp Club creation with you. 
It's a little Shabby Chic projects that HUNDREDS of blogs and fellow Stampin' UP! demonstrators are out there creating.  My Club Gals had a BLAST creating their final project and I hope you can swing back sometime tomorrow to check out what my Club Gals made.

Keep Living Your Dream!

Wednesday, October 26, 2011

October Stamp Club

Happy Wednesday My Blogger Friends......I'm soooo glad that you joined me today.  Today I will be attending my FU (Fabulously Unique) Stampers Group and I just can't wait to see these three ladies!  Our group hasn't gathered since two of the gals left to head back to cooler weather for the summer.  SO....today is a big big day! (I'll be sharing what we make today with you later this week)

Today's share is the fun little card my Stamp Club gals made on October 15th. 
Let me explain........
This little 3"x3" skull card was inspired by a fellow Stampin' UP! demonstrator Lynn Pratt.  She shared this amazing creation on her blog http://stampndesign.blogspot.com/ and I just knew that my Club Gals would seriously get a kick out of making this skull - and mainly because MANY of them had ordered the "Blossom Petals Builder" (P213) punch from previous months. 
AND YES.......you seriosuly heard that right......
The skull was created using the Blossom Petals Builder Punch!
To create the skull you use the largerest flower from the "Blossom Petals Builder" (P213) punch and the bones came from the "Modern Label" (P209) punch.  For the skull you free hand a skull image within the largest flower petal (adding eyes and a nose to the lower portion of your image with a Craft Blade).  And for the Bones - all you need to do is round off the pointed ends of the Modern Label Punch and scoop in the long sides just a touch. 
Is this not SIMPLY BRILLIANT!
Here's the inside of our card.  We used the "Extra-Large Oval" (P212) punch and added the "Modern Label" (P209) punch on top.  The sentiment is from the "Howl-o-ween Creeps" (P11-Mini) stamp set.....and oh how fitting is that sentiment.......HOWL-O...........
I just love how this fun little card turned out....and MANY THANKS to Lynn Pratt for her amazing and creative idea.  I'll be back tomorrow to share the fun little card we made at our October Stamp Club - Hope you can schedule some time to come back and join me. 
Keep Living Your Dream!

Tuesday, October 25, 2011

October Stamp Camp Day Three

Happy Tuesday My Blogger Friends and today we will be viewing the last two cards we made at last Wednesday's Stamp Camp.  Let's jump right in........
First card today is a little card that my good friend Mary Fish (http://stampinpretty.blogspot.com) shared with me.  She shared this card on her blog a week or so ago and I FELL IN LOVE!  Here's how I recreated this little 3"x3" cutie......First up I started with the "Pick Your Poison DSP" (P.10 in the mini) and addeda piece of Basic Black and thin strip of Pumpkin Pie to the front of my Whisper White base card. We used the "Spooky Bingo Bits" (P.25) stamp set and stamped the skull on a piece of Whisper White and matted it onto a piece of Basic Black cardstock.
We used the NEW "Peekaboo Frames"  (P36-mini) BigZ L Die to make our adorable Pumpkin Pie peekaboo frame and we added the EEEK stamp from the "Spooky Bingo Bits" stamp set inside the frame.  We added "Baker's Twine" (P194) around the top of our frame (we added the orange stripes to our Baker's Twine with the help of an orange sharpie)......and we called this one DONE! 
Oh So CUTE!
And our last card is a Spooky Little Number......that got most of it's help from the "Wicked Cool" (P24) stamp set.  We used the Witches Shoes and the Spooky saying from this set - and we also used a Clearance Rack find - "Night Owl DSP". 
The Witches Shoes were punched out using the 1-3/4" Circle Punch (P212) and the "Perfect Pennants BigZ L Die" (P221) helped us to create the black scallop circle and the last layer was added by punching out the 2-1/2" Circle Punch (P212) in Basic Gray.  We added a bow made from the 1/2" Scallop Dots Ribbon (P195) with a Old Olive "Glimmer Brad" (P199) adhered to the center.

So that's it for another Stamp Camp month.  I already have the card designs for my November Stamp Camp - which is scheduled for the 3rd Wednesday of November.  We will be creating all Holiday Cards for that Stamp Camp and look forward to sharing some FUN and CREATIVE ideas with my Camp Ladies. 

I'll be back tomorrow to share the first of my Stamp Club cards with you - Hope you can join me.
Keep Living Your Dream!

Monday, October 24, 2011

October Stamp Camp Day Two

Happy Monday My Blogger Friends and WELCOME BACK!  As promised.....Today I have two more cards/projects from my October Stamp Camp (which was last Wednesday).
Here's a recap of all the projects we made last Wednesday - and today we will be focusing in on the Candy Corn Cello Bag Treat......and......The Pumpkin card....Let's JUMP right in.........
First up is a project that I know you have seen at MANY OTHER Blogs.  This project was made possible with the help of those AMAZING NEW "Cello Bags" (P11-Mini) that are being offered in the new Mini Catalog.  How wonderful are these little bags?  I just knew when I saw these little babies that I would be purchasing MANY of them and using them for my Grandkids school treats (which I did this year).
I got the idea for creating the adorable Candy Corn Tag from a fellow SU demo blog (sorry-I'm not recalling the blog-but will post it when I run across it again).  All she did to create this Candy Corn Tag was use the "Bright DSP Collection" (P.186) and with the help of the "Petite Pennants Builder" (P.213) punch she punched out one pennant in Pumpkin Pie and one in Daffodil Delight and trimmed each of the punches down to fit perfectly over a base Whisper White pennant.  We used the "Tiny Tags" (P.136) stamp set and stamped out the "Boo" and punched it out using the "Jewelry Tag Punch" (P.210).  And we then hung our Jewelry Tag from our Cello Bag with the help of some "Linen Thread" (P.194) and 1//8" Taffeta Ribbon (P.195) in Pumpkin Pie.
My good friend Kris showed me how to feed the candy corn into the cello bag.....Which was BRILLIANT!  Because the opening is so small to our Cello Bags........If you take a 8-1/2"x1" piece of computer paper and fold it in half ....you will then be able to slip your computer paper into the cello bag and feed your candy into the bag with the help of this computer paper strip.  When you have the amount of candy you want in your cello bag....simply start pulling your computer paper out....and your candy will remain in the bag ......The candy will be NICELY STACKED UP and your computer paper will just slide right out of the cello bag!  (MANY THANKS KRIS for this amazing tip on getting candy into the Cello Bags....without having to finger up all the candy!)
And the last card I will be sharing with you today is this fun little pumpkin card.  We created our pumpkin with five "Large Oval" (P.212) punches - that were inked and stacked along side of each other to create a fun little pumpkin creation.  We stamped two "Falling Leaves" (P.29) images and cut them out and added those to the top of our pumpkin.  A thin strip of Early Espresso cardstock was added to create a stem.
And to add yet one more fabulous element to our card, we added the "Boo" from the stamp set "Tiny Tags" (P.136) and punched it out using the "Jewelry Tag" (P.210) punch.  We also added the new 3/8" Quilted Satin Ribbon (P30-Mini) in Early Espresso around the frames of our card and called this one DONE!  It's amazing what a WOW FACTOR a little ribbon can add to your card.
Thanks for joining me today - I'll be back tomorrow to share the last two cards from last weeks Stamp Camp.......... Hope you can come back and join me for those last two cards. 

Keep Living Your Dream!

Sunday, October 23, 2011

October Stamp Camp

Happy Sunday My Blogger Friends - Today I want to share two of my October Stamp Camp cards with you.  We will be viewing these cards over the next couple of days ..... SO.....Let's get started......
My October Stamp Camp met this past Wednesday and we made the six cards/projects from the above photo.
First up is a spooky little Owl card, which I saw the layout on Nance Leedy's blog (http://nanceleedy.blogspot.com) back on September 11th.  I used some different stamps and DSP - but over all.......This is was CASE card.  We started out with the new "Glimmer paper" (mini P41) that was used to punch out the FUN little moon.  We also used the "Decorative Label punch" (P209) and stamped the "Happy Halloween" from "Teeny Tiny Wishes" (P157) onto one end of the punched out Decorative Label punch.
The Owl and Bats came from "Spooky Bingo Bits" (P25) and the Branch came from the "Raining Flowers" (P111) stamp set.  The DSP we used was from the "Pick Your Poison" (P10-mini) DSP pack and we added a snappy little piece of 1/2" Pear Pizzazz Seam Binding (P194) around the DSP to give the looks of this card a fun little spin!
And the last card I will be sharing with you today is a trio skull card that came from the "Batty for You" (P26) stamp set.  We added a little snip of 1/2" Stitched Poly Ribbon (P194) in Peach Parfait, and mounted that ribbon behind the trio of skulls and also added a little snip at the very top of our card.
I just love how this spooky little skull card came together.....And by using the "Tasteful Trim" (P221) BigZ XL Die to form the rick-rack edge to our "Pick Your Poison" (P10-mini) DSP we were able to add just one more element of surprise to this trio of skulls card.  TOTALLY SPOOKY but TOTALLY ADORABLE!

Thanks for joining me today.  I'm off to spend the day playing in my studio ......I finished up all 150+ Halloween treats for my 7-grandkids....and now I'm needing to get busy and create my SaddleBrooke girlfriends Halloween treats.  I'll be sharing those with you on Halloween.

I'll be back tomorrow to share two more cards from my October Stamp Camp collection - Hope you can join me.  Keep Living Your Dream!

Saturday, October 22, 2011

Three Witches Skirts

Happy Saturday My Blogger Friends - and today I'm going to share a card that Stampin' UP! demonstrator Frenchie shared on her blog a week ago.  I made a few changes but pretty much stayed true to Frenchie's original card.  Let's get sharing.......
 This card was created with the "Wicked Cool" (page 24) stamp set for the hat and feet of this card.  I stamped the feet in Black StatzOn and each of the hats were stamped with Poppy Parade, Old Olive and Pumpkin Pie.
I used the "Eyelet Border" (page 211) punch to create the start of the skirts for each of my witches.....and I used dimensionals to a bit of dimension to each of the skirts.
 I also added a single Rhinestone to each of the boots.......and used my Stampin' Write Markers to color in the stripes of each of my Witches leggings.
 I added a piece of 5/8" Black Satin Ribbon across the center of my card and that created the look of a belt to the top of each witches skirt. (the buckles were something I found in my stash - and have no clue where they came from)
AND.....One final look at this amazing card that Frenchie created - OH SO CUTE!  Thanks Frenchie for sharing such an amazing little creation - I just know that someone is going to SMILE BIG when they receive this card for Halloween.

I'll be back tomorrow to share more Kards by Kadie creations.....Hope you can come back and join me.  Keep Living Your Dream!