Tuesday, May 07, 2013

Just Because Card

Happy Tuesday My Blogger Friends!
Hi Friends........I realized that I hadn't finishing sharing all the fabulous cards with you that we made at Di Gibbs Spring Fling Event.  So today I will hare with you a beautiful card that uses pieces from the Artisan Embellishment Kit from the new Spring Catalog.  Let me share this GORGEOUS "Just Believe" card with you.......
 
We used the Artisan Embellishments Kit in the Spring catalog for this card. 

 We stamp our "Just Believe" sentiment (from a now retired Sale-a-Bration set) onto Whisper White card stock and then die-cut out this sentiment with the Labels Collection Framelits set. 
 We embossed our bottom matted layer with our Big Shot and an embossing folder!
 And then we grabbed our Artisan Embellishments Kit and wrapped a small piece of the cotton lace around our top panel and topped it off with one of the resin flowers that were included in the kit.
 Here's a close-up of the white resin flower that we used.......and added a small piece of vanilla seam binding behind the resin flower.   GORGEOUS!
I think this will make a beautiful anniversary card and will probably use some of my left over Artisan Embellishments Kit pieces to do just that. 

Thanks for joining me today!  I'll be back tomorrow with another Spring Fling card to share with you........Hope you can make time to stop back and join me for that share.  Keep Living Your Dream!

Monday, May 06, 2013

Happy Birthday Patti

Happy Monday My Blogger Friends!
Today I want to share a special birthday card I made for my good SU friend Patti Willey.  It's her birthday today!

 This fun little card used a retired SU set from a couple of years ago.
I punched individual 1/2" circles and attached them right onto the stamped image. 
I love the color combination of pink and orange together.....
And this border punch was just the right about of something something that was needed for the top and bottom portion of my card.
And the final touch for this card was the Pretty Pink ribbon that I added across the top portion of my card.  PERFECT birthday card for my friend Patti.  Happy Birthday Friend! 
 
Thanks for joining me today!  I'll be sharing the rest of the projects that we made at Di Gibbs Spring Fling event (that I never finished sharing with you) tomorrow.  Hope you can come back and join me for that share.  Keep Living Your Dream!

Sunday, May 05, 2013

Scissors and the City Make 'n Takes

Happy Sunday My Blogger Friends!
Today I want to share with you the three make 'n takes that we made at last weekends Scissors and the City event.  We made two cards and one amazing and fun bookmark.  Let me share those projects with you......  

This card was designed by Stephanie......
 And here's a close-up of the Chevron background and flowers that we stamped.
This card was created by Sandy.....
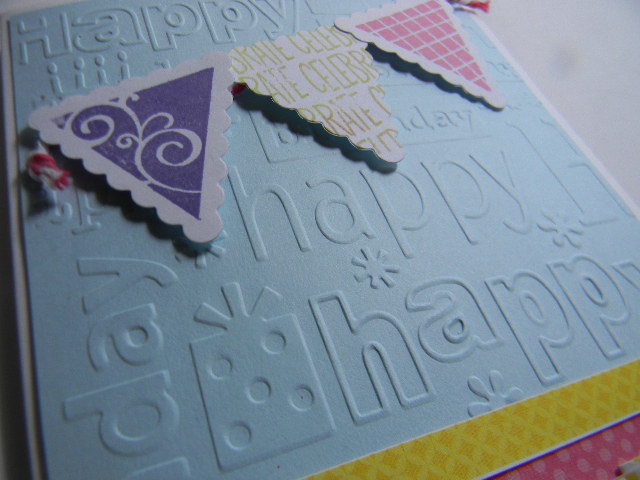
And a close-up of the cuddlebug embossing folder we used......and the darling little pennants that we stamped and die-cut out.
And my final project was this bookmark that Sandy designed.....

LOTS of detail....and LOTS of sparkle!

Thanks for joining me today.  I'm back tomorrow to share a special little birthday card for my dear SU friend Patti.  Hope you can come back and join me for that share.  Keep Living Your Dream!

Saturday, May 04, 2013

National Scrapbooking Day

Happy National Scrapbooking Day!
 
Today is National Scrapbooking Day.......and I have plans to head down to the Little House and spend the day with a couple of Saddlebrooke Stamping Friends and the Women with Scissors Group.  We will be spending the entire day scrapbooking......laughing......eating.....and PLAYING.  My goal is to finish Baby Twoie's baby book.  I have about 6 layouts to finish and I will be done.
 
My share today is somewhat of a scrapbooking project.......It's something that I made last weekend at the Scissors and the City event.  Check this beautiful wall art project out........
Sandy taught this class and it used a Artist Printer Tray and lots of scrapbook paper and embellishments.
We used a piece of white tulle and made this fun flower.  We gathered up the tulle and then used a heat gun to shrink it down to a fluffy flower.

This was a cute little bottle that Sandy gave to us......we punched out a few "message in a bottle" tags and dropped them into the bottle.  The bottle was attached with some Crystal Effects.
This frame was made from some rub-ons............
We used this charm frame to capture a heart under a bubble.......
Sandy had us make a resin butterfly........totally fun!
More rub-ons with a dab of Yellow Stickles before each saying......
One of these hexagon chipboard pieces was covered with glitter and the other was covered with some scrapbooking paper......
We die-cut out this flower from a coffee filter and then used some dye spritzer to add a little color to our flower.....
We cut a doily in half and formed an oval for this frame......Then w layered it with several layers of punched out flowers......
A single bee that was covered with yellow Stickles.....and used some alphabet stickers to spell out "thankful" along the side of this panel......
This was HANDS DOWN my favorite frame.  We used a punch for our watch band and then used a flattened soda pop top and dropped a stamped clock into the center.  We added Crystal Effects to the surface of our stamped clock and created this totally amazing 3-D watch........

And our final frame was this 3-D punched butterfly.  The "believe in yourself" rub-on was added directly onto the piece of ribbon that ran across the bottom of this frame.
So there you have it......The beautiful Artist Printer Tray that I made at last weekends Scissors and the City event.  It was a fun class and I really appreciated all the hard work that Sandy put into making this class happen.
 
Thanks for joining me today......I'll be back tomorrow to share the Make 'n Take projects that we made at last weekends Scissors and the City event.  Hope you can come back and join me for that share.  Keep Living Your Dream!

Friday, May 03, 2013

Chicken Card by Donna

Happy Friday My Blogger Friends!
Today I have a special blog post that was created by my good blogging friend Donna.  Now Donna is one of those card making friends that BLOWS ME AWAY with her talent.  She makes some of the most amazing cards......but has some of those AMAZING sentiments that she puts on the inside of her cards. Donn gave me this card at the Scissors and the City Retreat last weekend and I FELL IN LOVE with it.  Check it out for yourself.........

It's made with the Heart Framelits......and it uses the largest heart (that is scalloped).  It is cut out using Whisper White cardstock and embossed with the Perfect Polka Dots embossing folder. 
It uses the Full Heart Punch to make the red chicken arms......and the retired 3-heart punch was used for his top feathers.  How STINKIN' CUTE is this card!  MANY THANKS to Donna for giving me one of these cards......I'm going to make this card with Hailey for one of our upcoming Skype Sunday projects.  THANKS DONNA!
 
I'll be back tomorrow to share a National Scrapbooking Day Project with you. It's a project I made at last weekends Scissors and the City Event.  Hope you can make plans to join me for that share.  Keep Living Your Dream!

Thursday, May 02, 2013

Creped Filter Paper Card

Happy Thursday My Blogger Friends!
Today I would like to share the card my Stamp Club gals made at our April Stamp Club gathering.  The hostess for April was Lonnie......and wanted to use the new Creped Filter Paper in the Spring Catalog.  This new product has the look of tissue paper with the strength of cardstock.  We used dyes and framelits for our April card project.......Let me share that card with you......
Here is the card we created. 
W used the new Oh Hello stamp set for our sentiment.  That was stamped with Lucky Limeade onto a Whisper White 2-3/8" Scallop Circle.  We added dimensional adhesive to the backside of our scallop and adhered it to a 2-1/2" Calypso Coral circle.
We also added some texture to our Lucky Limeade panel by running it through the Big Shot with the Honeycomb Embossing Folder.  Our final touch was to add a small piece of Calypso Coral Ruffled Ribbon across the bottom of our card.
We used the Foral Frames Framelits to diecut out our flowers.......We used all sizes (except the largest framelits die) and diecut them out two times with the Creped Filter Paper
We used Calypso Coral reinkers and 70% Rubbing Alcohol in one of the SU Spritzer bottles and sprayed our creped filter paper flowers.
After the flowers were all sprayed ..... and before they had the opportunity to dry completely ...... we gathered each layer together and stacked them together and then used a brad to secure all the flower layers together.  We then began crunching up each layer to form our Creped Filter Paper Flower.
The final touch was to add some glimmer to our flower and we did this by adding several drops of the Champagne Mist Shimmer Paint......along with 70% Rubbing Alcohol to a sprinter bottle and then give each flower a light spray of shimmer.
So....There you have it.  Our Stamp Club project using the Creped Filter Paper along with some reinkers and some Champagne Mist Shimmer Paint,  We were able to create this super fun "Oh Hello" card in NO TIME FLAT.
 
Thanks for joining me today.....I'll be back tomorrow to share a super fun greeting card that my good buddy Donna gave to me last weekend at the Scissors and the City Event.  Keep Living Your Dream!

Wednesday, May 01, 2013

3x3 Square Note Box

Happy Wednesday My Blogger Friends!
Today I want to share the little 3x3 note pad holder that I made my Scissors and the City friends for this past weekends event.  Let's jump right in with this share........
I was inspired to make this box from a post done by a fellow Stampin' UP! demonstrator Dannie (www.danniesdesigns.com).  Her post on April 16th has a link to a video done on Split Coast Stampers and this box will hold 3"x3" paper and looks amazing and fun on any desk.  My box was made with Lucky Limeade and the side walls were matted with Tea for Two DSP.
I added a small piece of Calypso Coral Ruffled Ribbon to the inside bottom of my box and secured it down onto the inside of my box with the tiniest piece of sticky tape (I wanted to make sure it wasn't going to come up).  The 3x3 pieces of copy paper sit directly on top of the ribbon and when it's time to refill the holder......the ribbon makes an easy pull to release the final few pieces of copy paper.
1) Start with a 7-5/8"x7-5/8" piece of Lucky Limeade cardstock.
2) Score 1" and 2" on all four sides.
3) Cut out the three squares at each corner and leave one tab for tucking into the side walls of your box.
4) To create the little thumb tab for your 3x3 sheets of paper to be pulled out........You will use a 3/4" circle punch on the 1"score line of one side of your cardstock.  (The thumb tab will form when you fold over your side wall panels and build your box.
5) Now assemble your note box.  Use Sticky Tape to secure the four walls of your note box.
Add the 3/4"x2-7/8" DSP to the side panels of your box.......
Cut copy paper to 3"x3" and fill your note box with lots of paper.....
 
You will be done in no time making these for co-workers, neighbors, family and all those friends who join you at retreats!  Thanks Donna, Cathy, Jennifer, Terry and Melody for letting  me join you again for the Scissors and the City Retreat.  I had a BLAST! I look forward to seeing you'all in October for the next Scissors and the City event in Tucson.
 
Thanks for joining me today.  I'll be back tomorrow to share the fun little card we made at my April Stamp Club on April 20th.......Hope you can join me for that share.  Keep Living Your Dream!