Monday, November 07, 2011

Simply Score - Di Gibbs Style

Today I will be sharing some amazing projects I made when I attended a recent class that Di Gibbs was offering....check these amazing projects out.....
Di set out to teach us how to properly use our new "Simply Scored Scoring Tool" (P7-Mini).  She showed us how to make three ADORABLE PROJECTS and today I'm going to share the Box we made.
The real surprise that Di offers from this class is an amazing template that you place on the left hand side of your Simply Scored Scoring Tool and it sets up a jig that allows you to measure both the top and bottom portion of your box to be the exact same measurements and by using this jig when scoring the top of your box - It factors in the guess-work to allow for that little extra space needed to make your lid fit perfectly.
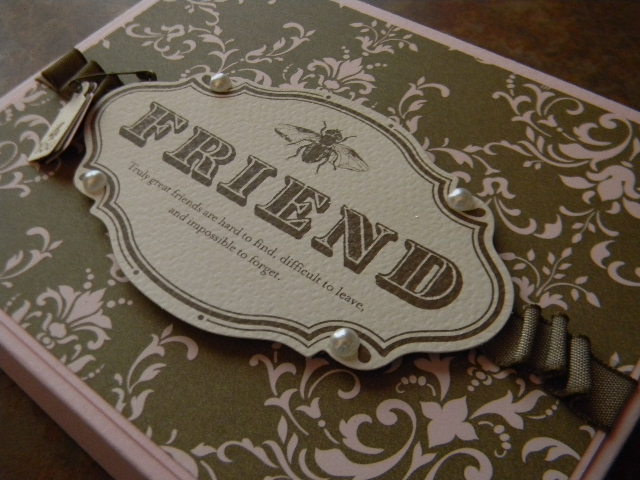
We used the "Beau Chateau" (P184) DSP and decorated the top portion of our box with the DSP and also the "Side Notes" (P190) die-cuts pieces.
I just love the "Friends" die cut from the Side Notes accents.  And a workshop of Di Gibbs just wouldn't be complete if we didn't use the "Jewelry Tag" (P210) punch.
It was so amazing to be able to cut both of our pieces of cardstock exactly the same measurements and then with the help of this "Special Jig" that Di included in with our class fee.......our boxes came together without having to factor in either a 1/16th" or 1/8th" measurement.
I will be sharing the cute little gate-fold card we made for the inside of our card box with you tomorrow......and then on Tuesday, I will be sharing the final project
we made at Di Gibbs Simply Score Tool Class. 

Hope to see you back here tomorrow.

Keep Living Your Dream!

Sunday, November 06, 2011

SW Stampers October Swap Cards Day Two

Happy Sunday My Blogger Friends!  Today, I will be sharing the last three cards that I received at my October SW SU Demo meeting.  Let's get started......
This card was made by Linda S.
She used the Always Thankful stampset and the new Spice Cake DSP.
This card was made by Cathy.
Cathy used the Gently Falling stamp set and the Lattice BigZ Die.
This card was made by Sue.
And Sue used the new Peekaboo Bigz L Die Frame to create the Boo portion of her card.

I LOVED each and every one of the cards I received from my fellow SU demonstrators - I am blown away with how much talent there is among these ladies.  It is my honor to be connected with this awesome group.

I'll be back tomorrow to share a fun little class that Di Gibbs has been offering.  
She offered a new Simply Scored Scoring Tool Class and I was lucky enough
to be able to sign up and attend this class last month. 
I will be sharing the amazing projects we made at that class with you tomorrow........
Hope you can stop back and join me.

Keep Living Your Dream!

Saturday, November 05, 2011

SW Stampers October Swap Cards

HAPPY HAPPY  Saturday My Blogger Friends.  I'm up in Mesa this weekend with my BFF attending the 15th Annual Rubber Stamp Convention.  We have decided to spend the weekend in Mesa and plan to do some serious shopping and playing and hope to get our Chrisatmas Cards done this weekend too.  But for today - I want to share the amazing cards that my SW SU demonstrators shared at our card exchange last month........Let's ge sharing.......
This first card up was made by Karen. 
She used the "Warmest of Wishes" (p5-mini) stamp set and punched out the center. 
This next card was made by Edna.
She used the "Always Thankful" stamp set and the new Spice Cake DSP.
And the last card today was made by Kendra.
She used the "Jack of All Trades" and Pick Your Poison DSP for her card.

I am honored to be included in this amazing group of ladies - they have sooooo many different levels of talent - and I am blown away every single time we get together.  Many THANKS Ladies for including me in your group.

Thanks for joining me today.......I'll be back tomorrow to share the rest of the cards
I received at my October SU Demonstrators card swap - Hope you can join me.
Keep Living Your Dream!

Friday, November 04, 2011

More Halloween Cards

Happy Friday My Blogger Friends!  Today I have several cards and projects to share with you that my friends in SaddleBrooke made for me......especially for Halloween.  Let's get this share started.......
Right out of the gates is a fun little "Ding Dong Ditch" surprise that my friend Sandy deliveried to me.  She some how managed to sneak up to my friend door and drop this little treat off ..... and she did it all without me seeing her.  (It's kind of hard to sneak up on me.....my studio window faces the front walkway of my house....so I see all the comings and goings to our house).
As I walked through my laundry room from the garage.....this little package caught my eye.  When I opened the front door......this was sitting on the entry rug.......Let's take a closer look at what Sandy left for me......
As if the card that Sandy made for me wasn't special enough......Sandy also made me this AWESOME bread!  Sandy makes some amazing breads and Jams and seems she is always surprising me with a fresh sampling of her goodies.....and let me tell you something my friends.......It is ALWAYS so DELICIOUS!  Jack and I actually fight over who gets the last piece.....(and I'm sure this loaf will be no exception!)
And here is the DARLING card that Sandy made for me.  The work she put into this card is SO AMAZING........It just made me smile from ear to ear as I held it and read the awesome little message on the inside. 
THANK YOU SANDY for SURPRISING ME.....and for thinking of both Jack and I with the YUMMY and AMAZING loaf of bread.
Next up is this fun little card that my FU Buddy Ann made for me.  She handed it to me on Saturday afternoon and when I opened it.......I actually SQUEALED when I saw how orginal her little creation was.  It actually looks like a Halloween sack....and one that has been distressed with what looks like a burnt edge across the top......OH SO COOL ANN!
She even decorated the inside with a fun little Halloween message....and on the side.....a piece of gum all decorated with a spooky Halloween Skull.  Thank you Ann for your fun shaped Halloween card - I really do ADORE IT!
And my last card I received was from my good buddy Opal........It was actually the only Halloween card I received in the mail this year.  My Jack came into my studio to deliver it on Halloween afternoon....and as we opened it together he SMILED BIG when I pulled it out of the envelope.  He knew immediately it was a very special Halloween card from "his girlfriend Opal" (inside joke Opal...Wink Wink).
Opal made an amazing Halloween fold for her card - and she also used one of my all time favorite Halloween DSP that Stampin' UP! ever had.  Many thanks Opal for thinking of Jack and me.....we love your card.
And I leave you today with one final look at all my Halloween cards and goodies for this year.  When I was thinking of a spot to display all my Halloween Treats.......I decided that the bookcase where I store my Cricut Cartridges would be the perfect spot to display all my Halloween Treats. 
So each and every time I walk into my studio.......I'm able to pass by these treats and enjoy looking at them time and time again..........
Many THANKS to all my friends that made me something special this Halloween Season......I without a doubt am blessed to have each of you in my life.....and treasure not only our friendships......but all the amazing treats you have made for me.  THANK YOU!

I'll be back tomorrow to share some amazing cards that my fellow SouthWest
Stampin' UP! Demonstrator friends made for our October Swap Card exchange.
Hope you can swing back and join me for those......
Keep Living Your Dream!

Thursday, November 03, 2011

Anniversary Card - Jan

Happy Thursday My Blogger Friends and isn't this card about the cutiest
Chicky La-La Card you've ever seen!
My BFF made me this card for my anniversary last month - Didn't she do an amazing job of coloring in these images......She seriously is the Queen of Copic Markers!
Don't know what I like more........The snappy shoes my Honey is wearing....or....My amazing shoes and matching purse......(and let's not forget my hat).....

Thanks Jan for remembering my Anniversary - and we just love love love our adorable card that you made us......I have it proudly displayed on my upper cabinet in my studio.

I'll be back tomorrow to share some final Halloween cards and projects I received.......Hope you can join me.  Keep Living Your Dream!

Wednesday, November 02, 2011

Spooky Fall Decor

Happy Wednesday My Blogger Friend. and Thanks for Stopping In Today!
Today I will be sharing a FUN Fall Decor piece that I made for my studio desk.......Check this out.....
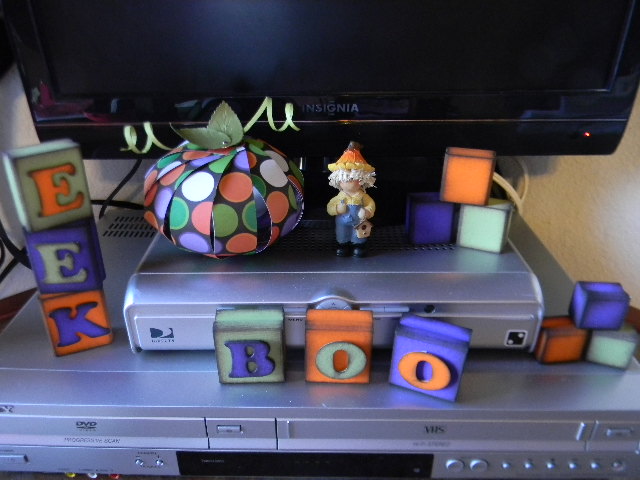
This little project started because I had made a little paper pumpkin (pictured above) that had Orange - Black - Green - and Purple in it and I wanted something small to go along with it for my studio.  I just couldn't find anything to go along with it....so I thought....I'll make some Halloween blocks.........
I started out hunting for some small children building blocks and NOBODY had any that were small enough and that weren't going to cost me an arm and a leg.  That's when it came to me.....I had a box that was stuffed full of Stampin' UP! wood blocks (in all sizes I might add)....and I just grabbed through that box and found enough in the same sizes to create ....... "BOO"........
and......."EEK".........
And here is the paper pumpkin that started this fun little project.  I also painted up a few extra sets of blocks to add just one more element of fun to this project.......
All I did was grab my acrylic paints in Purple.....Orange......and Green and painted the wood blocks with a couple coats of paint.  I set the blocks aside to dry and then came back in and distressed all the edges of the blocks.  I then turned to my trusty Cricut machine and using heavy weight chipboard and began cutting out different letters and painting those with the same colors I used for the blocks.
This whole project came together so quickly.......
I also added some SU dimensionals to the back of each of the letters to add a little bit of dimension and fun to each of the letters......
And it all started out with this fun little scarecrow man and paper pumpkin........
I'm thinking that this little project might be a fun little thing to do for each of the holidays.....Lordy knows I have enough of the wood blocks in my garage to do this ......... but for now......I'm going to have to put it on my ever growing "To Do" list and hope that someday I'm able to share those creations with you.

Thanks for joining me today....I'll be back tomorrow to share an Anniversary card that my BFF made for me........Totally going to blow you away!

Keep Living Your Dream!

Tuesday, November 01, 2011

Happy Halloween Treats

Happy Tuesday My Blogger Friends and today I will be sharing the treats I made for all my SaddleBrooke friends for Halloween yesterday.......Here's a little sneak peek......
 This is a super close-up of my mini milk carton creations as they were all stacked up waiting to be deliveried yesterday morning.......
 I thought I would snap one quick shot of my little treat holders as I was flying out the door at 6am to deliver them to my friends in SaddleBrooke........
I got this idea from my good friend Mary Fish http://www.stampinpretty.com ...... which she received as one of the swap shares at Founders Circle (I KNOW.....I KNOW......I actually was holding an original piece of art which made the rounds at Founders Circle.....UNREAL!).  When I saw this little creation, I just knew that I was going to have to make these and hang them from our mailboxes as my little Halloween treats.
Because I had used up all my SU DSP from Stamp Camp and Club......and.....I had to make soooooo many of them (lots of friends up here in SaddleBrooke)...I ended up using a Recollection Collection DSP pack.  Let's take a closer look.......
I used two Stampin' UP! Mini Milk Carton (P221) BigZ L Dies and by cutting off one panel from each of the cartons.....I was able to creat a six sided box.
I used the "Gift Givers" (P39-Mini) stamp set and punched the Happy Halloween out using the "Decorative Labels" (P209) Punch.
And the little owl was stamped out using the "Warmest of Wishes" (Hostess Set P5-Mini) and punched that out with the "Owl Builder" (P213) Punch.
 Of course I did go in and sponge all the edges of boxes (*WINK WINK my BFF).......
And tied the whole package up with some black and orange ribbon and left the ribbon long enough so I could hang this little cuties from my friends mailboxes..........
I just LOVE LOVE LOVE how this little project turned out.......and know that my friends here in SaddleBrooke were doing a happy dance as they made their way back from their boxes on Halloween Morning.

Many Many THANKS to my buddy Mary Fish (http://www.stampinpretty.com) for sharing this fabulous little creation with me - It was soooo much fun putting this together and even though I had to make over 25 of them.....It came together pretty quickly and was so much funny making.

Thank you for joining me today - hope you had a good visit.  I'll be back tomorrow to share a Spooky Fall Decor Project that I made for my Studio desk..........Hope you can come back and join me.

Keep Living Your Dream!