Sunday, March 24, 2013

March Stamp Camp Card #4

Happy Sunday My Blogger Friends! 
Today I am at a FULL RUN to get some last minute things done before the boys get here for a Spring Break visit.......SO......I'm going to jump right in with the last card from last weeks Stamp Camp......
This is the fourth card we made at last Wednesday Stamp Camp and it used the Secret Garden Stamp Set and the new Simply Score Diagonal Plate.  We first did our scoring with the Simply Score Diagonal Plate (every 1/2") and that gave use the base card to add a banner of DSP from the Parkers Pattern DSP pack and adhered that right down onto our card.  We also added one of the new Paper Dolies over our DSP and that was what our Water Colored Secret Garden flower was going to be adhered to.

Here's what the Cherry Cobbler base card looks like after we used the Simply Score Diagonal Plate to create a pattern on the front of our card.  We used a Stampin' Sponge and some Early Espresso ink to dust over the score lines to make those lines pop right off the card.
We used the largest Secret Garden stamp and stamp it twice on Water Color paper and then used our Cherry Cobbler Water Color Crayon to color in our flowers.  After it was completely dry....we cut out each of our flowers and used the center section of the second flower to create the center of our Secret Garden flower.  The last thing we did to our flower was add a medium sized pearl to the center.

We used the Daffodil Delight Seam Binding to create a pretty bow....and added a "hello" sentiment from the Tiny Tags Stamp Set that was punched out with the Jewelry Tag punch.  We adhered our sentiment with a Vintage Trinket Safety Pin and called this card DONE!
So there you have it friends........the final March Stamp Camp card.......OH SO PRETTY and OH SO FUN!
 
Thanks for joining me today.......I'm off to go enjoy a few Spring Break Days with Jack's boys and four of our California grandkids.  I'll be back tomorrow to share more Kards by Kadie creations with you......Hope you can come back and join me for that share.  Keep Living Your Dream!

Saturday, March 23, 2013

March Stamp Camp Card #3

Happy Saturday My Blogger Friends!
It's the weekend........and we are expecting two of Jack's boys (and their families) to arrive in Tucson tomorrow.  Lots of last minute things to get done.....so I will jump right in with my third card from my March Stamp Camp.

Here's a recap of all four cards we made at Stamp Camp.......


This card was shared by Lynda Gustadfson (a fellow SU Demo) and I knew there was LOTS of new product being used on this card and my Camp gals would squeal with HAPPY when they were able to try out some new product.
We used the new Honeycomb embossing folder and used some Soft Suede ink and a Stampin' Sponge to dust over the honeycomb to help bring out the image on both the Whisper White and Rich Razzleberry DSP.
 
We stamped our Secret Garden image on Rich Razzleberry  cardstock and then diecut out our image with the Secret Garden Framelit set.  Our flower FIT PERFECTLY in the Window Framelits and both the Framelits and the Secret Garden flower were adhered with dimensional adhesive.
Our sentiment is from the Sweet Essentials stamp set and we snipped both ends and rolled the center of our sentiment up to create a flagged banner across the bottom of our card.
GREAT card that can basically have any sentiment stamped on it.  It's one of those PERFECT go to cards that you keep on hand and have ready for when you need to send a quick card out.
 
Thanks for joining me today.......One last Stamp Camp card to share with you tomorrow.....Hope you can come back and join me for that share.  Keep Living Your Dream!

Friday, March 22, 2013

March Stamp Camp Card #2

Happy Friday My Blogger Friends!
Today I have card #2 from last Wednesday's Stamp Camp to share with you.  Here's a recap of all four cards we made at my March Camp......
 
 I will be sharing the Midnight Muse and Bashful Blue Secret Garden card today......
 
This card is another card that was inspired by my SU Stampin' Connection website.  We began with a Midnight Muse card base and added a Bashful Blue panel that was run through the Big Shot with the Perfect Polka Dots Embossing Folder. 

We added a panel of More Mustard down the length of our card and added a 3/8" Midnight Muse Stitched Ribbon along the bottom portion of our card.  To the ribbon we added a stamped thank you from the Pretty Petites SAB stamp set and punched our sentiment with the SAB Petite Curly Label punch.  We used a Vintage Trinket Safety Pin and some Linen Thread to adhere our label to our ribbon. 
Here's a close-up of the Bashful Blue panel after being embossed with the Perfect Polka Dots Embossing Folder.
 
We stamped our largest Secret Garden Stamp on a 2"x2" More Mustard card stock panel and then used our paper trimmer to cut that panel into four one inch square.  We then matted each of those 1" squares onto 1-1/4" square of Midnight Muse.
We used our corner rounder to round two sides of each square and arranged them onto our card and used dimensional adhesive to pop each square onto our card.  The finishing touch was adding one Extra Large Rhinestone to the center of our four squares and our card was then complete.
So there you have it.......Card #2 from my March Stamp Camp.  SUPER FUN CARD to create and the ladies enjoyed making this card.
 
Thanks for joining me today......I'll be back tomorrow to share Card #3 with you - Hope you can come back and join me for that share.  Keep Living Your Dream!

Thursday, March 21, 2013

March Stamp Camp Part One

Happy Thursday My Blogger Friends!
Today is my ALL TIME FAVORITE day of the month.....the third Thursday of the month.  It's the day after camp and it's my TOTAL INDULGE DAY.  The only plans I have for today involves connecting with my two good friends Kris and Ann and we are heading down to our NEW HOBBY LOBBY store (that opened yesterday).  I'm looking forward to hanging out and just CHILLIN with my friends!
 
So I've prepared the next couple of days to share with you the cards we made at my March Stamp Camp.  Let's jump right in.......

Here's all four cards we made at Camp on Wednesday.
First up is this trio of Secret Garden Flower card that just jumped right off the card.  My inspiration came from our Stampin' Connection demonstrators site and Justin Krieger.
We stamped two large Secret Garden flowers and one smaller flower and die-cut them out with the new Secret Garden Framelits.  We added a panel of Sycamore Street DSP that is in the SAB catalog.
Our Whisper White panel was stamped with Pool Party ink and the Woodgrain back ground stamp.   Our happy birthday sentiment comes from the Perfect Punches stamp set and punched out using the Extra Large Oval punch.......Inked in Island Indigo ink.
The leafs that were tucked behind the trio of Secret Garden flowers were die-cut using that same Secret Garden framelits set.  The center of our flowers were embellished with a Island Indigo flower from the Boho Blossom punch and a small pearl was added to the center for a tiny bit of WOW!
 
Thanks for joining me today!  I'll be back tomorrow with card #2 from Stamp Camp......Hope you cam make plans to stop back and join me for that share.  Keep Living Your Dream!

Wednesday, March 20, 2013

March Club Card #2

Happy Wednesday My Blogger Friends!
It's Camp Day today and I have two full camps taking place at 10:00am and 5:30pm.  Our Camp theme is Secret Garden......and I just know the ladies are going to be thrilled with the card projects we will be making.  I will begin sharing those camp cards with you starting tomorrow.
 
For today I have the second card we made at last Saturday's Stamp Club to share with you.  It was Berta's month for Stamp Club and she wanted to use the new Simply Scored Borders Scoring Plate for one of her card projects.  Here is the card I CASE from our SU Demo Site........
 
We started with a Whisper White card base and stamped the Best of Birthday's image in our upper right hand corner of our card.  We then added a piece of Sycamore Street Designer Series Paper to the center of our card (adding a small piece of SAB Island Indigo Ribbon to the far left hand side before adhering our DSP panel down).   
The real magic began when we used the Simply Scored Borders Scoring Plate to add an awesome sored border to the bottom portion of our Whisper White card base.
I gave the ladies the opportunity to select whichever pattern they wanted and I'm pretty sure no two cards turned out the same.
This is one of my favorite patterns on the Borders Scoring Plate. 
 And one last sample to share with you.
I also provided the ladies with enough DSP to decorate their envelopes.........So we added the DSP and also created the scored pattern to the outside flap of our envelope (OH SO PRETTY!).
Many THANKS to my fellow SU Demo Jessica Urrutia for her original posting of this card on Stampin' Connection.......SUCH A FUN CARD!
 
Thanks for joining me today!  Hope you can come back tomorrow and join me when I begin sharing the first of the four cards we created at my March Stamp Camp.  Keep Living Your Dream!

Tuesday, March 19, 2013

March Club Card #1

Happy Tuesday My Blogger Friends!
Today I want to share the first of the two cards that we made at my March Stamp Club on Saturday.  It was Berta's month and she wanted to use Builder Wheels and the new Simply Score Diagonal Plate for her two club projects.  Here is the project we made using the Stampin' UP! Wheels.......

Our Happy Birthday/Candle image is from the Candle Crazy Birthday Builder Wheel.  We started with a Whisper White cardstock base and layered a panel of Early Espresso and Soft Suede to our card.
We used Versa Mark Ink and the new Early Espresso embossing powder to stamp our image onto a piece of Whisper White cardstock.  We added a piece of  the new Natural Trim Ribbon from the Spring Catalog to add some WOW FACTOR right down the center of our wheeled image panel.
We stamped the Pennant Parade (wish big) and Topsy-Turvy Celebration (candle) sets for our Jewelry Tag images.  We strung each of our punched out images onto a piece of Linen Thread and attached them to the bow of our Natural Trim Ribbon.
This card was a HUGE HIT........and is PERFECT for all those "guy" cards we have trouble making.

Thanks for joining me today!  I'll be back tomorrow to share the 2nd card we made at last Saturday's Stamp Club with you.  Hope you can come back and join me for that share.  Keep Living Your Dream!

Monday, March 18, 2013

Skype Sunday Card #2

Happy Monday My Blogger Friends!
Today I have the second Skype Sunday Card that I shared with my granddaughter yesterday during our Skype Sunday Event.  Check out this fun creation that my fellow SU Demonstrator Angie Judda created........

Angie created this card last week and I knew it would be a great card to have Hailey create.....Especially since I was sending her some embossing folders and ribbon this week.
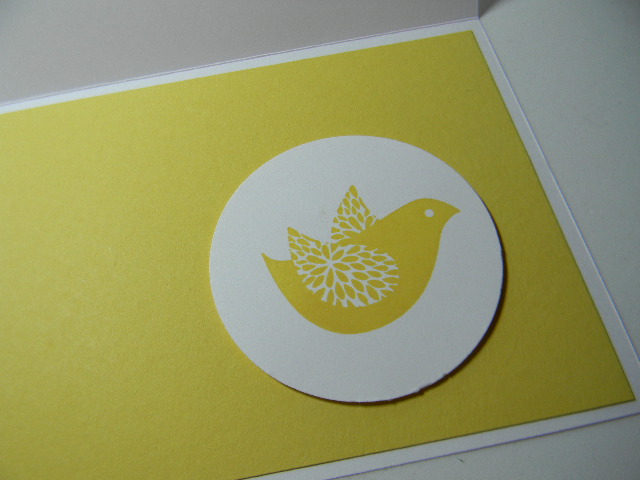
The front of the card is punched out using the 2-1/2" circle punch and then you use the punched out circle to stamp a sentiment or image on and pop that right over your punched out circle on the inside of the card.
We used the Betsy Blossom stamp set for our bird image.......
Here's what the inside of the front panel looks like when you open up your card......
We used the Needle Point Border Embossing Folder on the front of the card to create the embossed stitching across the bottom section of our card.......And then tied a piece of 1/8" Daffodil Delight Taffeta Ribbon around our card for a little WOW FACTOR!
I had Hailey use some of the stamp sets that I had sent her earlier in the month to decide what sentiment she wanted to add to the front of her card.  She's going to also hold off stamping some of her cards so she can stamp the perfect sentiment when she needs a quick card.
 
So there you have it......Card #2 for Hailey's Skype Sunday Event.  She participated in a Technology FREE three day event with her class this past week.  That meant from Wednesday through Saturday she was not to use any technology.  NO TV ..... NO Phones ...... NOTHING Digital ..... NO ipads or ipods........NOTHING Electronic!  SO ..... Needless to say ....... When I skyped her on Sunday at noon......she was chatting up a storm BIG TIME!  One very Happy Little Girl to have her NaNa Baby on Skype to chat with.  (I LOVE BEING A GRANDMA!)
 
Thanks for joining me today......I'll be back tomorrow to begin sharing the projects that my Club gals made on Saturday......Hope you can join me for that share.  Keep Living Your Dream!