Remarkable InkBig Blog Hop
Welcome to the Blog Hop for August 2017. This month our theme is “THANK YOU CARDS”. You may just be starting the blog hop here at my blog 'Kards by Kadie' or may have come from the person previous to me in the list. If you get off track at any time, the full lineup below will help you move along from blog to blog so you see all the projects. At the moment you are visiting KARDS BY KADIE.
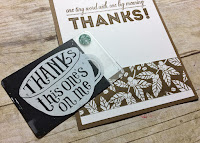
This pocket style card was inspired by the very talented Erica Cerwin. I put my own twist on this pocket card and created this fun coffee thank you card.
The spin to this style card is it has a pocket slider card inside ...... That pocket card has a built in gift card holder section attached right to the card and a Starbucks gift card fits perfectly inside.
I began my card by cutting a piece of 'Coffee Break Designer Series Paper' to 10" x 7-1/2" and scored it at 2-1/2" and 7". I grabbed my Gift Bag Punch Board and lined up the 2-1/2" score line at the 'Start Line' of the punch board and punched. Now slide your DSP over and line up the 7" score line to that same 'Start Line' of the punch board and punched that too. Use the 'Horizontal Line' section at the top of your Gift Bag Punch Board and score the entire top of your DSP (from left hand edge to right hand edge) using that 'Horizontal Line' guide. All that is left to do to finish up the construction of your pocket card is to use your Paper Snips and cut off the 2-side tabs (both left and right tab) of your DSP. That will leave you one center tab and that will be how you close up your pocket style card.
I cut a coordinating piece of the same Designer Series Paper to 3" x 10" and I used that to create the Belly Band for my card.
Here is the pocket insert I made for the inside of my card......
As you can see, I adhered three sides of my DSP to the bottom portion of my insert and that created an instant pocket for my Starbucks gift card to slide into.
Some quick stamping with the 'One Big Meaning Set' and my card was done and ready to go out in the mail to a dear friend.
Here's a quick peak at how I created the topper for my insert card. I adhered a small piece of 5/8" Burlap Ribbon and 1/8" Sheer Ribbon to the top of my insert piece ........ And then I used one of the small 'Metal Rimmed Pearls' and that acts as a catch for each time I slide my insert piece into my pocket card.
Thanks for taking part in our blog hop, there are so many amazing ideas and inspiration you don’t want to miss. Remember that currently you are at my blog – Kards By Kadie, so check the blog hop line up list below to see who is next in the list.


Your pull-up card is fabulous, Kadie! Thanks for the instructions!
ReplyDeleteCASE away Michelle and Su.......It's a pleasure being part of the blog hop with you both!
ReplyDeleteI have been trying SO hard to hold off on getting this bundle. Your project is perfection and may have tipped me over the edge. P.S. this is Corinne Blake. For whatever reason, Blogger is picking up an old username of mine and I can't figure out how to change it!
ReplyDeleteSO HAPPY that I tipped you over the edge on getting this set Corinne. It is one of those sets that I probably will NEVER give up. Thanks for your sweet comment!
ReplyDeleteBravo! Such a gorgeous mix of pattern and simplicity!
ReplyDelete