 First up.....a recap of what my dimensions are for today. This little pizza box measures 3"x3" and hold six little 3"x3" notecards w/envelopes that perfectly tuck inside this pizza box!
  Here's the belly band I created to wrap around my pizza box. Starting with your Whisper White pc: 11-1/2"x 1-1/2" Next is your Real Red pc: 11-1/2" x 1-1/4"
Layer these two pcs of cardstock on top of each other and then once your pizza box is completed - you will wrap your belly band around the pizza box and form your fold and then secure the ends together to form your belly band (which will slide on and off of your pizza box).You can add a scallop layered element to the center of your belly band (depending on what your using your pizza box for).
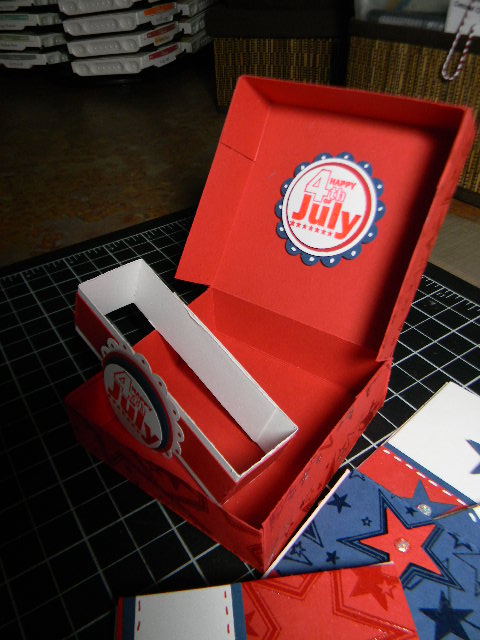 Here's what the pizza box looks like when opened. The dimensions of my pizza box measures: 5-1/4" x 9-1/2" (mine is with real red cardstock) Score on the 9-1/2" side at 1", 4-1/4", 5-1/4" and 8-1/2" Score on the 5-1/4" side at 1" on both ends. You will on the 9-1/2" side CUT up to the score line at the 1" score, 4-1/4" score, 5-1/4" score and the 8-1/2" score. You will do this to both sides of the 9-1/2" side. What this step will be doing is creating the tabs for you to form your box. Add sticky strip to each 1" section of these snips that you just made and assemble your pizza box.
  When you have completed all these steps......You should end up with a pizza box that looks like this. Please contact me if you have any questions or if any of these steps aren't clear. I'll be back tomorrow to share with you the cards and project samples that I made for my Open House. I'll be sharing those with you starting tomorrow and continue sharing over the weekend. Happy New Catalog Release and my hopes are that you don't end up with too many paper cuts from rapidly flipping through the pages of the new 2011-2012 Stampin UP! Idea Book and Catalog. Keep Living Your Dream!
Too cute! Have a Happy 4th!
ReplyDelete