Happy Friday My Blogger Friends!
I have some FABULOUS NEWS........Jack and I have booked our flight to go visit the kids in Madison ..... so.....here begins another "COUNT DOWN TO GRANDKIDS VISIT". We will be leaving in 36 days - so to help the kids keep track of when we will be arriving, I will post every day the number of days left until we arrive in BEAUTIFUL Madison, Wisconsin.
Countdown Till We See The Grandkids - 36 Days
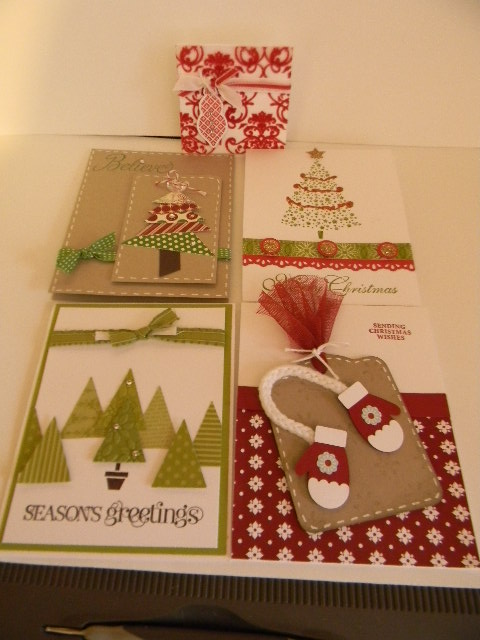
For my card share today.......I have the first two card from my July Stamp Camp to share with you. Here are all five of the cards we made at Wednesday's Stamp Camp.......
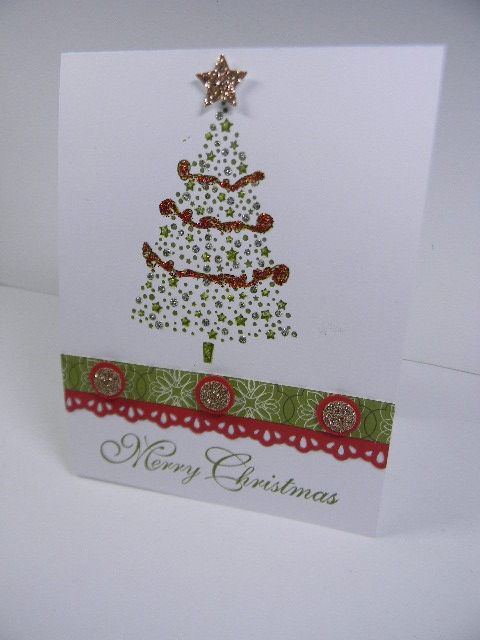
My July Stamp Camp was a Christmas in July camp and we created these five Christmas card. Here are the first two cards we made......My first Christmas in July card share is this fun little Holiday Tree that was stamped using the "Star Tree" from Stampin' UP!
I used the "Candlelight Christmas" DSP and the new Champagne Glimmer Paper that will be released in the new Holiday Mini Catalog on August 1st.
I also used the Red, Silver and Clear Dazzling Details all over the Christmas Tree.
And my "Merry Christmas" sentiment was stamped with Gumball Green ink with the "Greeting of the Season" stamp set. I also added the "Finishing Touches" edgelits die in Real Red to the bottom of my DSP piece.
I honestly think this was my second favorite card from the Christmas in July cards we made on Wednesday.
My next card was inspired by Julie Marshall at
www.stampinimpressions.blogspot.com. However, the original card layout came from Jennifer Timbo back in December 2011. I made this card using the new stamp set "Snowflake Soiree" and stamped the "Believe" sentiment with Gumball Green ink.
We cut our "Be of Good Cheer" DSP into five different squares (3/4", 1", 1-1/4", 1-1/2" and 1-3/4"). All we needed to do from that point is cut the squares into two triangle pieces and we arranged the triangle pieces onto a small piece of Early Espresso piee that was adhered to the bottom of our tag to create the tree trunk.
We added two Rhinestones Jewels to our tree and added a piece of Gumball Green Stitched Satin Ribbon around the bottom of our card and added our tree tag to the bottom right hand corner of our card.
We added white stitching around our tag and the outer edges of our base card and secured a new Faceted Vintage Button to the top of our tree and called this one done. Such a pretty and festive card and will for sure make someone smile when we give this one out for the holidays.
Thanks for joining me today ...... I'll be back tomorrow to share two more Christmas in July cards with you ...... Hope you can come back and join me for that share.
Keep Living Your Dream!


0 comments:
Post a Comment