Saturday, December 31, 2011

Santa Pants and Gift

Happy Happy Saturday My Blogger Friends - Well ...... It's the last day of 2011 and all I can say is ....... Where the HECK did the year go?  I remember the very beginning of the year - and a part of the summer - but the rest of the year ...... YIKES ......Is this what it's like to get OLD?
Today, I want to share a fun little project that I made for my Stamp Club gals in December.  This project was a direct CASE from someone's blog - but I honestly can't remember where I saw it. (If you know who's blog this was originally from - can you please share it in my comments section - I can then do my best to link this back to their AMAZING CREATION) For my project, I took a plan brown lunch bag and cut it down and aded some Real Red cardstock to the front and began decorating it to resemble the center of Santa's suit.  This little gift was my little little way of thanking the gals for being part of my first Stamp Club adventure.  It all came to an end in December - but not to worry ...... I lined up six ladies (some repeats!) to join me in January to kick off a new 6-month Stamp Camp.  
I covered the front and back of my cut down lunch bag with real red cardstock ..... added some black cardstock to the bottom portion of the bag to act as the belt ...... added a square of silver glimmer paper and topped it off with another square of black ....... and added two 1/2" circle of black to represent two of Santa's buttons.  TOTALLY CUTE and totally predictable for right before Christmas.  I also added a small little gift to the inside of the Santa Bag .......
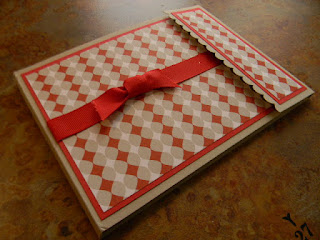
I took an empty Stack and Store Container (Page 226) and began decorating it with circle punches and retired DSP.
The little snowman is from a retired set - but seriously is one of those snowman stamps that I will probably NEVER retire from my stash.
The inside of the Stack and Store Container has six of the mot ADORABLE gift tags - all decorated and ready to hand out.  The back side of the tag has a "To - From" adhered to it.
I used some dimensional puffy paint to decorate all the tags - giving the tags just one more level of dimension and FUN!
I used my Tabletop Paper Cutter to cut up lots of thin stripes of red and white cardstock and then gathered them up and ran the stripes through my crimper to create some fun filler for these adorable Santa Pants.

LOVE how this project turned out and I'm sure that the ladies loved  receiving their gift and HOPE they know how much I appreciate their FRIENDSHIP and Business.

Hope you'all have a FUN and HAPPY New Year's Eve.   Jack and I will be getting all snug tonight in front of our TV with our JAMMIES and COMFY BLANKIES to enjoy an evening of movies and (for me) NAPS!  Whatever you have planned to tonight - enjoy your evening!  I'll be back tomorrow to wish you a HAPPY 2012!

Keep Living Your Dream!

Friday, December 30, 2011

December Stamp Camp Part Two

Happy Happy Friday My Blogger Friends and many thanks for joining me today.  Today I will be sharing the last two cards that we made at Stamp Camp in December - Let's JUMP right in .....
This first card up for today is a cheery little "Get Well" card that is sure to make someone smile (well - unless your my good friend Debbie.  She doesn't like Butterflies so we substituted HEARTS for her card and the card turned out with SMASHING results). 
We used Rose Red, So Saffron and Baja Breeze for our color combination on this card ...... We ran each of those colors through the Big Shot and using the Embosslits Beautiful Wings folder we were able to create a line-up of three butterflies which were diecut and embossed at the same time.  OH SO PRETTY!  The "Get Well" wishes was stamped using the Perfectly Penned stamp set from Stampin' UP!  Our scallop border is from the Tasteful Trim BigZ die that was cut out from So Saffron cardstock.
And our last card was a fun little "thank you" card that used lots of circle layers and the Easy Events stamp set for our focal image.  We added a small piece of Calypso Coral Ruffled Ribbon across the bottom of our card and then with the help of the Jewelry Tag punch and the "GO TO" stamp set Teeny Tiny Wishes - we create a fun little banner that attached to our ribbon with a trinket safety pin.
The ladies colored in their flowers with the help of several matching Stampin' Write Markers.
We are nearing the end of the year and I've been busy getting myself organized and settled back into a clean and organized studio to start the New Year out.  With several conventions and WAY TOO MANY ROAD TRIPS with my girlfriends - Let's just say ....... I have my work cut out for me!

I'll be back tomorrow to share a fun little gift that I made my Club gals in December ....... Hope you can come back and join me for that share. Keep Living Your Dream! 

Thursday, December 29, 2011

Paper Crafter's Library Team Submission

Hi Blogger Friend! I received news that Andrea Walford over at Paper Crafter's Library was looking for 4-6 new paper crafters to join her design team and I knew IMMEDIATELY that this is one team that I would walk over ground-glass to be part of (okay...maybe not walk over - but would seriously think about walking over it in an attempt to be invited to join her design team).

Today, I will be sharing the three projects that represent my best design style which will allow Andrea and her team the opportunity to not only see my design style ...... but also my style of writing.  SO ..... Let's get this party started.

First up is the fun project I made for my Grandkids classmates, which was posted on 12/22/11. 
(http://www.blogger.com/post-edit.g?blogID=1631178639265827936&postID=4904033414463808452)
Having seven little grandkids that I make holiday treats for allows me the opportunity to create fun projects in a BIG WAY.  Making 175 (and YES.....You did hear that correctly .... One Hundred and Seventy Five) holiday treats - for them to share with their classmates also keeps me busy and out of trouble to say the least.
To create this little cutie, I went to the Dollar Store and picked up several pairs of red gloves and immediately came home and cut off the fingers to each of the gloves.  (The fingertips were going to be used to make the snowman hats)  Next I rolled up the fingertips to form a hat and then popped it on the top of a wrapped hersey nugget.  (the nugget was wrapped with a white Avery mailing label)  I then added the face to my snowman and a pom-pom to the top of the hat and this project was done (well.....almost done ..... I only had to make 22 more of these little cuties to complete Steven's class).
The pink snowman was for Steven's teacher (who by the way - he is in LOVE LOVE LOVE with his first grade teacher ..... but seriously ..... what kid isn't in love with their first grade teacher?).
I think this was my all time favorite treat that I sent out to my grandkids this year.

My second project is by far my favorite papercrafting love and that is cardmaking.  This card was featured on my blog 3/26/11 (http://www.blogger.com/post-edit.g?blogID=1631178639265827936&postID=7968286123678511649).  It spotlights Stamping, using the Big Shot, and some Creative Details that make this an awesome "thinking of you" card.
This card started out as a challenge card from my SaddleBrooke Stampers group.  We were given the stamped basket and told to create something. 
I stamped the Stampin' UP! Easter Bunny onto chocolate chip card stock and then embossed him with clear embossing powder and cut him out with my paper snips (just love SU paper snips!).  I placed my cut out Easter Bunny in the center of my basket and surrounded him with eggs and grass for that little WOW FACTOR he was needing.
I ran my base card through my Big Shot and used the Framed Tulips Embossing Folder to create a  super fun frame for my easter basket to be centered in.  With the help of a Nestabilities Label Die, I was able to stamp my "Thinking of You" sentiment directly in the center of my diecut label and simply added some Polka Dot Ribbon to each end of my label and secured it to the top of my embossed frame.
I framed my basket with a mat of Whisper White and Melon Mambo carstock and then added several layers of dimensionals to the back of my basket and centered that piece at the bottom of my card. 
And what would an Easter Basekt be without Easter Eggs and Grass?  So both of these elements were generoulsy added and secured into place.
This card was sent off to a friend back in Wisconsin that is in a Nursing Home - and I just know it must have brighten up not only her day ...... but also her room.
And my last project was posted on 9/7/11 and was a little something I made for each of my grandkids to give out to their Teachers, Principals AND School Bus Drivers at the beginning of the school year.  (http://www.blogger.com/post-edit.g?blogID=1631178639265827936&postID=6456540902127947437)
Of course I just had to use the new It's a Wrap Occasions stamp set from Stampin' UP! which is the perfect stamp set for this back to school project.  This stamp set is designed to be stamped onto White Avery Labels and then the labels are applied directly to your hersey nuggets.  You are then left with the most amazing and fun wrapped candy project.
The bus was created with the help of my Cricut and the DoodleCharm cartridge.
 And the hersey nuggets lined up perfectly in the small box that I created for my bus.
Of course my grandkids were thrilled to hand these out on the first day of school this year.

Many THANKS to Andrea for allowing me this opportunity to submit my three projects for a possible spot as one of her new Design Team Members.  It SERIOUSLY would be an honor to represent myself as a Paper Crafter's Library Design Team member.  I'm going to keep my fingers - toes and eyeballs crossed in hopes my work is EXACTLY what Andrea is looking for.

I'll be back tomorrow to share Part Two of my December Stamp Camp cards with you'all.......Hope you can come back and join me for that share.  Keep Living Your Dream!

Wednesday, December 28, 2011

December Stamp Camp Part One

Happy Wednesday My Blogger Friends!  Today I will be sharing three of the card projects that we made at our December Stamp Camp last week.  The first card up is a little 3"x3" card - Made with the Pocketful of Posies DSP and Baja Breeze Cardstock.
The stamp set we used for this card was "A Word for You" and we used Statz-On black ink to stamp that on to a baja breeze cardstock piece and punched out with the small oval punch.
The real surprise came when we added a small punched out piece of whisper white using the eyelet border punch.  We added a layer of white bakers twine around the DSP to give a fun little layer to the center of our card.
Our next card used the embossing textured impressions folder (framed tulips) as the base of our A2 card.  We stamped our "Teeny Tiny Wishes onto a piece of whisper white card stock and punched the sentiment out with the large oval punch.......we punched a cherry cobbler scallop circle punch and matted our sentiment and attached that piece to our card.
We used the "Easy Events" stamp set to create our focal image and punched that out with our 1-3/4" circle punch.  We then started layering our stamped image on to an Old Olive scallop circle punch .... next up was our So Saffron piece that was punched out using a 2-1/2" circle punch ...... and our last layer was a 3" Cherry Cobbler circle.
Next up we made a fun little birthday card.  We created the base to our card by running a piece of Brushed Silver cardstock through our Big Shot using the Perfect Polks Dots Textured Impressions folder.
We used the Pretty Postage and Turtle Company stamp sets for our birthday card.  The Happy Birthday cake was stamped in Real Red and punched out with the 1" Square punch.  We also used the Postage Stamp punch and Scallop Square punch to layer our birthday card image on to.  The little party hats were punched out with a 3/4" circle punch and then layered with a 5/8" Circle Punch in Real Read cardstock.  We added a small piece of Red Baker Twine around our card and called this one DONE and FUN!

Thanks for joining me today - I'll be back tomorrow to share the last two cards that we made at our December Stamp Camp with you - Hope you can come back and join me.  Keep Living Your Dream!

Tuesday, December 27, 2011

December Stamp Club Projects

Happy Happy Tuesday My Blogger Friends!  Today I have the projects that we made at our December Stamp Club to share with you ....... Let's get started .......
First up was our fun little 3-D project.  We used the Candy Wrapper Die to create this fun little Thank You gift.
 We used the Blossom Bouquet Triple Layer punch to create a fun flower for the top of our wrapper.  And we added the Jewelry Tag punch with a "Thanks so much" message stamped on it
 The wrapper itself was secured closed with some pretty 3/8" ruffled ribbon in Calypso Coral.
And we wrapped our Crumb Cake Candy Wrapper with an Old Olive belly band.  Our project was stuffed with a mini hersey candy bar (well ..... it was suppose to have a candy bar added ...... but most of the gals ended up eating their candy bar - and I think it was to keep their strength up to continue making the rest of the card projects).
Our 3"x3" card was made with the Build a Blossom stamp set and stamped in Cajun Craze ink.
The Thanks so much flag was created with the Trendy Trees stamp set ........VERY FUN!
To create a little dimension to my flower - I stamped the top layer of the flower with Cajun Craze ink ....... and the bottom petals were stamped off and then stamped onto Whisper White card stock. 
And our A2 card was created with the amazing flower stamp set "Flower Fest"  We stamped the largest flower onto Rich Razzleberry cardstock with Statz On ink ....... and then we cut out each layer of the flowers and popped each layer up with dimensionals.
We added three different groupings of flowers to our card - and that litle bit of WOW came from using Glimmer Paper and the circle punch from the Itty Bitty Shapes Punch Pack.
We used the Scallop Edge Border punch to create a fun little border at the bottom of our card - and we used the Rich Razzleberry DSP from the Bright Collection pack.

I pulled out my Word Play stamp set and stamped the "Imagine The Possibilities" Stamp onto Whisper White cardstock with Rich Razzleberry ink.  OH SUCH a LOVELY LOOK for this already FUN CARD!

My Club gals loved these projects and even though it was just a week before Christmas - I think the time we spent together was RELAXING and MUCH NEEDED during the busy holiday season.  MANY THANKS CLUB GALS for allowing me to be part of your busy holiday season.

I'll be back tomorrow to begin sharing my December Camp cards with you - Hope you can swing back and join me for that card share.  Keep Living Your Dream!

Monday, December 26, 2011

Gift for Opal

Happy Monday My Blogger Friends!  Hope you had a FABULOUS Christmas!   I spent the entire day with Jack and my favorite chair in my studio.  It was an AMAZING DAY!  
Today, I will be heading out with my two good friends Kris and Debbie to do some serious after Christmas shopping.  We are heading to both Joann's and Michael's to see if we can score some deals on any of the new Cricut Cartridges. 
As for my share for today ...... I have a sweet little gift that I made for Opal when our Crafternooner group met last Friday.  Check this out ......
My Crafternooners group meets on the 4th Friday of the month.  This month .... It was just Opal and myself that met.  SO ...... I just couldn't resist making Opal a little something somthing.  Here is the fun little bag I handed to Opal when I walked in the door.  I actually thought I was being CUTE by re-using the bag that I thought she used for her "Secret Santa" gift exchange with our SaddleBrooke Stampers Group.  Turns out it wasn't Opal's bag ...... so the joke was on me (this time)!
I pulled out one of the extra tags I had made for our tag exchange and used that for Opal's gift.  The tag was super fast to make ...... I just punched the Stampin' UP! snowflake punch in the center of a Night of Navy tag and ran chunky glitter along the outside edges of my tag and matted it onto a piece of Whisper White cardstock for the base!
The actual gift that I made Opal was designed by Andrea Walford (http://sunnystampingstudio.com) over at Sunny Stamping Studio.   Andrea shared how to make this super cute and super fun tag portfolio on her blog about two years ago and I love love love making this portfolio and giving them out at Christmas time.  Check it out .......
The portfolio closes up with the help of a scallop flap and a tiny piece of velcro - which secures the flap closed and helps to keep the tag inside the clear envelopes that are on each side of the portfolio.
When you open the portfolio ...... it exposes two pockets that holds the dozen matching tags that I made for Opal.
 I mixed and matched the tags to coordinate with the retired DSP used for my portfolio.
I was able to tuck six tags into each of the clear envelope pockets.  
And since the envelopes are side loading envelopes ...... the tags stay inside the portfolio instead of falling out the top (which would happen if I had used clear top loading style envelopes).
 I had so much fun creating this portfolio for Opal and just know that she will enjoy it.
Please head over to Andrea Walford's blog to find out how to make this amazing little portfolio.  If you do head over to her blog ...... allow yourself PLENTY OF TIME to visit ..... I am serious when I say ....... everything she post is worth reading and her "How To" videos are AMAZING! 

Tomorrow I will begin sharing the 5-cards that we made at Stamp Camp last Wednesday - So I'm hoping that you can return tomorrow to check those projects out.  Keep Living Your Dream!