Sunday, June 30, 2013

Switching to Bloglovin

Follow me on Bloglovin
 
With the retiring of my current blog reader........and wanting to claim my "Kards by Kadie" blog site........I will be switching my blog posting to Bloglovin starting tomorrow. 
 
My fingers are crossed that I did everything correctly........and the transfer will be seamless and we will all continue Living Our Dream!
Kadie

Worth Repeating!

Happy Sunday My Blogger Friends!
Today I have one more new product card to share with you ...... and YES ..... It's a WORTH REPEATING card from my June Stamp Camp!  
We made this card at my June Stamp Camp ....... but we made it in Crisp Cantaloupe!  My card share today uses Coastal Cabana cardstock!
I used the Mosaic Madness Embossing Folder to create some AMAZING mosaic texture on my Coastal Cabana panel...... 
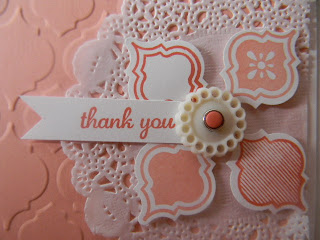
And then I inked up the Mosaic Madness stamp set with Calypso Coral and Coastal Cabana ink and punched the images out using the new Mosaic Punch.  I arranged the mosaic punched out pieces with a small piece of dimensional adhesive and placed them directly onto one of our paper doilies.  The center of my arrangements has a Very Vintage Designer Button with some Linen Thread that has been tied up in a pretty bow and then topped off with a retired Calypso Coral brad.  OH SO PRETTY!
My flag banner sentiment was stamped from the Express Yourself stamp set and adhered down with dimensional adhesive.  Just know I'm going to use this layout for some of my upcoming On-Line Thank You cards for the fall.
 
Thanks for joining me today!  I'll be back tomorrow to share some AMAZING and OH SO PRETTY Birthday cards I receive from three of my dear SaddleBrooke friends.  Hope you can join me for that share........Keep Living Your Dream!

Saturday, June 29, 2013

Do It Again Card

Happy Saturday My Blogger Friends!
 My card share today is another version of one of my June Stamp Camp cards.  This one I made with all new SU colors......
My base card is Baked Brown Sugar that has been run through the Big Shot using the Modern Mosaic Embossing Folder. 
I used two new colors for my punched Mosaic Punch pieces.  Here is Crisp Cantaloupe and Bermuda Bay cardstock along with Soft Suede. 
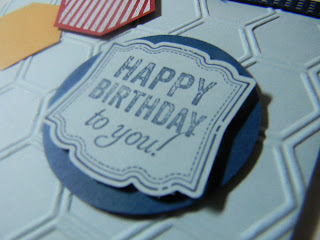
I used the Mosaic Madness stamp set to stamp some of my Mosaic Punch pieces and I also used the new stamp set Label Love for my Happy Birthday to you sentiment.
I stamped my Happy Birthday sentiment onto Baked Brown Sugar and then punched it out using the Artisan Punch and popping that piece onto a 1-3/4" Circle Punch. 
I tied some 3/8" Soft Suede Taffeta Ribbon around the fold of my card and called this card done.  OH SO PRETTY and OH SO WORTH doing it again.
 
Thanks for joining me today.....I'll be back tomorrow to share another WORTH REPEATING card with you.  Hope you can make plans to stop back and join me for that share.  Keep Living Your Dream!

Friday, June 28, 2013

HONEYcomb Card

Happy Friday My Blogger Friends!
My card share today is another CASE card and this one comes from Debbie Henderson who created a darling honeycomb card.  My version of this card has a HONEY of a TWIST  to it ...... and I ended up not having the small bees stamp and had to use the retired Spring Sampler bee instead.  Here is my version of Debbie's honeycomb card.......
This card starts out with a Baked Brown Sugar base card and I added a Whisper White panel to the front of my card.  I then ran a piece of More Mustard cardstock through the Big Shot using the HoneyComb Embossing Folder and then went to town cutting up the embossed panel to create a honeycomb home for my busy bees to work on. 
I cut two embossed honeycomb pieces out and attached them to my Whisper White panel with dimensional adhesive....but the real fun came when I added some Crystal Effects directly onto the embossed honeycomb pieces. 
Here you can see where the Crystal Effects has been added to a portion of a few of the embossed honeycombs and the entire honeycomb piece just POPPED with the look of YUMMY HONEY after the Crystal Effects dried.
My sentiment is from the new Banner Greetings set and I stamped that with Baked Brown Sugar ink and then just used my Paper Snips to cut out my banner.  I also added a few Sizzlits Little Leaves behind my sentiment and a few buzzing bees were added to my Whisper White panel at the very end.
 
This design is PURE MAGIC and many thanks to Debbie Henderson for her AMAZING EYE to see and create this DARLING LITTLE CARDLOVE IT!
 
Thanks for joining me today!  I have a DO IT AGAIN CARD to share with you tomorrow, hope you can return and join me for that share.  Keep Living Your Dream! 

Thursday, June 27, 2013

New Catalog CASE

Happy Thursday My Blogger Friends!
Today I have a fun little CASE card from the new SU catalog.  It is was featured on Page 123 and I knew the minute I saw this card that I would CASE it for my Open House.  Here is the card I CASE'd....... 
I really didn't change anything on this card...........I figured it was PERFECT just the way it was displayed in the catalog!
I started out with a Whisper White base card and ran the front of the card through my Big Shot using the Lots of Dots Embossing Folder.  I then grabbed some of my circle punches and the Delicate Dollies stamp set and began stamping my images. 
I used Pear Pizzazz, Strawberry Slush and Daffodil Delight ink to stamp my images and then used the 1-1/4" and 1-3/4" circle punches to cut out my images.
My sentiment was from the Sweet Essentials stamp set and was inked up with Strawberry Slush ink.  I also added three Vintage Faceted Buttons to the front of my card and called this one DONE!
 
This is one of those cards that I will probably be doing with my granddaughter Hailey on an upcoming Skype Sunday!  Just know Hailey is going to love making this card.
 
Thanks for joining me today!  I have another CASE card to share with you tomorrow....but this one has a HONEY of a TWIST to it........Just going to leave it at that and ask you to come back tomorrow to see what I made.  Hope you can join me!  Keep Living Your Dream!

Wednesday, June 26, 2013

Riverton Regional Make 'n Take

Happy Wednesday My Blogger Friends!
Today's share is a little something something I found on the internet from Stampin' UP!  It was the make 'n take that Stampin' UP! demonstrators made at the Riverton Regional gathering a couple months ago.  Here is the card they made.......

This card starts out with a Whisper White base card and has the largest die-cut from the Apothecary Accent framelits added to the front of the card. 
The Apothecary Accents die was run through the Big Shot with the Modern Mosaic Embossing Folder and then popped up onto the Whisper White base card with dimensional adhesive.
Three banner flags were created using the new Gingham Garden DSP and each flag was cut at a different length and width to add a little charm to this card. 
 The "best wishes" sentiment is from the new stamp set Express Yourself and that used the new In-Color ink Strawberry Slush.  I used the Ticket Duo Punch to frame my sentiment and then mounted that piece onto an Extra Large Oval punch.  To add some dimension to this piece......I inked around the edges with some Strawberry Slush ink.  DARLING OR WHAT!
 
LOVE the design of this card....and if you place an order on-line with me his month.....this will be the thank you card you receive from me.  Think this card is just a classic card and could be used for just about any occasion.
 
Thanks for joining me today!  I'll be back tomorrow to share with you a CASE card from the new catalog that I created.  Hope you can make plans to come back and join me for that share.  Keep Living Your Dream! 

Tuesday, June 25, 2013

Modern Mosaic Card

Happy Tuesday My Blogger Friends!
Well my adventure yesterday with Nancy turned up plenty of fun shopping....but no treasures to speak off.  We will probably hit 4th Avenue/Tucson on our next outing.

For today.......I have a pretty card to share with you that spot-lights LOTS of new product from the new SU catalog.  Let's jump right in with my share......

When I think of pretty.....I think of our new In-Color Crisp Cantaloupe with Calypso Coral.  The two colors together or like a BURST of Pretty and Happy rolled up together.
Here's a close-up of what the Crisp Cantaloupe cardstock looks like after it is run through the Big Shot using the new Modern Mosaic Embossing Folder........
And a close-up of what the Calypso Coral cardstock looks like after it is punched out using the new Modern Mosaic Punch....and then some small pearls added to the center of each punched out Mosaic shape.
The sentiment is stamped on Whisper White cardstock using the new Label Love stamp set and Crisp Cantaloupe ink.  I punched it out using the new Artisan Punch and then popped that image onto a Calypso Coral piece that was punched out using the Modern Label Punch.  I also added some Calypso Coral Bakers twine around my card for a little FUN!
 
SERIOUSLY LOVE LOVE LOVE how SU has coordinate the stamp sets with the punches.....that COORDINATE with the embossing folders.....and work PERFECTLY with our new Designer Series Paper.  Who wouldn't want it all from this new catalog?
 
Thanks for joining me today.......I'll be back tomorrow with another new product card to share with you.  Keep Living Your Dream! 

Monday, June 24, 2013

Mad For Mosaic

Happy Monday My Blogger Friends!
What a fabulous weekend we had in Arizona......IF.....you like HOT!  It topped off over 100 degrees all three days and if you found me outside.......I was either running to another A/C something....or...I was in my pool.  It's CRYSTAL CLEAR and the PERFECT TEMPERATURE for hanging out.  And that is exactly what I did all three days. 
 
My share today is yet another card made with some of the new product that SU released in our new catalog.  Check this really cool card out......
This card spot-lights the new Quatrefancy Specialty Designer Series Paper. 
It also uses the new Modern Mosaic Embossing Folder that coordinates PERFECTLY with this DSP.
The sentiment is from the Perfectly Penned stamp set......And I used the Windows Framelits dies for my sentiment and a piece of Island Indigo was used to frame my "thank you" sentiment.
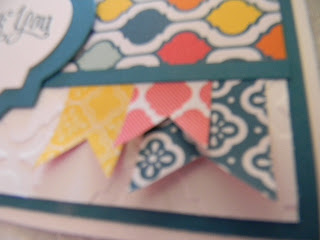
I selected three different patterned paper from the Quatrefancy Specialty pack and created three hanging banner flags for the bottom corner of my card.
Here's a close-up of how I attached them to the bottom portion of my DSP.
 
LOVE the color combination of this card.....and I am THRILLED to pieces that they carried the Island Indigo color into the new Regals Collection.
 
Thanks for joining me today!  I'm off to go spend the day with my good friend Nancy.  We are going to do some shopping and see what kind of treasures we can find today in beautiful Tucson, Arizona.  I'll be back tomorrow to share another Mosaic Madness card with you.....Hope you can make plans to stop back and join me for that share.  Keep Living Your Dream!


Sunday, June 23, 2013

June Stamp Camp Card #4

Happy Sunday My Blogger Friends! 
Today I have the fourth and final card from my June Stamp Camp to share with you.  This card uses the Mosaic Bundle set........And that includes the Mosaic Madness stamp set AND the Mosaic Punch.  Here is the card we created......

We began with a Crisp Cantaloupe panel and ran it through the Big Shot using the Modern Mosaic Embossing Folder. 
Here's a close-up of all the texture that the Modern Mosaic Embossing Folder left on our Crisp Cantaloupe panel.
We then added a Doily to the edge of our card and just snipped off the small section that was over-hanging.  We didn't throw that small Doily piece out.....we actually used it to "PRETTY UP" the inside of our card.
We stamped four Mosaic Madness images (two in Crisp Cantaloupe and two in Calypso Coral) onto Whisper White cardstock and used the Mosaic Punch to cut out each image.  We added a dimensional to the back of each punched Mosaic and arranged them on our Doily so the tip of each Mosaic was touching and we then added a Designer Very Vintage Button to the center of our arranged Mosaic Punches. 
 
Here's a close-up of the Designer Very Vintage Button......and the real SURPRISE was adding one of the Candy Dot Brads to the center of our Button and then topping if off with a Subtles Candy Dot.  The "thank you" banner was added behind the button and a small piece of dimensional adhesive was added to the banner right before adhering it down. 
This card was a BIG HIT.......And I don't believe there is a Stampin' UP! color that wouldn't make this card look amazing.
 
Thanks for joining me today!  I have another new sample cards to share with you tomorrow.......I hope that you can come back and join me for that share.  Keep Living Your Dream! 

Saturday, June 22, 2013

June Stamp Camp Card #3

Happy Saturday My Blogger Friends!
Today I have Card #3 of my June Stamp Camp.  Let's jump right in with my share......
 
 This card was made with the Six Sided Stamp Set Bundle.  We also used the Hexagon Embossing Folder for the background on our front panel.
 The ladies stamped "Happy Birthday to you!" from the Label Love stamp set....and that was stamped onto Soft Sky cardstock.  We punched our sentiment out with the Artisan Punch and then we matted it to a 1-3/4" Midnight Muse circle punch.
 Our hexagons were embossed with VersaMark and White embossing powder....and then we punched them out using the new Hexagon Punch.
We added a 3/8" Midnite Muse Stitched Ribbon to the top of our card......And each of the embossed Hexagons were added to our card with dimensionals. 
 The Hexagon embossing folder was the PERFECT addition to this card creation.

 Makes a perfect masculine card (using these colors).....but can be switched up pretty easily for the female and kids on your birthday card list.

Thanks for joining me today.....I'm back tomorrow to post the 4th and final June Stamp Camp card with you.  Hope you can come back and join me for that share.  Keep Living Your Dream!


Friday, June 21, 2013

June Stamp Camp Card #2

Happy Friday My Blogger Friends!
Talk about an AMAZING and RELAXING Day Off yesterday.......It was totally what I needed to recharge and regroup my energy.  I was able to get eight cards made for my FU (Fabulously Unique) Group....and even went out to my pool and hung out on my floating chair.....IT WAS LIKE HEAVEN!   But for today......I'm back in my studio this morning getting things set-up for my July Camp and my swap cards for convention.  I'll be tackling both of those projects for most of next week. 

Here's a re-cap of the four cards that we made at Wednesday's Stamp Camp............ 
My card share for today is this GORGEOUS Wildflower Meadow Card.
I think the single thing I adore most about this stamp set is the hummingbird image.
I just love how clean and clear this little stamps out.  I used Baked Brown Sugar on my Wildflower Meadow stamp......and I stamped on Whisper White cardstock.  I then used the Wildflower Meadow embossing folder and that is when the entire stamped Whisper White panel came to life.
The flowers on this stamp set turn into pure magic after running my stamped image through the Big Shot using the embossing folder that coordinates with this stamp.  SU did an amazing job of matching this stamp set up with the embossing folder.........It lines up with very little effort.
We added a small piece of 7/16" Natural Trim Ribbon along the bottom portion of our card.......
And then we used the Lacy and Lovely stamp set to stamp out our sentiment.  All that was left to do was punch our sentiment out with the Scallop Oval Punch.......and then mount our sentiment onto an XL Oval Punch.  Our sentiment was added to our card with the help of a couple small pieces of dimensional adhesive.
 
LOVE how this card turned and I'm going to be making some sympathy cards with this layout soon. 
 
Thanks for joining me today!  I'll be back tomorrow with Card #3 of my June Stamp Camp......Hope you can make plans to come back and join me for that share.  Keep Living Your Dream!

Thursday, June 20, 2013

June Camp Card #1

Happy Thursday My Blogger Friends!
It's MY FAVORITE DAY of the month.......The 3rd Thursday of the month has to be the HAPPIEST DAY on the calendar for me.  It's the day after my camp...and that means ...... NOTHING on my plate for the next FULL WEEK!  I am however going to be doing some SERIOUS preparing for the upcoming SU convention in July.  I'm making 100 swap cards and I have the most DARLING card to share with my fellow demonstrators. 
 
SO FOR TODAY.......I'm going to begin sharing the cards that my Camp gals made at my June Stamp Camp.  The theme for my June Camp was "All About The Bundle".  Here's a Sneak Peek at all four of the cards we made yesterday.........
I used four new SU Bundles to create the cards for June.  The first card I'm going to share with you today is the Flower Shop Bundle Card.  Here is that card........

One of my favorite bundles in the new catalog is the Flower Shop Bundle on Page 95.  This bundle includes the Flower Shop stamp set and coordinating Pansy Punch.  We created this card by stamping two each of the flowers on Strawberry Slush, Coastal Cabana and Crisp Cantaloupe cardstock.  We used VersaMark on each of the colored cardstock and then grabbed the coordinating pansy punch and our six flowers were done in no time flat.
We added an Early Espresso little flower from the Boho Blossom punch to the center of each Pansy.....and topped it all off with a small Rhinestone.  The Sizzlits Little Leaves Die was die cut out with Garden Green cardstock and then trimmed down to add a little accent to our floral arrangement. 
We made the Baked Brown Sugar Flower Pot from the Apothecary Accents Framelits Die.  We cut off one end of the big framelit to create a flower pot for our flowers to be stacked in.
The ladies used the "Beautifully Baroque" stamp set to create the etched image onto their vase.  They also added a piece of Very Vanilla Seam Binding around the center of their vase.
I also showed the ladies they could use the Beautifully Baroque Embossing Folder to create an embossed look to their flower pot.
The ladies had the option of decorating the inside of their card with the left over portion of the Apothecary Accent Die cut piece.  Here I added it to the inside of my card and added three little flowers from the Boho Blossom punch and a left over piece from the Sizzlits Little Leaves Die.
Here's what all six Pansy Flowers looked like all arranged in the vase.
The ladies were able to select the sentiment they wanted from the "Banner Greeting" stamp set.  They stamp it with Strawberry Slush ink and then used their paper snips to cut out their flag banner.  Here is the "good for you" sentiment......
And the "friends forever" sentiment.......
The "happy birthday" sentiment......
And the "thankful for you" sentiment.
Such a happy and fun card....and the color combinations for this card are endless.  I knew I would be creating more of this card.........And this Sunday, Hailey and I are going to create this card for our Skype Sunday Event.  Know she is going to really like making this card.
 
Thanks for joining me today.....I'm off to go PLAY the day away!  Hope you can join me tomorrow for my second June Stamp Camp Card.  Keep Living Your Dream!