Happy Saturday My Blogger Friends!
Countdown Till We See The Grandkids - 9 Days!
HOT DAMN.....we have made it to SINGLE DIGIT DAYS! It's all systems go and full steam ahead for our upcoming trip back to Wisconsin - I honestly CAN'T WAIT!
My share today is the last of my All Halloween Stamp Camp Series - Let's Go......
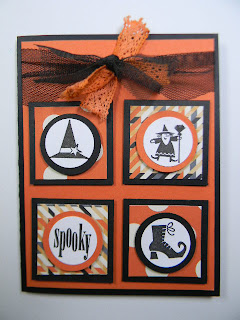
Here's a re-cap of the cards/projects we made at last Wednesday's Stamp Camp. Today, I am sharing the upper left hand corner card and the bottom left hand corner card with you today.This fun little card has soooo much love in it........I took our Early Espresso 3-1/2" Scalloped Tulle Ribbon and changed the color to "BLACK" by using my reinkers and water to create a mixture that I dipped the tulle into and then layed the tulle out on paper towels to dry. I did the same thing with our 5/8" Victoria Crochet Trim.......I wanted it to match my card, so I used Tangerine Tango reinker and water to create another mixture that turned my crochet trim to a GORGEOUS Tangerine Tango color.
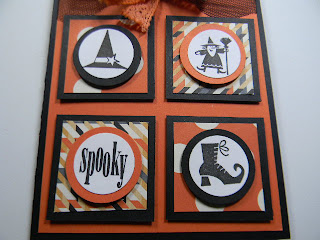
We used dimensionals to pop up each of the squares and the DSP was just added to the top of each square. We added dimensionals to the back of each of the circles and adhered the stamped image directly onto the popped circles.
Here's a close-up view of what all the dimension on this card looked like. SO FUN!
The suggestion I can give you if you are thinking of using the reinkers to dye the tulle ribbon (or any ribbon for that matter)...........1) Make sure your baggies are completed closed before you begin shaking or mixing the contents up. (yes.......it did spill all over me......my rug in my studio.......and what I was wearing). I just dumped the tulle into the baggie and began mixing and when I felt the drop of something hit me (for the second time).....I realized that I had a bigger problem than I had anticipated. 2) YOU MIGHT WANT TO PUT ON A PAIR OF RUBBER GLOVES BEFORE YOU STICK YOUR HAND INTO THE BAGGIE TO PULL OUT THE DYED TULLE. And yes friends........I speak from experience when I say.......It will dye your entire hand and nails the color in your bag!
And my last All-Halloween card share is this DARLING Scary Cat card. We used Statz-On to stamp the new Frightening Feline stamp set onto Whisper White cardstock. We also used the Howlstooth and Scaringbones DSP right across the center of our card.
We added three 1/2" Circles to each side of our framed out Kitty (two black and one gray) and then added a 1/4" circle using the new Silver Glimmer paper to the top of each of the 1/2" circles.
The collar we created made using a Silver Glimmer Brad and some 1/8" Black Taffeta Ribbon. All we did was wrap the ribbon around the brad and clip off the ends - Perfect little Kitty Collar.
We wrapped the new 1/2" Striped Satin Ribbon around the very top of our card and this card was done. Such a fun little card and packs a big punch for all those kitty lovers on my Halloween card giving list.
Many Thanks for joining me today - I'll be back tomorrow to share more Kards by Kadie creations with you - Hope you can come back and join me for that share.
Keep Living Your Dream!


0 comments:
Post a Comment