Happy Happy Thursday My Blogger Friends!
Today I have the first two projects that we made at yesterday's Stamp Camp. These two cards are Project #1 and Project #2 for the day. Let' JUMP right in with Project #1.......
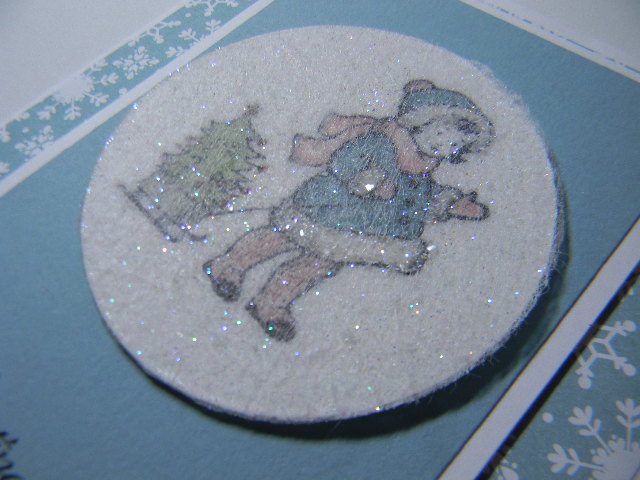
This card uses the Dryer Sheet/Glitter Technique - and let me tell you something ..... It was
SERIOUSLY one of the favorite projects at Camp yesterday.
The girls were asked to bring a USED dryer sheet and they ran it through the Big Shot using the 2" circle die. Once they got their dryer sheet cut out .... they used the new SU Jumbo Sticky Rounds to get the dryer sheet and image secured together.
Here's a picture of the finished results - along with the image colored and the Jumbo Round and Dryer Sheet just waiting to be adhered.
Once your adhere your colored image to the Jumbo Round - all you need to do is release the other side of your Jumbo Round to expose the other side of the sticky tape. All that is left to do is lay your dryer sheet over that surface and press down. You can then dip your image into glitter and almost like MAGIC ....... the glitter adheres to the dryer sheet and creates almost a snow globe look to the circle. And
WOW ......... you end up with this
GORGEOUS GLITTERED IMAGE.
We used dimensionals to pop up our image and our Baja Breeze center panel. A little piece of 1/8" Very Vanilla Taffeta Ribbon was added across the bottom of our Baja Breeze panel for a little added extra look.
Our next card was a Toxic Treat Soot card.
We used a panel of Glossy Card Stock to create a background soot image - one which we did by holding our glossy cardstock panel over a flame and running the glossy side down over the flame to collect the soot onto the glossy cardstock and then stamped our image over the sooted cardstock.
Here's a picture of the glossy cardstock that was run over the flame......
And then all that was left to do was stamp our image directly onto the soot and then the soot was pulled off the cardstock and transferred to the stamp. We did need to clean off the stamp every once in awhile and then spray a fixative sealer over the stamped soot cardstock to seal the soot image onto the glossy cardstock piece and make it so the soot did not smear off.
This project was a big big hit and all the ladies had fun making a small sample piece to take home with them.
OVER-ALL ...... Stamp Camp was FUN and I do have two more projects that I will be sharing with you tomorrow. Keep Living Your Dream!


flames . . . wild technique! fun projects!
ReplyDelete