Wednesday, April 21, 2021

I'm Here For You

 Happy Wednesday My Blogger Friends!
My blog post for today is Wine-Down Wednesday.  My middle of the week card feature for today will hopefully offer you some inspiration and provide you with some motivation to keep you moving through your busy week.  Let's jump right in with my card share for today........
Living in AZ......I LOVE everything Cactus.
And this time of year ..... Our cactus are in FULL BLOOM.
I started this card off with a White base card ...... And I added a panel of Mossy Meadow and created a panel of the 'Flowering Cactus Designer Series Paper' to the top of that.
I cropped out three Mossy Meadow 'Rectangular Postage Stamp Punch' pieces and used the cactus dies and Flowering Cactus Designer Series Paper in the 'Flowering Cactus Product Medley' to add three cactus images to each of the Postage Punch piece.  
I also stamped the sentiment "I'm Always Here For You" and cropped that down to fit on the corner of each Postage Punch piece.
I also added a small flower felt piece (that came with the Product Medley) to each of the cactus to bring some real WOW FACTOR to each die-cut cactus.
And that's all it took to create this AWESOME looking card.

Thanks for joining me today!  I'll be back tomorrow with a Tag Thursday creation to share with you ........ Hope you can make plans to stop back and join me for that share.  Keep Living Your Dream!

Tuesday, April 20, 2021

Mitaski Flower Box

Happy Tuesday My Blogger Friends!
My blog post for today is 'CASE IT TUESDAY'.  That means today I have a fun little 3-D project that I found on the internet ....... And I created a CASE of that project to share with you today.  This project was SUPER FUN to create and I want to jump right in and share that project with you now.
This FABULOUS box of cards was inspired from Mikaela Titheridge ....... Who shared this project on her blog on March 10, 2021.  
Here is a link to her blog post:  Around the World on Wednesday - 3D Projects - The Crafty oINK Pen
I used Bermuda Bay card stock to create the bottom of my box ...... And White card stock for the lid.  The base of the box is a 8-1/4" x 6-1/4" piece of Bermuda Bay that is scored at 1-3/8" on all four sides.  The lid of the box is a 5" x 7" piece of White card stock and that piece is scored at 3/4" on all four sides.
The inside of the box holds a dozen 3" x 3" note cards.  And also has a divider section......
That divider section is designed to hold an assorment of oval stamped sentiments.  That insert piece is a Bermuda Bay card stock piece that measures 3-3/8" x 7-1/2".  That piece is scored at 2", 3-1/8" and 4-1/4".  I used the 'Stitched Shapes Dies' to crop out the oval ..... And the sentiments are from both the 'Oval Occasions' and 'Simply Succulents' set.
Here are the four little 3x3 note cards I created for this gift.  My colors are Bermuda Bay and Pool Party, Mango Melody and Daffodil Delight, Gorgeous Grape and Highland Heather, Melon Mambo and Flirty Flamingo.
Each note card was decorated with some 6x6  Designer Series Paper Packs ....... And a single flower was added to the top of each card.  I used the 'Perennials Petals Dies' for the flowers. 
So there you have it friends.......
Just crazy about the way this gift turned out.

Thanks for joining me today!  I'll be back tomorrow to share a Wine Down Wednesday card with you ........ Hope you can make plans to stop back and join me for that share.  Keep Living Your Dream!

Monday, April 19, 2021

Flowering Cactus Upgrade

 Happy Monday My Blogger Friends! 
Today is Mix-It-UP! Monday, and I have an upgraded version of the card I shared with you yesterday.  I used the exact same product that was used to create yesterday's card ..... But I added a couple additional products found in the 'Flowering Cactus Product Medley' to bring this card up to the next stamping level.
Here's my Spot Light Sunday card from yesterday on the TOP.....
And my Mix-It-UP! Monday upgraded card for today on the BOTTOM....
The first upgrade I made for my card today was changing the orientation from a Portrait style card to a Landscape style card.
I kept the same 'Flowering Cactus Designer Series Paper' to top off my Mossy Meadow base card ...... But for my upgraded card I created a center flap card panel.  This White panel measures 3-3/4" x 4-1/2" and I scored that White panel at 2-1/4".  
I cropped out one of the cactus images on the Designer Series Paper with the help of the dies included in this medley.
And I stamped an additional message to the inside of this White flap panel.
My White flap panel was finished off using some of the die-cut felt flower pieces that were included in this medley to decorate both the front of my card and the cactus.

So what do you think my friends??????
Do you have a favorite?????

Thanks for joining me today!  I'll be back tomorrow to share a 3-D Tuesday creation with you ...... Hope you can make plans to stop back and join me for that share.  Keep Living Your Dream!

Sunday, April 18, 2021

Flowering Cactus

 Happy Sunday My Blogger Friends
Today is Spotlight Sunday ....... And I have a card I created using product from the 2021 Stampin' UP! Mini Catalog.  This card uses several products from that new catalog ........ And I'm thrilled with the way it turned out.  Let's jump right in with my card share for today..........
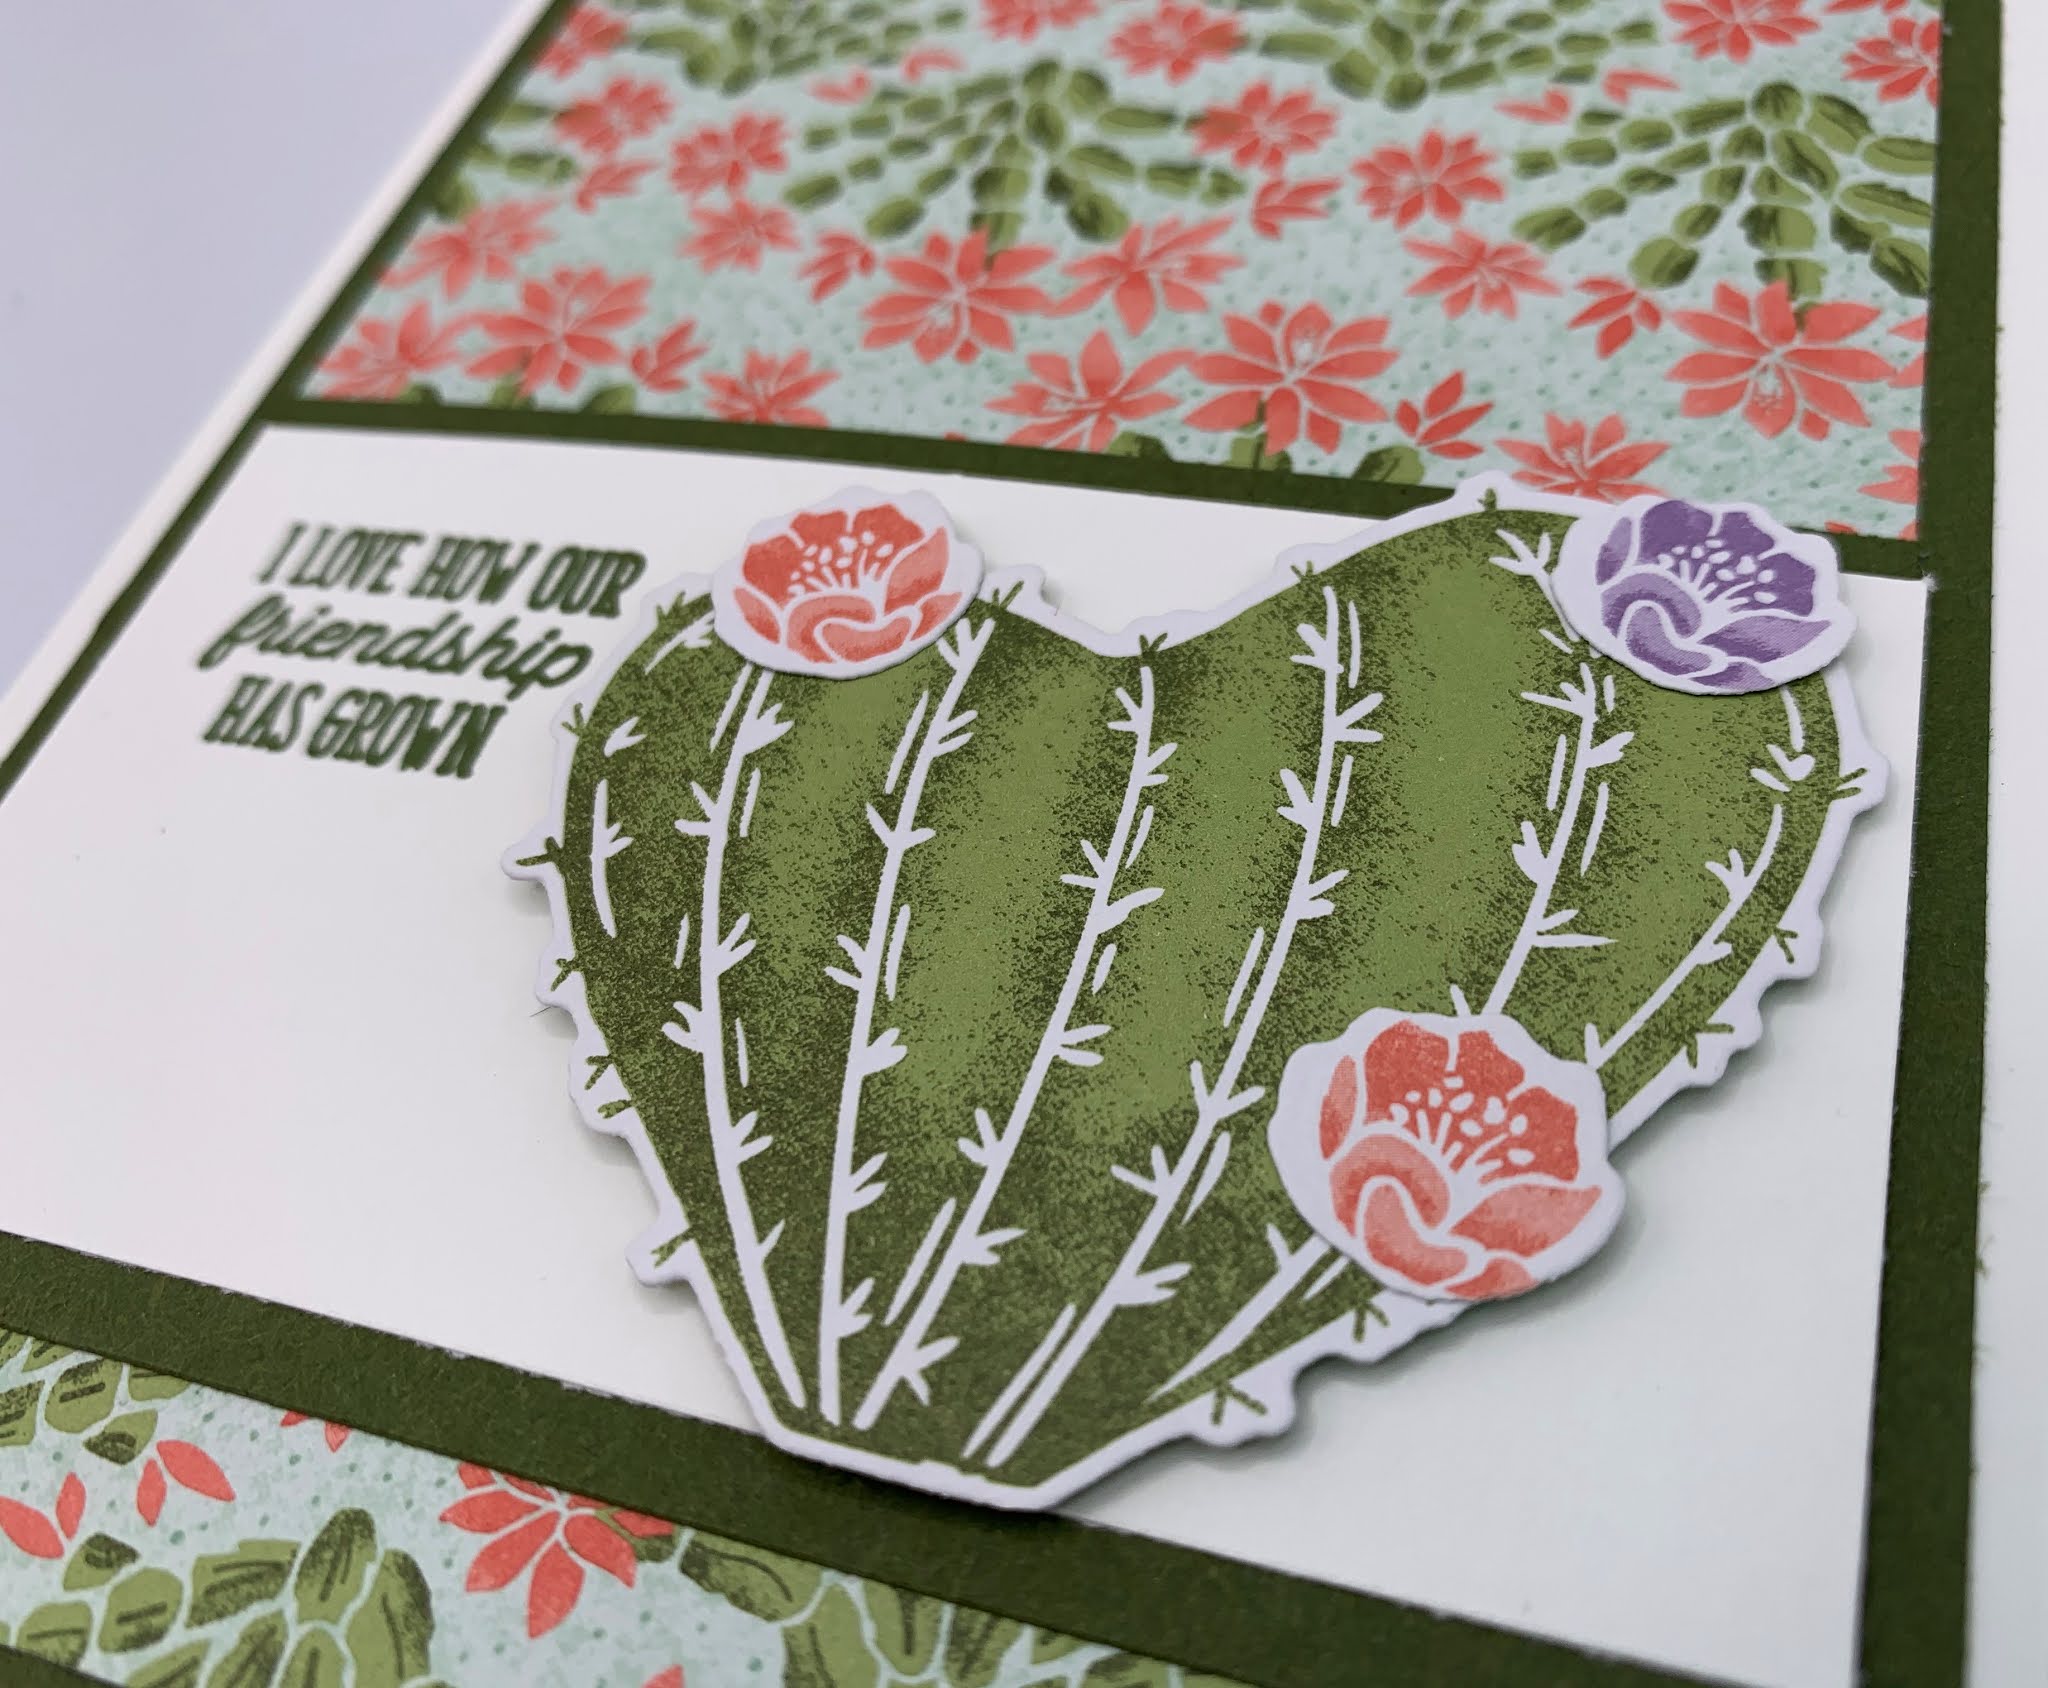
I am SERIOUSLY in LOVE with the new 'Flowering Cactus  Product Medley'.  This Product Medley comes with not only the cactus stamp set but also the Designer Series Paper and the coordinating Cactus Dies to create ENDLESS cards and project ideas.
For this card ....... I started with a White base card and added a panel of Mossy Meadow cardstock to the top of my card.  I then added a panel of Designer Series Paper and positioned that over my Mossy Meadow cardstock.
I added a Mossy Meadow and White panel across the bottom portion of my card and stamped my sentiment directly onto the left hand side of that White panel.
I used the Cactus dies that came with this kit and cropped out a large cactus from one of the sheets of Designer Series Paper.
And I also used the same dies to crop out three pretty flowers for the top of my die-cut cactus images.
Just couldn't be happier with the way this card turned out.....
What do you think my friends????

Thanks for joining me today!  I'll be back tomorrow to share an upgraded version of this very card with you ...... Hope you can make plans to stop back and join me for that share.  Keep Living Your Dream!

Saturday, April 17, 2021

5-Banner Card

 Happy Saturday My Blogger Friends!
My blog post for today is Paper Pumpkin Saturday ........... And I would like to share with you the project I created using the March 'Here's To You' Paper Pumpkin kit.   Here's that project.......
Using the left over pieces from my March kit ....... I was able to create several of this sweet little card.
I started out with a White base card ...... And then added a panel of Calypso Coral and Petal Pink to the top of my card.
I did trim down two of the Envelope Liners that came with this kit to create banner flags ...... and I did the same by adding Crushed Curry, Pretty Peacock and Calypso Coral cardstock.
Across the center of my card, I added a sentiment piece ...... and I used the stamp set that came with this kit to create that sentiment piece.
I grabbed my 'Playing With Patterns Resin Dots' and colored 7 of those dots with my Calypso Coral Stampin' Blends.  Just love that all my Stampin' UP! product coordinates and I'm able to create just the PERFECT look every single time.

Thanks for joining me today!  I'll be back tomorrow to share a Spot Light Sunday creation with you ........ Hope you can make plans to stop back and join me for that share.  Keep Living Your Dream!

Friday, April 16, 2021

Friends Friday Pics

                     Happy Friday My Blogger Friends!
My blog post for today is Friends Friday.  On Friday's, I have the honor of spot-lighting some of the fabulous cards and projects that I received from Friends ....... Fellow Demonstrators ........ and Family.  Each of these creations are works of art........and it is with great pleasure that I share with you today some AMAZING projects that four very special friends made for me.
First up is this OH SO THOUGHTFUL gift that Susan Wormley sent to my Prada Kitty for her birthday.  It's a toy that has 8-little cups that you pop a kitty treat into each of the cups.  Then you flip the little lever over the cups and your kitty works to figure out how to open the lever. 
It didn't take Prada Kitty long to figure out which cups the treats were in ........ And how to open it up to get the treats out.  SO FUN watching her play with this toy.
Check out this PRETTY PRETTY card that my good friend Gus Berry made for me.
This card was made by my sweet friend Jan Gore.......
Along with this DARLING little Chick Treat Holder.  OH YUM!!!
And my final share for today is this OVER-THE-TOP basket that my dear friend Betty Pearce created for me.
Not only was this basket filled with FIVE precious strawberry boxes.......But each little strawberry box was JAMMED PACKED with some YUMMY Easter candy.  It was a DELISH gift.

Thanks for joining me today!  I'll be back tomorrow to share a special Paper Pumpkin Saturday creation with you ........ Hope you can make plans to stop back and join me for that share.  Keep Living Your Dream!

Thursday, April 15, 2021

Big Butterfly Tag

 Happy Thursday My Blogger Friends!
My blog post for today is Tag Thursday.  Today, I will feature a tag I created and show you how easy it is to use minimal supplies to create a SUPER PRETTY TAG.  Now that you have the details for my Tag Thursday creation for this week ........ Let's jump right in with my tag share for today........
Check out this giant butterfly tag I created.
I started off with a White tag and added 5-different patterns of the 'Butterfly Bijou Designer Series Paper' to the front.  I created a banner flag tail at the end of each DSP and layed each of them across my tag.
Next, I used the 'Valentine Keepsake' set to stamp my sentiment at the bottom of tag.
The butterfly was cropped out of the 'Butterfly Bijou Designer Series Paper' ...... And I used Stampin' Dimensionals to pop that little cutie onto my tag.
The finishing touch was wrapping some 'Bumblebee 1/4" Ribbon' around the top of my tag and then I tied it off into a pretty bow.
LOVE how this tag turned out.

Thanks for joining me today!  I'll be back tomorrow to share some Friends Friday creations with you ........ Hope you can make plans to stop back and join me for that share.  Keep Living Your Dream!