Friday, December 22, 2017

Day 29/32 Christmas Extravaganza Merry Christmas Card

Happy Friday My Blogger Friends!
Today is Day 29 of my 32 days of Christmas Extravaganza projects.  This card was created using product from the Stampin' UP! 2017 Holiday Catalog and the 2017-2018 Annual Catalog.  This card  is one special card that just screams ........TRADITIONAL OLD FASHION CHRISTMAS to me.  Let me share that card with you now.....
There's just something about a Real Red and Garden Green plaid holiday card that just makes me feel all WARM & COZY this time of the year.
I began this card by stamping my Merry Christmas sentiment onto a panel of Whisper White cardstock using the 'Snowflake Sentiments' set.  I used Real Red ink to stamp my sentiment ...... And then I layered it with a thick layer of Real Red cardstock and topped it off with a smaller layer of Whisper White cardstock.
To add an element of WHIMSEY & FUN  to my sentiment panel ..... I die-cut a single Whisper White snowflake from the 'Swirly Snowflakes Thinlits Dies' and added that to the top left hand corner of my sentiment panel.
And to finish off my sentiment panel ...... I added three Garden Green 'Enamel Shapes' to the bottom right hand corner of the Whisper White panel.
I added a plaid panel of the 'Christmas Around the World Designer Series Paper' to the bottom portion of my Real Red base card ........ And wrapped some Whisper White Baker's Twine around the center of that DSP panel and tied it up into a pretty bow and added a tiny piece of the 'Real Red 1/8" Solid Ribbon to the center.
And that's all it took to create this
FESTIVE & FUN holiday card.
 
Thanks for joining me today!  I'll be back tomorrow to share Day 30/32 Christmas Extravaganza with you ........ Hope you can make plans to stop back and join me for that share.  Keep Living Your Dream!

Thursday, December 21, 2017

Day 28/32 Christmas Extravaganza Gift Tag

Happy Wednesday My Blogger Friends!
Today is Day 28 of my 32 days of Christmas Extravaganza projects.  This tag was created using product from the Stampin' UP! 2017 Holiday Catalog and the 2017-2018 Annual Catalog.  This tag is one of those tags that packs a whole lot of Stampin' UP! punch.  Let me share that tag with you now......
I'm just IN LOVE with the way this tag turned out.
I started this tag off with a Smoky Slate base tag and topped it off with a panel of Basic Gray Designer Series Paper that came from the  'Christmas Around the World' stack.  To create some real FUN for this tag ...... I used the new 'Everyday Label Punch' for my sentiment portion.
I stamped my To/From sentiment onto a Whisper White tag that was created with the 'Everyday Label Punch'.  I used the 'Good Tidings' set for my sentiment ...... and then stamped the holly from that same set and used my Paper Snips to fussy cut out both those holly images.
I used that same 'Everyday Label Punch' and created a Cherry Cobbler label ....... and adhered that piece behind the stamped Whisper White tag.  I used the 1/2" Smoky Slate Gingham Ribbon to add some tails behind my punched sentiment.
All that was left to do was add some of the 'Smoky Slate 1/2" Gingham Ribbon' to the top of my tag and I tied it off with a pretty bow made with the Whisper White Baker's Twine.
A very traditional looking tag ......
With a fun Basic Gray/Smoky Slate spin to it.

Thanks for joining me today!  I'll be back tomorrow to share Day 29/32 Christmas Extravaganza with you ........ Hope you can make plans to stop back and join me for that share.  Keep Living Your Dream!

Wednesday, December 20, 2017

Day 27/32 Christmas Extravaganza Simple Joy Card

Happy Thursday My Blogger Friends!
Today is Day 27 of my 32 days of Christmas Extravaganza projects.  This card was created using product from the Stampin' UP! 2017 Holiday Catalog and the 2017-2018 Annual Catalog.  It's a sweet little holiday tree card with a special little stamped sentiment.  Let me share that card with you now......
This card was so much fun to make.......And I have someone extra special on my Christmas card list that it will be going out to.
I started out with a Whisper White base card and used the 'Christmas Pine' stamp set and some Real Red ink to stamp my sentiment onto the front of that card.
Next I added a panel of Real Red cardstock to the left hand side of my Whisper White card ....... And before I adhered it down onto my card, I used my Big Shot and the 'Layering Square Framelits' to die-cut a square panel into that Real Red cardstock panel.
Once I got the square shape die-cut onto my Real Red panel ...... I used a piece of Whisper White cardstock and both the 'Layering Square' and 'Stitched Shapes' Framelits to create a Whisper White frame.  All I need to do was adhere that frame down onto my Real Red panel and that gave me the perfect spot to position one of the trees from the 'Quilted Christmas Designer Series Paper'.
A final touch for this card was wrapping a piece of the 'Quilted Christmas 1/4" Ribbon' around the top of my Real Red panel and tying it up into a pretty knot.  Then all I needed to do was position that panel down onto my Whisper White base card and this card was done!
It's a WOW kind of card ........
That doesn't take any time to put together!

Thanks for joining me today!  I'll be back tomorrow to share Day 28/32 Christmas Extravaganza with you ........ Hope you can make plans to stop back and join me for that share.  Keep Living Your Dream!

Tuesday, December 19, 2017

Day 26/32 Christmas Extravaganza Tiny Box of Tags

Happy Tuesday My Blogger Friends
Today is Day 26 of my 32 days of Christmas Extravaganza projects.  This project was created using product from the Stampin' UP! 2017 Holiday Catalog and the 2017-2018 Annual Catalog ....... And it's one of those projects you can make quickly for those last minute gift giving needs you might have this holiday season.  Let me share that project with you now......
How FABULOUS would it be to take this little box of tags along with you to your next holiday party ........ and present it to the hostess of that party.  I'm sure she would be BLOWN AWAY with receiving this cute little box of tags.
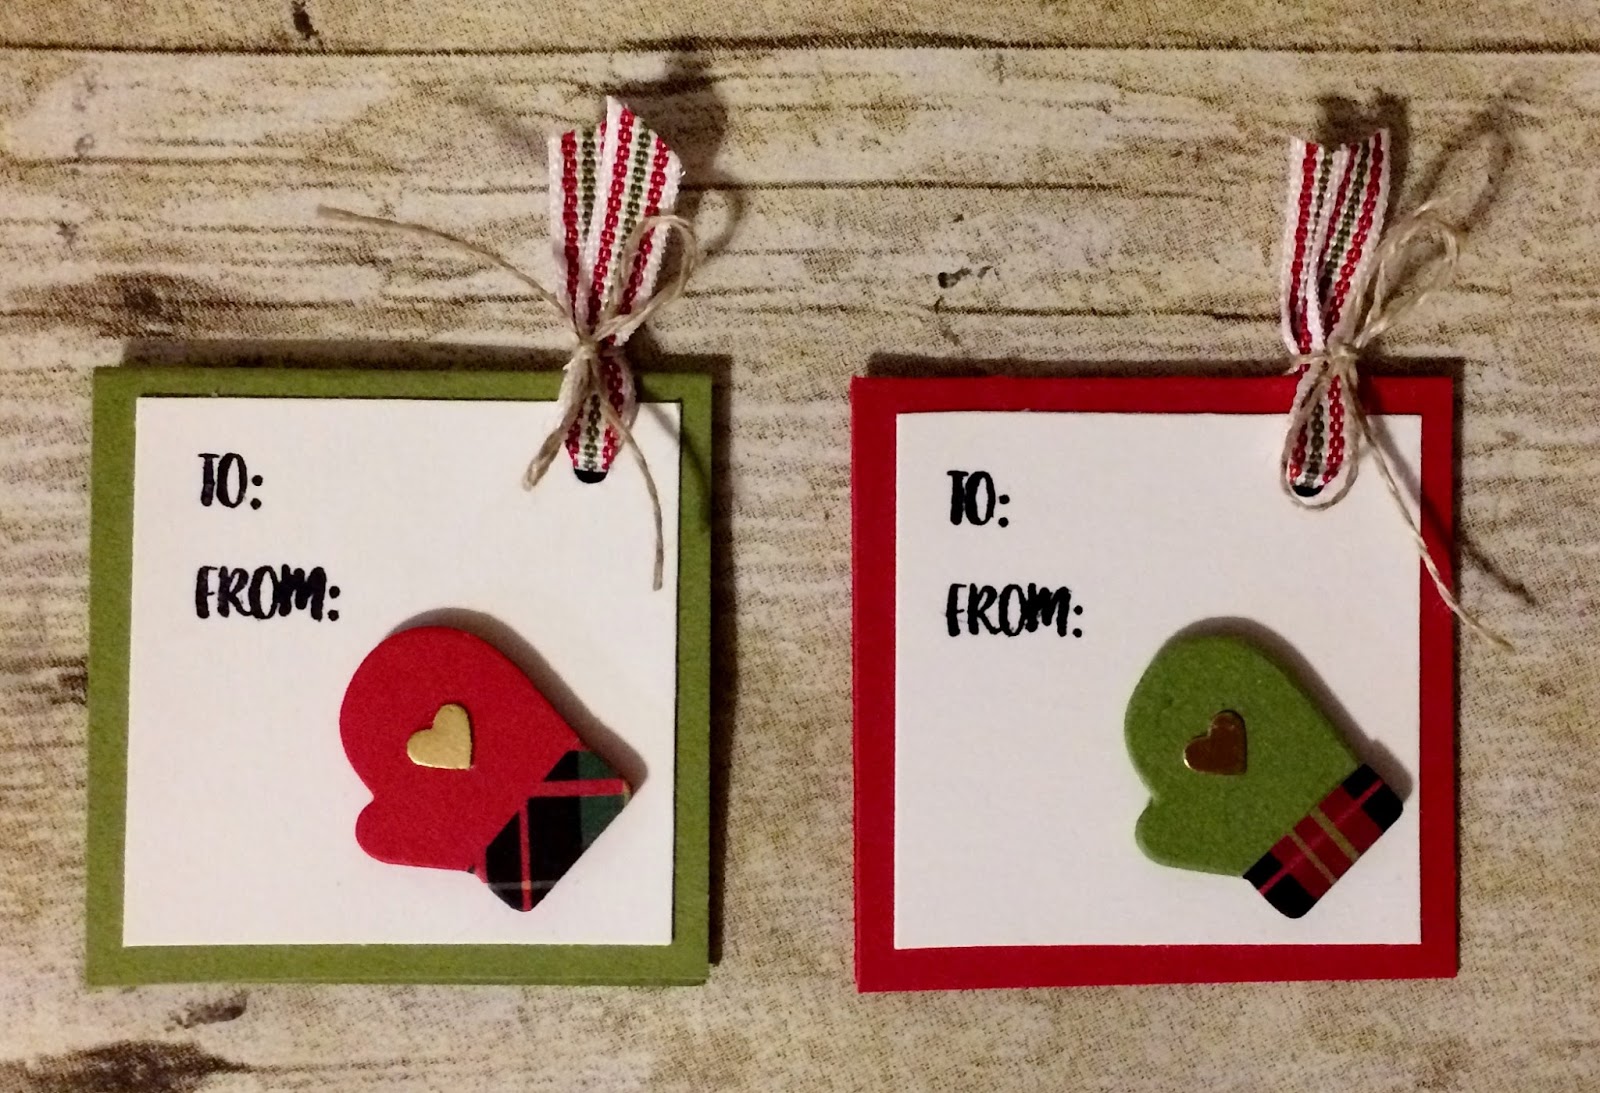
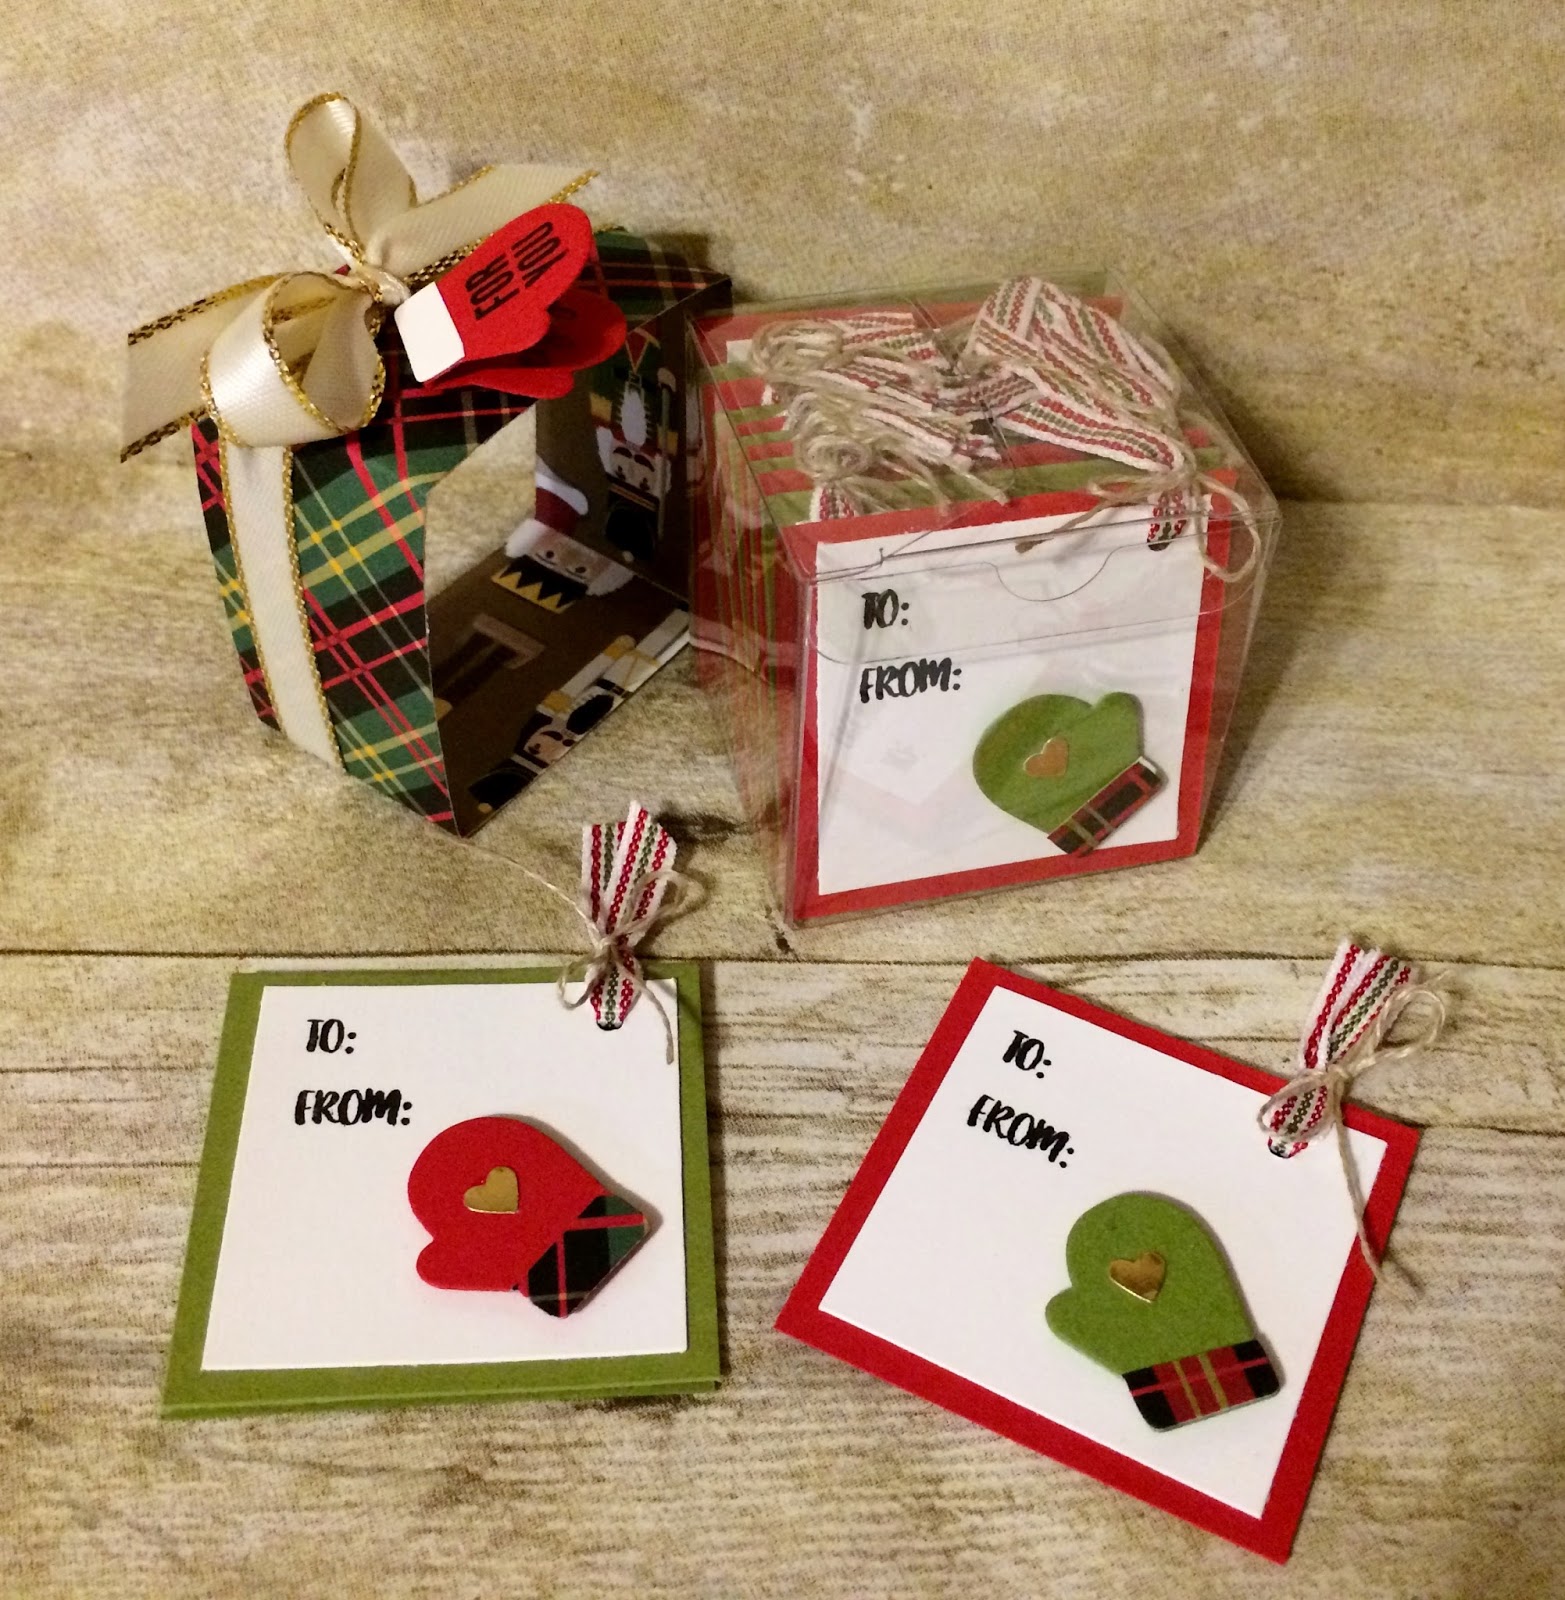
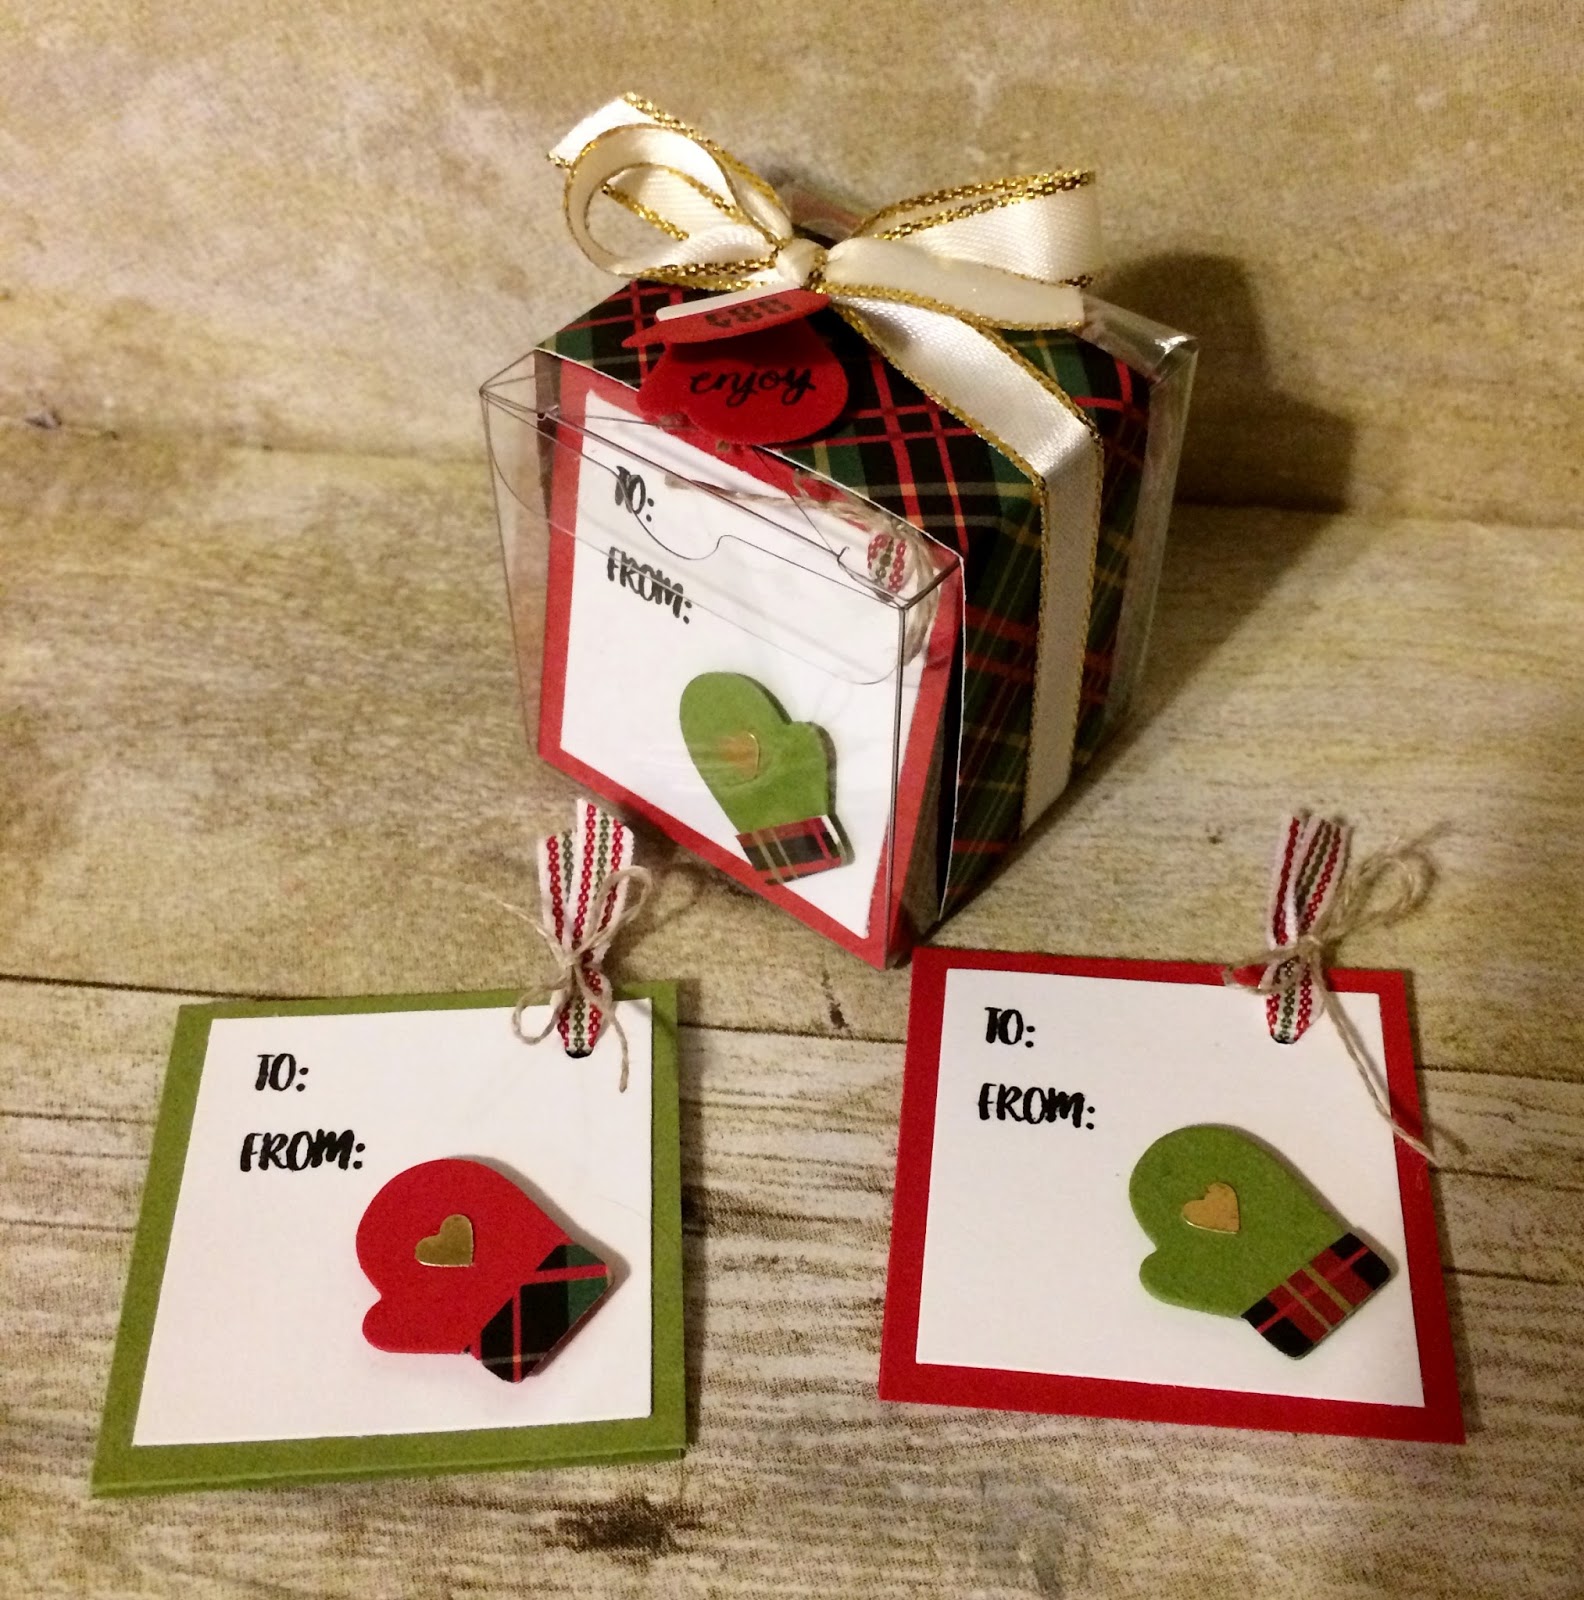
This little box of a dozen gift tags was made with the 'Clear Tiny Treat Boxes'.
And fits a dozen pretty mitten gift tags inside the clear little box.
The entire packaging is closed up with a belly band.....
And each tag is made from a 2" x 4" piece of Real Red or Old Olive cardstock and scored at 2".
Here's a close-up of the Belly Band.  It uses the 'Christmas Around the World' Designer Series Paper and has the beautiful 3/8" Metallic-Edge Gold Ribbon wrapped around it.  The real magic was adding a tiny mitten tag on the top of the packaging ...... And that was created with the 'Many Mittens Framelits Dies'.
Each tag has a "To/From" stamped on a panel of Whisper White ......... And I used the 'Season Like Christmas' set to stamp the "To/From".
The other thing each tag has is a tiny mitten die-cut from the 'Many Mittens Framelits Dies' and each cuff was decorated with the 'Christmas Around the World Designer Series Paper'.
I'm just crazy about the way this gift turned out ........
And have a couple of these on hand to pass out this holiday season!

Thanks for joining me today!  I'll be back tomorrow to share Day 27/32 Christmas Extravaganza with you ........ Hope you can make plans to stop back and join me for that share.  Keep Living Your Dream!

Monday, December 18, 2017

Clearance Rack Update

Can you even image my SURPRISE when I spotted the Stampin' UP! Clearance Rack had been updated this morning.  There are LOTS of new items added to the rack ........ And some items are as much as 70% off.
 
There are some GREAT BARGAINS including Designer Series Paper, Framelits, Ribbon, Punches and Embellishments. 
 
The best thing you can do is RUSH OVER to my on-line store (https://www.stampinup.com/ECWeb/ItemList.aspx?categoryid=100100) to grab up some AMAZING BARGAINS!   It's also the perfect time to get stocked up on those last minute stocking stuffers ......... Or what the heck ......... fill up your own stocking this holiday season!
 
Remember to use Hostess Code 
H4QTBVKM
And you'll receive a special little SURPISE GIFT from me.
 
HAPPY SHOPPING!!!!
 
Remember......this link will take you directly to my On-Line Store:

Day 25/32 Christmas Extravaganza Let It Snow Card

Happy Monday My Blogger Friends!
Today is Day 25 of my 32 days of Christmas Extravaganza projects.  This card was created using product from the Stampin' UP! 2017 Holiday Catalog and the 2017-2018 Annual Catalog.  This is a BEAUTIFUL gold embossed card with a twist of green and black plaid to bring some PRETTY & FUN to it.  Let me share that card with you now......
How's this for a PLAID & JAZZY kind of holiday card?
I started this card out by creating a center panel of the 'Merry Little Christmas Designer Series Paper' (in the Old Olive & Black pattern) ...... And matted it with a panel of Basic Black cardstock.  Before adhering it down onto my Old Olive base card ....... I added some 'Gold 3/8" Metallic-Edge Ribbon' around the left hand side of that DSP panel.
Here's how GORGEOUS that 'Gold Metallic-Edge Ribbon' looks against the Old Olive and Black Designer Series Paper.
All that was left to do was create my sentiment piece.  For that I stamped the "Let it Snow" image from the "Merry Little Labels' set.  I used VersaMark ink and Gold Embossing Powder to help that image POP off the Whisper White cardstock.  And to crop out my sentiment ...... I used the 'Everyday Label Punch' and adhered it down onto a circle that was die-cut from the 'Layering Circles Framelits' set.
One finishing touch was adding two Gold 'Metallic Enamel Shapes' to the Black circle and I called this card DONE to PERFECTION!

Thanks for joining me today!  I'll be back tomorrow to share Day 26/32 Christmas Extravaganza with you ........ Hope you can make plans to stop back and join me for that share.  Keep Living Your Dream!

Sunday, December 17, 2017

Remarkable/InkBig Blog Hop

Welcome to the Remarkable InkBig
Blog Hop for December 2017

This month our theme is Sneak Peek: 2018 Occasions & Sale-a-Bration Catalogs!  You may just be starting the blog hop here at my blog – Kadie Labadie at KardsByKadie or may have come from the person previous to me in the list. If you get off track at any time, the full lineup below will help you move along from blog to blog so you see all the projects.
Here is the sneak peek project that I created. 
It's a little purse size note holder.
I started out with a 11" x 2-3/4" piece of Berry Burst cardstock.  My scoring measurements are 4-1/4", 4-3/4" and 9-1/2".  After I had my piece of cardstock scored........I used the largest die from the 'Lots of Labels Framelits Dies' to cut out the small scored section on my Berry Burst cardstock.
 
Here is how I inserted my Berry Burst cardstock into the 'Lots of Labels Framelits Dies'.  All I wanted to do was die-cut the very edge of the small scored section.  Once I had my framelits die insert.....All I had to do was run that die through my Big Shot - Just till the scalloped edge of the die cut my Berry Burst cardstock.  Then I rolled the die backwards out of my Big Shot Machine.
Next I trim about 1/16" off the long edge of my cardstock piece.  This was done to help the insert pages fit into my holder.  I also cut a piece of the new 'Picture Perfect Party 6"x6" Designer Series Paper' that measures 4" x 2-1/2" and that piece was adhered to this trimmed off section.
I used my Stampin' Trimmer to cut up 12-pieces of copy paper that measured 2-1/2" x 4-1/2".
I neatly stacked all 12 pieces of the copy paper into the center section of my holder and then used my desk stapler to adhere that paper into my holder.
The next thing I did was create a closure for my holder.  I used Lemon Lime Twist cardstock and the 3/4" circle punch to form the base ...... And then I grabbed some Berry Burst cardstock and the smallest flower from the 'Flourish Thinlits Dies' and created this darling little flower to top off my Lemon Lime Twist circle.  I used a Stampin' Dimensional to adhere that piece to my holder.
To secure my holder closed .... I stacked two Velcro small dots together and attached them to the flap portion of my holder ........
Then all I needed to do was close that flap over ..... PRESS DOWN FIRMLY and the Velcro pieces would be attached to my holder.
To pretty up the stapled section of my holder, I wrapped some of the new 'Night of Navy Corduroy Ribbon' around that section and tied it off into a pretty knot. 
For my sentiment panel ........ I punched a Berry Burst 2" Circle Punch and stacked a Night of Navy 'Tailored Tag Punch' piece onto that.  The new 1-3/8" Scallop Circle Punch was punched with Lemon Lime Twist cardstock and I topped that off with a 1-1/4" Circle Punch piece in Berry Burst.  My sentiment was from the new 'A Good Day' set and I punched that out with a 1" Circle Punch. 
I jotted a quick note on the inside paper......
And topped my flower closure off with a Night of Navy 'Enamel Shape'.
A pretty quick and easy project that is perfect to hand out as a quick little gift ....... or maybe even customize them and use them for a quick stocking stuffer for Christmas.

Thanks for taking part in our blog hop, there are so many amazing ideas and inspiration you don’t want to miss. Remember that currently, you are at my blog – Kadie Labadie at KardsByKadie, so check the blog hop line up list below to see who is next on the list.