Wednesday, June 19, 2013

Mosaic Madness Meets Perfectly Penned

Happy Wednesday My Blogger Friends!
Today I have two Stamp Camp sessions that I will be offering......Going to be a busy day for me.....So let me get right to my card share for today.......
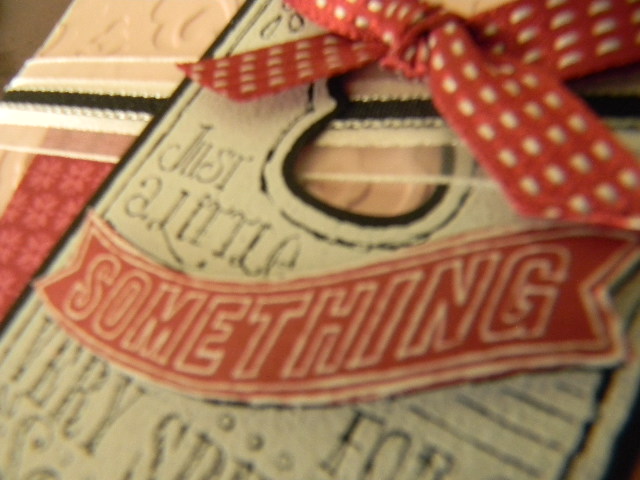
This card was a CASE card from the Stampin' Connection Demonstrators website.  I knew the minute I saw this card design by Deb Valder that I would be creating a sample card for my June Open House. 
I used Baked Brown Sugar cardstock for my Mosaic Madness punched images and added a stamped panel trim of the Mosaic Madness stamp set across the center of my card.   
I used the new Modern Mosaic Embossing Folder on the top half of my Whisper White panel and then dropped the punched mosaic punched pieces into each of the four embossed mosaic sections.  I used the Itty Bitty Shape Punch Pack to create the center flower for each mosaic punch.  And to complete each center.......I added a small rhinestone for a little bling action.
 
I love how this card turned out and will more than likely be using this layout for an upcoming Stamp Camp this fall.
 
Thanks for joining me today......I'll be back tomorrow to begin sharing my June Stamp Camp cards with you.  Hope you can come back and join me for that share.  Keep Living Your Dream!

Tuesday, June 18, 2013

Stampin' UP! Shopping Cart


Happy Tuesday My Blogger Friends!
Today I'm going to be busy setting up for my Stamp Camp tomorrow..........So, I'm going to jump right in with today's project share.....
I made these adorable Stampin' UP! Shopping Carts for each of my Stamp Club ladies that were at my June Camp.  How STININ CUTE are these?
I bought the shopping cart at Oriental Trading Company and have honestly had them for SEVERAL YEARS.  I thought they would be the perfect parting gift to give my Club gals on our last month of club. 
Here's what the carts look like EMPTY and with the Stampin' UP! decal that I made up for the front of the cart.
 My good friend Kris had this stamp that said "Groceries or Stamps".....UHM......
 I thought this would be the PERFECT tag to make for each of the carts.
Here's a close-up of the inside of each of the cart.  I had a small stamp in one bag....and of course some chocolate in the other bag.
Here's a close-up of the two bags.....
I used some of the newest DSP that is in our current catalog to decorate the four pieces of chocolate that I wrapped up for each cart.
The ladies LOVED LOVED LOVED their Club gift....and I even heard from one of my Club gals (Pam) and she told me that she was using the cart to store her distress ink and sponges.  She said it looks perfect on her studio desk.......YIPPPIEEEE! 
 
So there you have it........a SERIOUSLY FUN PROJECT that came together in a SNAP and I just couldn't have planned a better gift to share with my June Club gals.
 
Thanks for joining me today......I'm off to start setting up for tomorrow's Stamp Camp.  Hope you can make plans to come back tomorrow to check out another new sample card that I will be sharing.  Keep Living Your Dream!


Monday, June 17, 2013

Stamp Club Card #2

Happy Monday My Blogger Friends!
Today I have the second card that my June Stamp Club Gals made on Saturday.  Check out this cute cute card......

This card was inspired by Sandy Risi on Stampin' Connection.  This is a SU Demonstrators site and needless to say.........There are SO MANY talented and creative ladies who share their work on this site.  The minute I saw this card......I FLIPPED.  I knew it would be the perfect add-on for my Chalk Talk Club Projects!
I embossed the Pink Pirouette cardstock panel with the new Beautifully Baroque Embossing Folder.......(OH SO PRETTY!).
The ladies used VersaMark on a piece of Basic Black cardstock and then used White Embossing Powder to create a "Chalk Board" tag for the front of their card.  We used the new Chalk Talk Framelits dies and the ladies even had the opportunity to use the new Magnetic Plateform that SU has in our new catalog..........(They agreed it's a MUST HAVE!).
The ladies cut-out the flag image that was stamped on a piece of Raspberry Ripple cardstock using Whisper White ink.  A couple pieces of dimensional adhesive behind their cut-out flag image and it popped right off their tag.
We also added a small 3/8" Raspberry Ripple Satin Stitched Ribbon to the top of their die-cut tag and looped it under the White Organza and 1/8" Black Taffeta Ribbon piece that was added to the top portion of their card.
We used the NEW Birthday Basics DSP to create a charming flag banner ..... and that was adhered behind the White Organza ribbon and adhered directly down onto my card.
 
Thanks for joining me today!  I'm all ready for Stamp Camp on Wednesday......so I plan to spend today playing in my studio with some of the new product I've purchased.  Hope you can come back tomorrow ....... I'll be sharing another new card creation with you.  Keep Living Your Dream!

Sunday, June 16, 2013

Stamp Club Card #1

Happy Sunday My Blogger Friends!
And a SPECIAL Father's Day Wish to all the Dad's out there.  Hope you have a fabulous day and can spend the ENTIRE DAY doing whatever makes you feel good!
 
My blog share today is one of the cards we made at my June Stamp Club yesterday.  Pam was the hostess for June....and she had NO PROBLEMS knowing what to pick for her technique/stamp set for June.  She picked the Chalk Talk stamp set and wanted to learn the chalk board stamping technique.  HOW FUN.......This set is PERFECT for that technique.  I gave the ladies two options for the first card.........
 Here is the 1st version......

 And here is the second version.........
The first version used the "I'm So Grateful There's You In The World" stamp from the Chalk Talk set.......
 And the second version used the "Happy Big Day" stamp from the Chalk Talk set.
 Both cards used the NEW Brights DSP Stack.....and one version the gals could use the Black 1/8" Taffeta Ribbon........
 And the other option was to use the Real Red 1/8" Taffeta Ribbon.
The ladies stamped their image out using VersaMark and White Embossing Powder.  And then when the embossing powder had cooled off.....They used a Whisper White Stamp Pad and a small piece of a white wash cloth and were able to create the chalk board erased look on their Basic Black panel.
 Didn't matter which stamp the ladies selected.......Both cards turned out AMAZING!
 
Thanks for joining me today!  I'll be back tomorrow with the second Stamp Club card that my club ladies made.......So I'm hoping that you will make plans to come back and join me for that share.  Keep Living Your Dream!

Saturday, June 15, 2013

Father's Day Cards

Happy Saturday My Blogger Friends!
It's Stamp Club today so I'm going to jump right in to my card share.  Here are the Father's Day cards I sent out to 8 of my FAVORITE DADS.......

My inspiration came from Amy Storrie who made a similar Father's Day card and shared it on her blog.  Now normally if I'm going to CASE a card.......I will put my own spin on it.  BUT.....since I waited till Thursday to make and get my 8-Father's Day cards out in the mail.........I seriously pretty much just CASE'd the card Amy made and cranked these little cuties out the door.
I used the Fitting Occasion stamp set to create my Artisan Punched piece ......... and to add my own spin to my cards I used Red Ink for the Necktie and added a small Rhinestone Jewel to the necktie image.
I used the Label Love stamp set to stamp my Artisan image and then punched it out with the coordinating punch.  I stamped my mustache and tie onto a piece of Very Vanilla cardstock and used the 1" Circle Punch to punch out my image and adhere it directly onto the stamped Label Love image.  Adding dimensional adhesive to the back of the Artisan Punched helped to create some dimension on that portion of my card.
My Happy Father's Day sentiment was changed up a little bit too.  I used the Teeny Tiny Wishes stamp set and stamped that onto Very Vanilla cardstock and created a fun little banner for the bottom section of my card.  
I used the new Modern Medley DSP and created four panels for the front of my card.  LOVE how my card turned out.
So my 8-cards went out to my Son (Michael)......Two Son-in-Laws (Kris and Michael).......Jack's three Sons (Pete, Adam and Gabe)......and two of my FAVORITRE GUYS on the planet (John Hamm and Dick Ebert).  Hope that all the guys out there have a FABULOUS Father's Day and can spend time on Sunday doing what TOTALLY makes you HAPPY!
 
Thanks for joining me today!  I'll be back tomorrow to share the two cards that we are making at today's Stamp Club........Hope you can come back and join me for that share.  Keep Living Your Dream!

Friday, June 14, 2013

Mosaic Madness Card

Happy Friday My Blogger Friends!
It was a SAD SAD Day at the Fisher/Labadie household yesterday.  We kept looking out at the nest ........ Just hoping to see Spike or Gizmo return ...... But didn't have a single visitor!  There has been lots of activity on our hummingbird feeder - and we can only hope that Spike and Gizmo have found that feeder.  Many THANKS to all the followers that have left comments - You truly touched me with your sweetness.
I saw a sample of this card made on the Stampin' UP! demonstrator website and fell in love with the design.  It uses the new Mosaic Madness stamp set and the new Mosaic embossing folder.
I used the Bordering on Romance stamp set for my floral image and used my Stampin' Write Markers to watercolor in each of the flowers.
Here's the Mosaic Madness border stamp that makes a great accent border for the bottom portion of my card.  I used the new Banner Greeting stamp set to add a fun flag sentiment to my border panel.
And I also used the Mosaic Embossing Folder to add some fun texture to my Calypso Coral base card.  Really like how fresh and snappy this card turned out.
 
Thanks for joining me today!  I'm off to go put the finishing touches on my last Stamp Club gathering tomorrow.  Can't wait to see the club ladies and spend some time playing with the new stamp set Chalk Talk.  I'll be sharing the two card projects we make at my June Stamp Club with you on Sunday.    
 
I'll be back tomorrow to share the fun Father's Day cards I made for the guys in my life......All eight of them.  Hope you can come back and join me for that share.  Keep Living Your Dream!

Thursday, June 13, 2013

Forever With You Card

Happy Thursday My Blogger Friends!
Day 20 (or could be Day 21) of My Hummingbird Update......
And then there was ONE......

Well it was official..........Spike has left the nest and that left Gizmo to work on his flapping skills.  Not sure when Spike left the nest ..... thinking it was Tuesday evening or early Wednesday morning.  This is what I spotted when I woke up to on Wednesday morning.  I was hoping that Gizmo would QUICKLY figure out it's better to be part of the PACK and get his wings flapping,
And now there are NONE........

Gizmo left the nest Wednesday afternoon right before noon.  Jack said he looked up from his chair and Gizmo was taking flight.  OH MY GOSH.....we are official....EMPTY NESTERS!  Jack told me that shortly after Gizmo flew away Momma Goldie came back and was trying to feed the babes and then realized there wasn't anything in the nest but feathers........Jack said she looked around wondering where she left her babes and then flew away.  We haven't seen Goldie return back to the nest.
 
SO THERE YOU HAVE IT FRIENDS!  My 21 day adventure of capturing a true miracle from the comforts of my living room window.  I have been blessed to have been a part of this and I'm hoping that Spike and Gizmo find wonderful adventures and even come back to RE-USE the nest MANY THANKS to all who have been following this adventure with me.....I appreciate all your wonderful comments and for all the entertainment my little hummer provided you over the last couple of weeks.
 
My card share for today is using the new Gingham Garden DSP and the Forever With You stamp set.
I used the new In-Color ink Strawberry Slush for the "wherever" words on my Forever With You stamp set.....and the remainder of the letter used my Island Indigo ink.
My Window Framelits created the perfect focal image for my sentiment and all that was left to do was add a Rhinestone to each of the corner of my Island Indigo frame.
I also punched out a Pear Pizzazz Dotted Scallop Ribbon Border Punch and added a tiny piece of Island Indigo cardstock through the center of the border punch and adhered that to the center of my card.  It joined the four square DSP pieces together and gave my card that little something something it was needing.
 
Many thanks for joining me today.......I'll be back tomorrow to share another new product card with you.  Keep Living Your Dream!