Tuesday, December 25, 2012

December Stamp Camp Part Four

Merry Christmas My Blogger Friends!
Today I will be sharing with you the last project that we made at my December Stamp Camp.  I had the Camp Gals create a bookmark and they each were able to put their own spin on their bookmark.
Here is a picture of the sample bookmark I made for them to CASE......
But their spin was to layer and create their own bookmark.  And believe it or not.....they did create some pretty amazing bookmarks for their own.
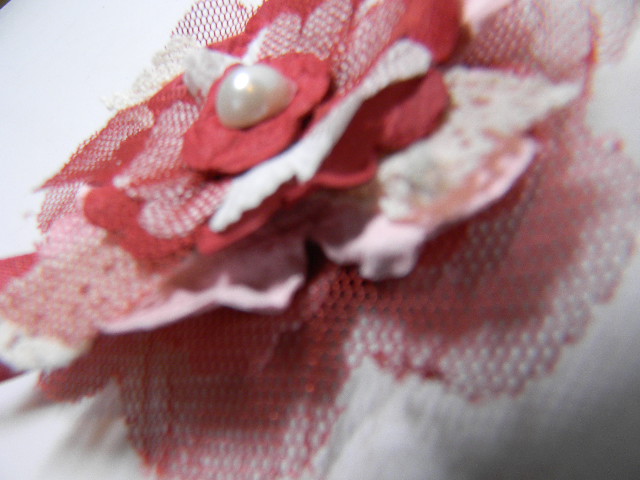
We started with a base of two layers of Cherry Cobbler Tulle Ribbon......
And added three layers of punched cardstock flowers, a 1/2" circle, a layer of Victoria Crochet Trim and a Paper Daisy Flower (page 175) for the top.
The bottom of our bookmark was a medium Vintage Faceted Designer Button.
And for the back of our bookmark we added a layer of the Blossom and 1-3/4" Scallop Circle punches.
To create a pretty shabby chic look to our flowers we sprayed our flowers and circles with water and then wrinkled all our pieces up and let them dry all wrinkled.  This gave each of our flowers a shabby chic look and helped to add lots of texture and dimension to our layers. (The trick to this step is to let each of the pieces you sprayed with water the opportunity to DRY so your adhesive can stick to the cardstock.)
OH....and one last product......The actual bookmark started with a piece of 1/2" Cherry Cobbler Seam Binding.  That was sandwiched between the two pieces of Cherry Cobbler Tulle Ribbon that was diecut out using the 3" Bigz die circle.
 
Such a pretty gift and comes together in a SNAP!  The really nice thing about making this as a gift.....You can create your bookmark in whatever color fits that someone special your making it for.
 
Thanks for joining me today.......Hope you have a very Happy and Merry Christmas.  I'll be back tomorrow to begin sharing some Christmas Gifts and Cards I've received this holiday season.  Keep Living Your Dream!

Monday, December 24, 2012

December StampCamp Part Three

Happy Monday My Blogger Friends!
Today I have the third project we made at my December Stamp Camp.  This birdhouse creation was inspired by fellow SU Demonstrator Kelly Gettelfinger.  When I saw this darling birdhouse that Kelly showcased at Stampin' Connection (SU Demonstrators website) I knew immediately that it would be the perfect project for my camp gals to make.  Check this cutie little creation out......
This Birdhouse is actually a Post-it-Note Holder.....
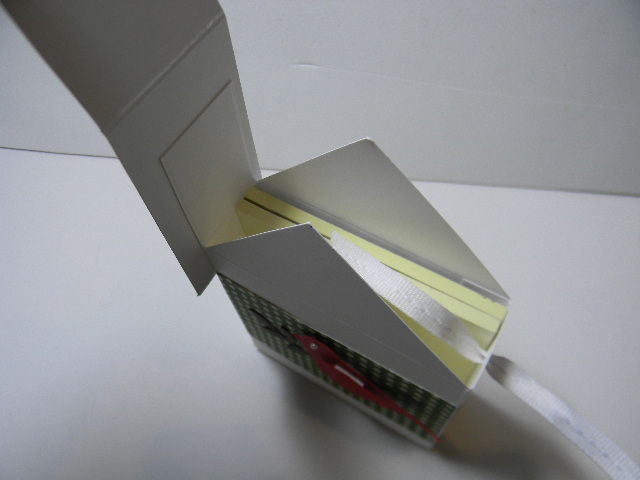
Here's a view of it looking down onto the house......
The size is perfect for holding several pads of Post-it-Notes.
And here is what happens when you untie the Stitched Ribbon and lift back the roof......
That's right.......It's filled with Post-it-Notes!
You need to punch a small hole into the roof and also into the side of the house ...... so you can attach a small piece of ribbon to close up your birdhouse.
The roof flips up so you can access your post-it-notes.
We used the Be a Good Cheer DSP to decorate our birdhouse......
And we used the bird punch to create a darling little bird for our birdhouse.
 
The measurements for this birdhouse are:
Base Box = 5-1/2" x 8-1/2" Whisper White
Score on the 5-1/2" side at 1" and 4"
Score on thr 8-1/2" side at 3", 4", 7" and 8"
 
DSP for Siding Your House:
Qty 2 pcs of 3"x2" DSP
Qty 2 pcs of 3"x1" DSP
 
Roof: 1-1/2" x 5" Cardstock (we used Gumball Green) and you will score this in half to create your roof.
 
Thanks for joining me today - I'll be back tomorrow to share the last project we made at my December Stamp Camp......Hope you can join me for that share.  Keep Living Your Dream!

Sunday, December 23, 2012

Decemer Stamp Camp Part Two

Happy Sunday My Blogger Friends!
Today I have the second project we made at my December Stamp Camp last Wednesday.  This project is a little 3x3 Monogram Fold Over Purse that holds three little 3"x3" notecards.  Check it out......
We created this fun little purse with Whisper White Cardstock and the Floral District DSP.
We also used the Notable Alphabet Stamp Set to stamp our monogram.
We wrapped a piece of Gumball Green Satin Stitched Ribbon around our box and added a tiny piece of Summer Starfruit Ribbon before we tied the knot.
The gals each created three little 3x3 note cards that tucked inside their purse.
There were two Gumball Green Notecards and one Summer Starfruit Notecard for each purse.
And each notecard was monogrammed and matted onto a scallop circle.
The gals even used a paper piercer to pierce holes into each of the scallops on their mongram cards.
The measurements for this little purse start with a 6"x10" piece of cardstock.  On the 6" side you score at 1" and 4-1/4".  On the 10" side you score at 1", 4-1/2", 5-1/2" and 9".  You remove the lower left and upper right hand square of your purse and then cut up to the score line of both the top and bottom portion of your purse.  We added sticky tape to close our purse up.  After we got our purse assemblied.....we added our DSP around the entire top portion of our box and a small piece was added to the bottom of our purse.
Here's a close-up of how the top of the purse folds over to creat a fun little layered fold to this purse.
And a close-up of the handle ...... Which was a 9"x1/2" piece of Whisper White cardstock and we cut a piece of DSP at 9"x1/4" and adhered the two pieces together and then sticky taped the ends of the handles into the purse.
This is a FABULOUS GIFT and one that comes together SOOOOOO QUICKLY! The fun to this project is you can custom design it to coordinate for that someone special on your gift giving list and it can be created in their favorite color combination. 
 
Thanks for joining me today......I'm busy putting the finishing touches on my Christmas Gift for my SaddleBrooke Stamping Friends........Which I plan to deliver bright and early tomorrow morning.  I'll be back tomorrow to share the third gift that we made at my December Stamp Camp - Hope you can join me for that share........Keep Living Your Dream!

Saturday, December 22, 2012

December Stamp Camp Part One

Happy Saturday My Blogger Friends!
Today I will begin sharing with you the 3-D Projects we made at my December Stamp Camp.  Our theme for December was Last Minute Gift Giving Ideas and we made four of the most ADORABLE and QUICK Gift Giving Ideas for this busy holiday season.  Let's get started with the first project we made.......
 This first 3-D project was inspired by the famous In and Out Burger baskets.
 This tray was designed to hold 3-A2 Note Cards and envelopes......
We used a base of Very Vanilla for our tray and grabbed the Tasteful Trim die to create the Early Espresso scallops that go completely around our tray.
The Early Espresso and Crumb Cake Scallop Tulle Ribbon was the PERFECT touch to wrap around our tray and tie the entire package up.
We created three A2 Elegant Butterfly cards for our Tray......And each card was created with a Very Vanilla base and then Crumb Cake and Early Espresso squares.
 There are three squares and three butterflies on each card.......
And we added a small piece of dimensional to the backside of each butterfly to add a little lift for each butterfly.......
 And we also added three drops of Dazzling Details to the center of each Butterfly.
Here's the Crumb Cake and Early Espresso Card.......
 The Early Espresso and the Festival of Prints DSP Card.....
 Amd the Early Espresso and Crumb Cake Card........
LOVE LOVE LOVE how this project turned out and I'm going to create more of these and give them out as hostess gifts in 2013.
So there you have it......The first of the four projects we made at last Wednesday Stamp Camp.  I'll be back tomorrow to share the little 3x3 Purse we created.....Hope you can make plans to join me for that share.  Keep Living Your Dream!


Friday, December 21, 2012

December Club Cards

Happy Friday My Blogger Friends!
Today I will be sharing the two cards that my Club gals made for the inside of the darling little tote that we made at our December Club.  Here's a recap of the tote we made (with the two cards).....
Our tote was made with Rich Razzleberry and the International Bazaar DSP pack.
We created our A2 card with a Whisper White base card and added a Rich Razzleberry panel onto the front of our card.  We used the Fancy Fan Folder Stampin' UP! Embossing Folder on our Rich Razzleberry panel........

And we added a banner of the Internal Bazaar DSP across the bottom portion of our A2 card......
We also created a Daffodil Delight and Whisper White panel for our "Thank You" sentiment and two Butterflies to be stamped on........
And our Thank You sentiment was stamped from the Blooming with Kindness.....And our Butterfly was stamped  from the Papillon Potpourri stamp set.
For our 3x3 card used the same Fancy Fan Embossing Folder and Daffodil Delight and Whisper White panel.......
And we also used the Internation Bazaar DSP to create our banner for the bottom portion of our card.
The "Thanks" sentiment was from the Kindness Matters stamp set......And we also stamped our butterfly with the Papillon Potpourri stamp set.
The entire Tote Project was a HUGE HIT and comes together SO QUICKLY.  This makes it the PERFECT last minute Gift Giving Project.
 
THANKS for joining me today........I'll be back tomorrow to begin sharing the projects we made at my December Stamp Camp.  I can honestly say that my December Stamp Camp was the BEST CAMP I offered in 2012.  The theme for my December Stamp Camp was 3-D/Gift Giving Projects and we were able to complete FOUR PROJECTS in the two hours we were together.  The four projects we created are honestly the most ADORABLE 3-D/GIFT GIVING PROJECTS you could image ........... and you will want to make plans to join me tomorrow for that share.  Keep Living Your Dream!