Thursday, November 22, 2012

Blessing Box

Happy Happy TURKEY DAY My Blogger Friends!
Count-Down to Wisconsin in 8 Days!
It's TURKEY DAY and I hope you are BLESSED WITH ...... Great Food, Relaxing Moments, Wonderful Football, Plenty of Laughter and you are able to FILL YOUR DAY WITH FABULOUS THANKSGIVING TRADITIONS!

Though Jack and I won't be sharing this Thanksgiving with our Family ....... We will be sharing it with seveal SaddleBrooke Families and having our Thanksgiving Dinner at our Club House this year.  It will be a relaxing day that we will FILL with ALL OF THE ABOVE.

My share for today are the Thanksgiving Blessing Boxes that I deliveried to 22 of my DEAREST and SWEETEST SaddleBrooke Friends.  Check out this little cutie that each of them found hanging on their mailboxes......
 They are my traditional Thanksgiving Blessing Box with this DARLING Scarcrow Face!
I based my idea from a card my dear sweet blogging friend Donna Fritz had made for me (THANKS DONNA for your amazing creation.)  Donna made me a scarcrow card and I knew IMMEDIATELY that his little face would look PERFECT attached to the front of a little box.....and filled with my traditional Thanksgiving Blessing Mix.
So I set out to make 22 of these Scarcrow Boxes for my dearest and sweetest SaddleBrooke Friends.
I made FOUR versions of this little cutie ..... Each one used the SU Top Note Die, the Bird Punch, some Circle punches, the Orchard Harvest DSP along with Crumb Cake cardstock. 
Here's Version #1......
 Here's Version #2......
 Here's Version #3......
And Version #4.....
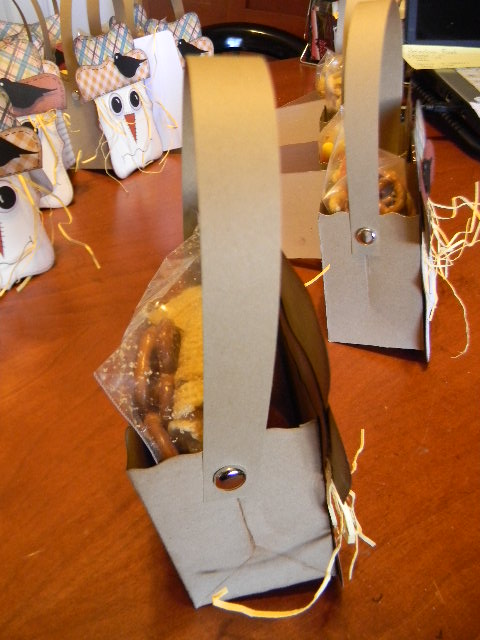
 I also used the SU Fancy Favor Bigz Die to create the box......
And my Thanksgiving Blessing Mix was tucked right into the fancy favor box.
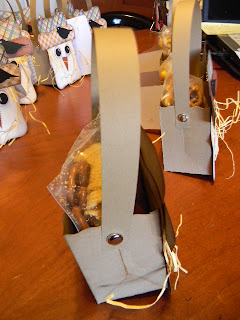
I also made a 1/2" x 11" handle for my box and attached the handle with some silver brads.
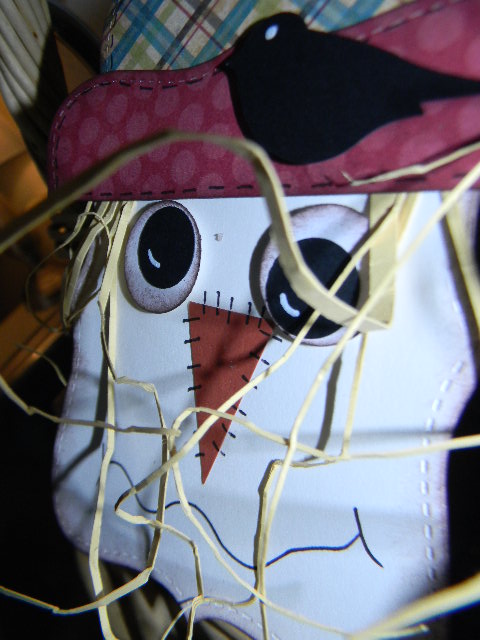
I used the SU Bird Punch to create the bird sitting on the scarcrows hat.....and added some thinly sliced stripes of So Saffron cardstock under his hat to look like his straw stuffing.
 Here's all my cuties tucked in a basket.......Waiting to be deliveried!
 I used a Black SU Writer to free-hand his little mouth and as far as the cute little nose......I know first hand from a phone call I received that the stitching lines I made to his nose were a favorite!
 Here's the backside of my blessing box......
I didn't want the backside of my box to have DSP or Very Vanilla Cardstock showing (on his hat or backside of his face) ...... so I went the extra mile and added a backing of crumb cake cardstock to the backside of his hat and face and that way the entire backside of my box was covered completely in Crumb Cake cardstock (and that way matched the Crumb Cake cardstock of the Fancy Favor Box). 
I added Bugles.....Pretzels.....Peanuts.....Candy Corn and Orange Slices for my Blessing Mix
 Isn't his little face just TOO CUTE for words........
 And adding the straw behind his hat just gave him a totally FUN LOOK!
SO THERE YOU HAVE IT ........ Another HAPPY HOLIDAY SURPRISE for some of the most AMAZING FRIENDS a Girl could have.  I am without a doubt......TRULY BLESSED!
 
Wishing you a Happy and Blessed Thanksgiving!
Keep Living Your Dream (I AM)!

Wednesday, November 21, 2012

Stamp Club 3-D Project

Happy Happy Wednesday My Blogger Friends!
Count-Down to Wisconsin in 9 Days!
Today's share is the 3-D Project we made at Stamp Club last Saturday.  I wanted to create a gift that you could "give" to a fellow papercrafter and I remembered the gift that my Scrapbooking GalPal Kaila (from Wisconsin) made for me two years ago when I returned to Madison for a Christmas Retreat.  I put my own SPIN on this project for my Club Gals.
We made a sheet of Embellishment Glue Dots!  We used LOTS of leftover cardstock.......Some small punches......The Teeny Tiny Wishes Stamp Set and some pearls and rhinestones!
You will need a piece of Window Sheet that measures 3-3/4"x5-3/4" ...... and you will adhere 12-Mini Glue Dots onto this piece of Window Sheet (just make sure you evenly space out your glue dots.....giving them equal distance between each glue dot).  You will also need one of SU Small Cello Bags that measures 4"x6".
Next you will begin punching 1", 3/4" and 1/2" circles and position your circles right onto the exposed sticky side of your glue dots.  This will be the base of each of your embellishements ...... and from there the SKY is the LIMIT.  You can punch out heart punches - flower punches - stamped circles ...... SERIOUSLY......HAVE FUN!
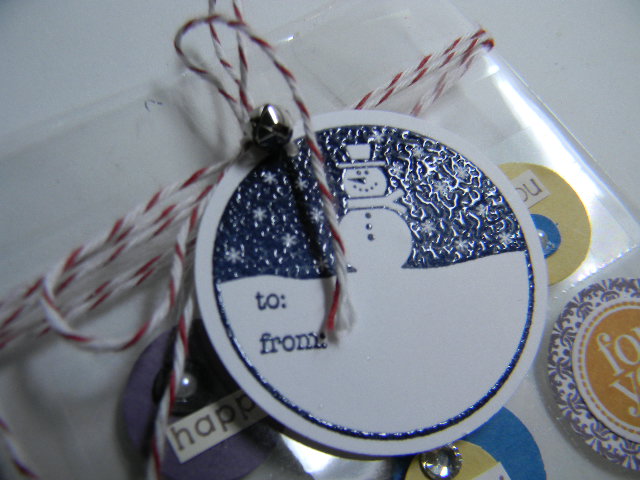
We stamped and embossed (in Midnight Muse) a snowman tag from the Tags til Christmas set and attached it to the top of our cello bag with some Cherry Cobbler Bakers Twine and two Jingle Bells.
This project is a GREAT WAY to use up those scraps that WE ALL HAVE - and can be a fun gift to give to all your papercrafting galpals.
 
Thanks for joining me today, I'll be back tomorrow to share the Thanksgiving Blessing Boxes that I made for my SaddleBrooke Girlfriends.  Hope to see you tomorrow......Keep Living Your Dream!

Tuesday, November 20, 2012

Stamp Club 3x3 Project

Happy Happy Tuesday My Blogger Friends!
Count-Down to Wisconsin in 10 Days!
Today I have the 3x3 card project that we made at my November Stamp Club this past Saturday.  This project was a HUGE HIT and the project idea came from Teri at Big Idea From A Little Girl blog.  She shared this project on her blog about a year ago and I FINALLY got around to making this ADORABLE project.   
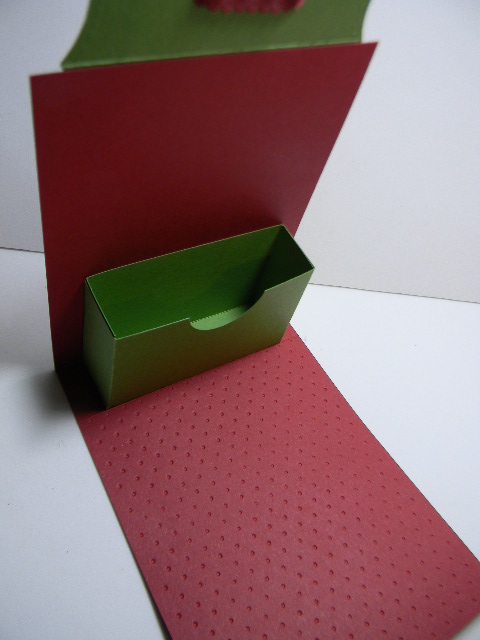
This is a 3x3 card holder that will easily hold SEVERAL little 3"x3" note cards.
We started with a Cherry Cobbler base of 4-1/4" x 11" cardstock and scored it at 5" and 6".  We ran our Cherry Cobbler piece through the Big Shot and used the Lots of Dots embossing folder to add some texture to the front of our holder.
The sweet scallop closure for the front of our holder was stamped from the Four Seasons Hostess set.  It was stamped on a Early Espresso piece of cardstock with Whisper White ink and then it was embossed with White embossing powder to really get the image to POP!
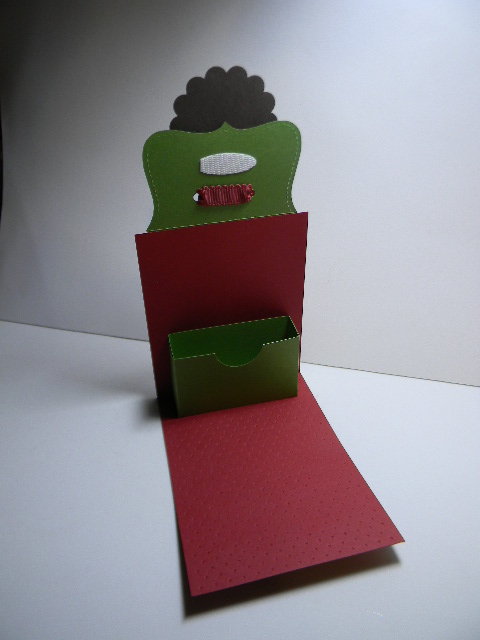
Here's what our holder looks like when the Top Note closure is opened up.......
It reveals a small box that is secured to the inside of our holder and it holds 3x3 notecards.
We made two 3x3 note cards from the Snow Festival DSP.......
And basically all you need to do is trim the DSP down to 2-3/4"x2-3/4" and adhere those panels to a 3"x3" Whisper White card base.
The inside pocket is a 5" x 5-1/4" piece of Gumball Green Cardstock.......
And you score your 5-1/5" edge at 1" on each side......
And the 5" edge you score at 2" and 3".
Here are the two cards that I made for my holder......
Before I give my holder away......I'm going to fuzzy up my cards by adding some Cherry Cobbler Dazzling Details.......
And some Silver Sparkle Dazzling Details to both my cards.
We added a piece of Cherry Cobbler Scallop Dotted Ribbon to the top of our holder.....
And I gave the girls the option of either a Early Espresso scallop or a Cherry Cobbler scallop circle.  This project came together in a FLASH and several of the girls said they were going to make a few of these for Hostess Gift to give out during the Holiday.
 
Thanks for joining me today!  I will be sharing the 3-D project with you tomorrow....Hope you can come back and join me for that share.  Keep Living Your Dream!

Monday, November 19, 2012

Stamp Club A2 Project

Happy Happy Monday My Blogger Friends!
Count-Down to Wisconsin in 11 Days!
Today I have the first of the three project we made at Stamp Club on Saturday.  Typically, we do an A2 Card ...... A 3x3 Card ...... and some type of 3-D Project at our clubs.  The hostess for November was Lonnie and she asked me to do Christmas Gift-Giving Ideas and I put a total twist on the projects that we made.  For November - all three projects had a 3-D spin to them and today I will be sharing the A2 Card project with you.  Let's Jump Right IN.......
I wanted to create a Gift Card Holder for my A2 Card for November so I spun it up by using the Season of Sweets Designer Kit (Page 15-Holiday Catalog) for my Gift Card Holder.
I used one of the Gusseted Treat Envelopes for the base of my Gift Card Holder.......
I stamped the "Joy of Christmas" from the Perfect Punches stamp set and used my Window Frames Collection Framelits to die-cut out that stamped image......
I tucked a piece of Cherry Cobbler cardstock behind the window frame and used my White Signo Gel Pen to create stitching lines around the window image.....
This pretty pretty belly band was created with Very Vanilla cardstock and a piece of DSP from the "Be of Good Cheer" DSP pack.
We used a 1" circle punch to create a thumb-pull section on the back of our envelope.....
And this allowed the person opening this Gift Card Holder a way of pulling out the gift card (or check) that is tucked inside the envelope.
Here are the two panels that tuck inside the envelope.....
We used the Be of Good Cheer DSP to cover a square panel of Very Vanilla Cardstock and the Window Frames Collection Framelits was positioned right in the center of our DSP panel and our gift card can be secured right over the top of this diecut.
Check out how the Window Frames Collection Framelits (on the left) looks without a gift card adhered on top of it. 
The belly bands not only adds a little WOW FACTOR to our completed project......but also acts as a way of keeping our envelope closed (without us having to seal the envelope shut).
We also added a small Holly Berry to the upper corner of our window frame.  The Season of Sweets Designer Kit comes with two sheets of  Designer Card Stock Stickers and just peel right off and can be placed onto your project in a SNAP!  I have to say that several of the gals purchased this kit and all of them said that they would have never known how FUN and CREATIVE this Designer Kit was if I hadn't shared it with them at Club.  SO GLAD they liked this project.
 
I'll be back tomorrow to share the 3x3 card project we made on Saturday......Hope you can come back and join me for that share.  Keep Living Your Dream!