Tuesday, July 31, 2018

Acetate Box of Cards

Happy Tuesday My Blogger Friends
My blog post for today is 3-D Tuesday.  That means today I have a fun little 3-D project to share with you.  This project is SUPER FUN to create and the product is featured in 2018-2019 Annual Stampin' UP! catalog.  Let's jump right in with my project share for today.......
How ADORABLE is this little 4-1/2" x 4" acetate box?
I used the 'Clear Acetate Boxes' and just cut off 2" from the top to create this little box. 
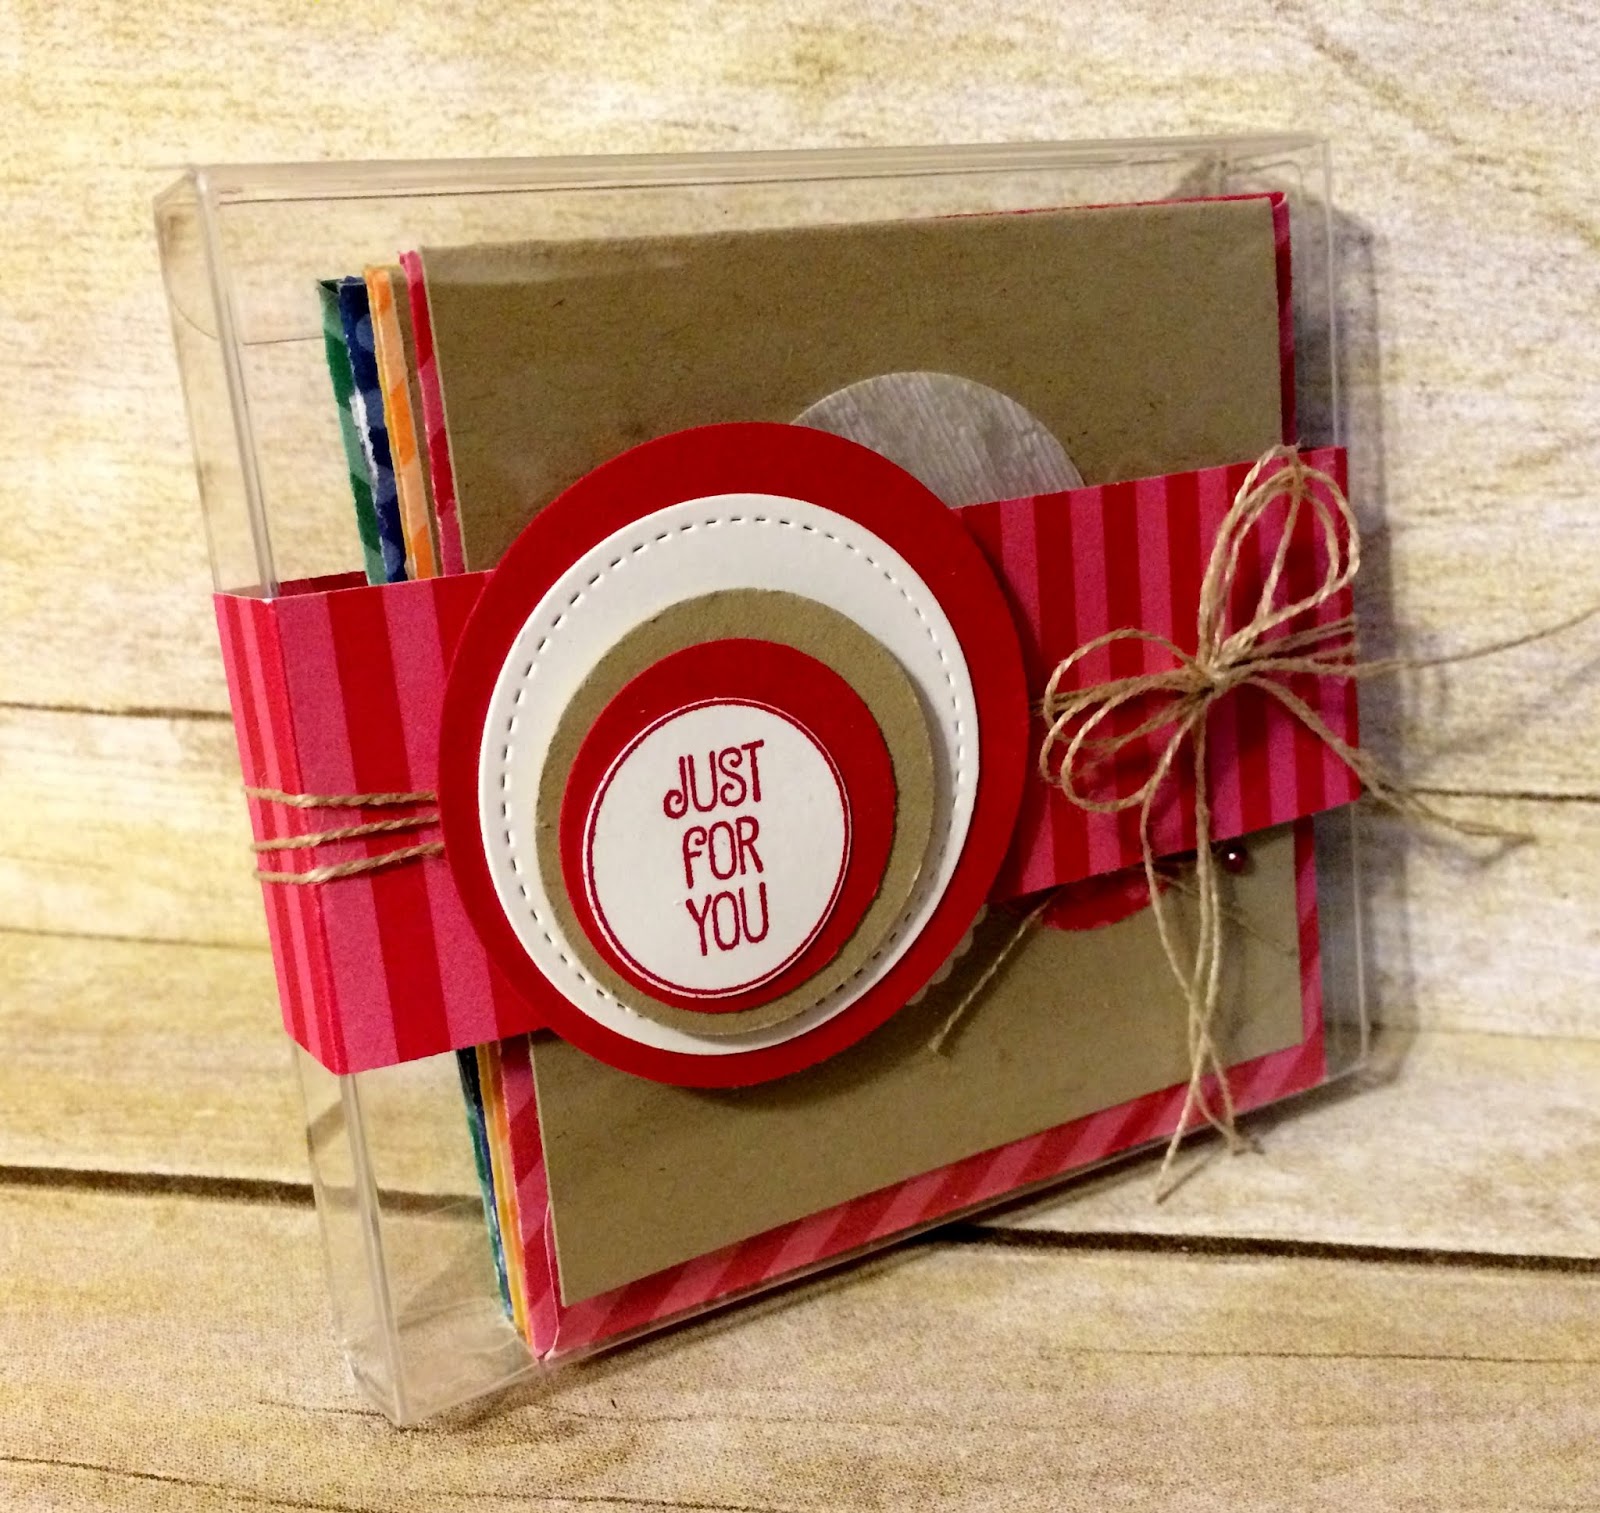
After I cut off the 2" from the top of the box ....... I scored it at 1/2" and 1".  That created the top fold for my box.
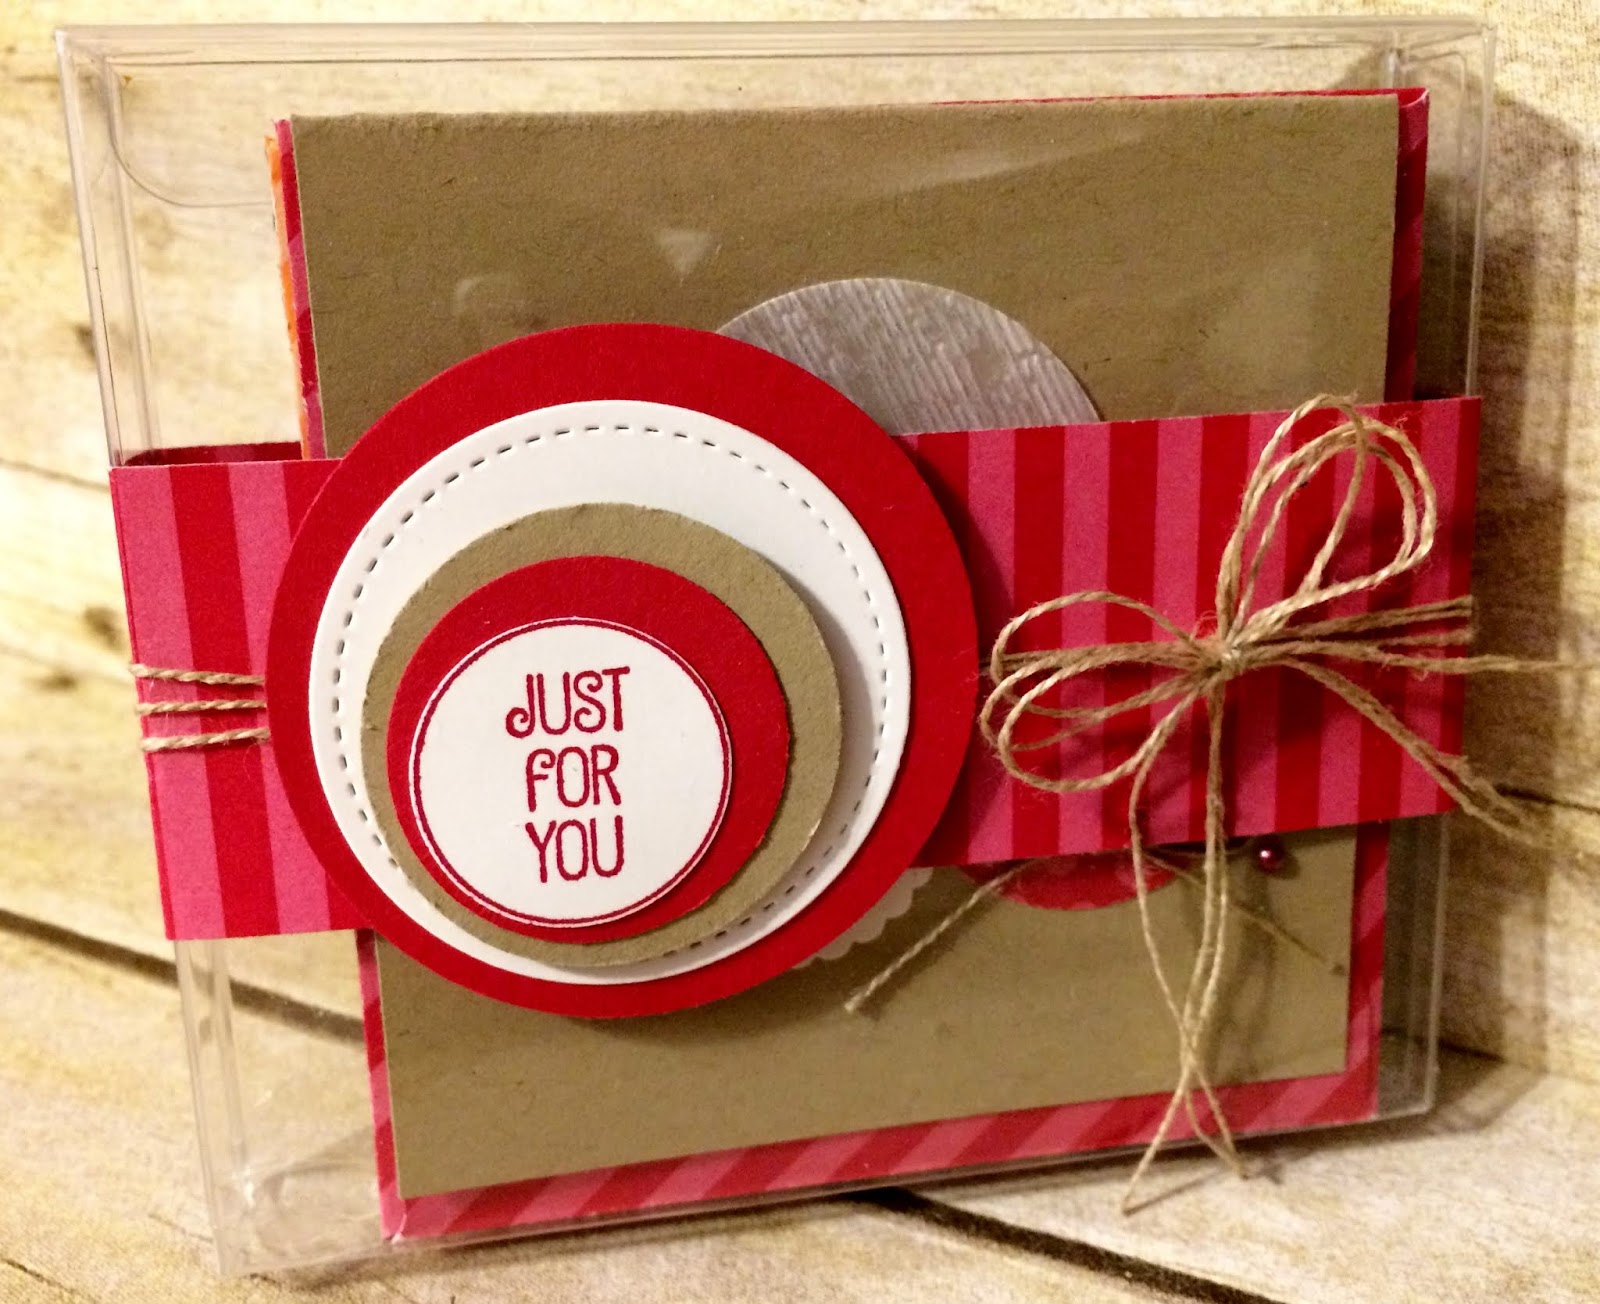
I used the 2018-2020 InColor DSP to create my belly band......And added some 'Linen Thread' around the center to add a touch of whimsy to the belly band.
I filled my little acetate box with a set of 3-1/2" x 3-1/2" note cards.
I used the 2018-2020 InColor Card Stock and DSP collection to create my five cards.  Here is the Pineapple Punch card.
Here's the Blueberry Bushel card.
 This is the Grapefruit Grove card.
 The Call Me Clover card.
 And my favorite.....Lovely Lipstick card.
Each card had a coordinating envelope that I made with the Envelope Punch Board.
And each card had a vellum 2" circle......that was run through the Big Shot using the 'Subtles Embossing Folder'.......
And a 1-3/4" DSP Circle along with a 1-3/8" Scallop Circle that was stamped with the 'A Good Day' set.  A final touch for each of the cards was adding a 'Linen Thread' bow and three pearls that were colored in with my Stampin' Blends.
 I'm just crazy about the way these little card turned out.
Can't wait to give this little gift away to someone special.

Thanks for joining me today!  I'll be back tomorrow to share a Wine Down Wednesday card with you ........ Hope you can make plans to stop back and join me for that share.  Keep Living Your Dream!

Monday, July 30, 2018

You're My Everything Upgraded Card

Happy Monday My Blogger Friends!
Today is Mix It UP! Monday and I have an upgraded version of the card I shared with you yesterday.  I used the exact same product that was used to create yesterday's card ....... but added a couple additional products found in the 2018-2019 Stampin' UP! Annual Catalog to bring this card up to the next stamping level.
Here is my Spot Light Sunday card from yesterday on the LEFT....
And my Mix-It-UP! Monday card for today on the RIGHT!!!!
I'm just crazy about how soft and pretty this upgraded card turned out.
I started out with the same Whisper White base card ...... But for my upgraded card, I added a panel of Petal Pink card stock to the front of my base card.
I used the 'Beautiful Layers' die to create my large Melon Mambo element ...... And I topped that element off with a 1-3/4" Melon Mambo 'Starburst Punch' piece.  I stamped my sentiment with the same 'Beautiful Promenade' set and then quickly sprinkled it with Clear Embossing Powder for one additional WOW FACTOR on this card.
I created the same Designer Series Paper panel for the center of my card ...... But for my upgraded version, I wrapped the 'White 5/8" Polka Dot Tulle Ribbon' around the entire length of this panel.  I did upgrade the polka ribbon by using my 'Petal Pink Stampin' Blends' to color each of the polka dots on the ribbon.  What a soft and beautiful upgrade this created.
And my final upgrade was adding the same 'Corrugated Heart Element' and using the 'Clear Embossing Powder' over the top of it for some extra sparkle and shine. 
So tell me friends.......Do you have a favorite????

Thanks for joining me today!  I'll be back tomorrow to share a 3-D Tuesday creation with you ...... Hope you can make plans to stop back and join me for that share.  Keep Living Your Dream! 

Sunday, July 29, 2018

You're My Everything Card

Happy Sunday My Blogger Friends!
Today is Spotlight Sunday ....... And I have a card I created using product from the 2018-2019 Stampin' UP! Annual Catalog.   This card uses several products from that catalog ....... And I'm thrilled with the way it turned out.  Let's jump right in with my card share for today..........
 I'm LOVING every little thing about this card!
I started this card out by stamping my sentiment from the 'Beautiful Promenade' set with Melon Mambo ink.  I stamped that sentiment in the lower right hand corner of my Whisper White base card.
Next, I added a panel of the 'Petal Promenade Designer Series Paper' that was matted onto a Melon Mambo panel.
But before I adhered that completed panel down to my Whisper White base card ....... I added some 'White 5/8" Polka Dot Tulle Ribbon around the right hand section of the Designer Series Paper panel and then adhered it down onto my base card.
A pretty touch was adding a 1-3/4" Petal Pink circle to the left hand edge of my Designer Series Paper ....... And using my Melon Mambo ink with a sponge dauber on one of the 'Corrugated Elements'.  I quickly sprinkled that heart with some 'Clear Embossing Powder' and that gave my pretty corrugated heart a glossy shine.
Just a quick and easy kind of card ........ That would look FABULOUS with any of our Designer Series Papers.

Thanks for joining me today!  I'll be back tomorrow to share an upgraded version of this very card with you ...... Hope you can make plans to stop back and join me for that share.  Keep Living Your Dream!

Saturday, July 28, 2018

Hooray Box of Cards

Happy Saturday My Blogger Friends!
My blog post for today is Paper Pumpkin Saturday ........... And I would like to share with you the project I created using the June Paper Pumpkin kit.   Here's that project......
Check out this amazing box of little 3"x3" cards.........
Made with one of the envelopes from the June kit.
 And the envelope/box holds 4-adorable little cards.
These are the 4-cards that were tucked inside my envelope/box.  To create these cards ...... I used the product in the June kit.
The only additional product I used on these cards ....... was a tiny panel of Basic Black and Lovely Lipstick card stock that was adding to the top of each panel of Designer Series Paper.
 I'm just crazy about the ways the balloons on these little cards just POPS!!!
To create the envelope/box ..... I cut one of the envelopes down to 2-3/4" and then scored three sides at 1".  I scored each of those 1" sections at 1/2" and that was how I pleated the sides and bottom of my envelope/box.  What a fun way to use one of the envelopes within this kit.

Thanks for joining me today!  I'll be back tomorrow to share a Spot Light Sunday card with you ...... Hope you can make plans to stop back and join me for that share.  Keep Living Your Dream!

Friday, July 27, 2018

Friends Friday Pics

Happy Friday My Blogger Friends!
My blog post for today is Friends Friday.  On Friday's, I have the honor of spot-lighting some of the fabulous cards that I received from Friends ....... Fellow Demonstrators ........ and Family.  Each of these card creations are works of art........and it is with great pleasure that I share more of the cards created by my Kadie's Ladies Team with you.  Let me share those pretty cards from this VERY TALENTED group of ladies..........
 First up today is the BEAUTIFUL card that Betty made.
This FABULOUS card was made by Lydia.
And here is what the other side of this barn door card looked like.
 
And my final card share for today is this PRETTY  looking card that Judy made.

Thanks for joining me today!  I'll be back tomorrow to share a special Paper Pumpkin Saturday creation with you ........ Hope you can make plans to stop back and join me for that share.  Keep Living Your Dream!

Thursday, July 26, 2018

3-Thank You Tag

Happy Thursday My Blogger Friends!
My blog post for today is Tag Thursday.  Today, I will feature a tag I created and show you how easy it is to use minimal supplies to create a SUPER PRETTY TAG.  Now that you have the details for my Tag Thursday creation for this week ........ Let's jump right in with my tag share for today........
Here's a FUN little tag you can create when saying thank you one time just isn't enough.
I stamped my thank you sentiment with the 'Abstract Impressions' set.
I used Berry Burst, Powder Pink and Lemon Lime Twist card stock and ink.  And each stamped sentiment was punched out with the 'Tailored Tag Punch.
I added a single 'Petal Pink Rhinestone Gem' to the bottom of each punched out sentiment.....
And topped my tag off with a trio of 3/8" Mini Ruffled Ribbon.
I'm just crazy about the way this tag turned out.....
And can't wait to make it many other color combinations.

Thanks for joining me today!  I'll be back tomorrow to share some Friends Friday creations with you ........ Hope you can make plans to stop back and join me for that share.  Keep Living Your Dream!

Wednesday, July 25, 2018

Love What You Do Card

Happy Wednesday My Blogger Friends!
My blog post for today is Wine-Down Wednesday.  My middle of the week card feature for today will hopefully offer you some inspiration and provide you with some motivation to keep you moving through your busy week.  Let's jump right in with my card share for today........
Who wouldn't LOVE receiving this card!
I started this cad out by adding a panel of the 'Share What You Love Specialty Designer Series Paper' right down the center of my base card.
Next, I sponged one of the 'Pearlized Doilies' with some Fresh Fig ink and matted behind it a Rich Razzleberry circle.  To the top of my sentiment piece ..... I used one of the frames that is included in the 'Share What You Love Embellishment Kit.  I stamped my sentiment from the 'Love What You Do' set with Rich Razzleberry ink.
I used some 'Fresh Fig 1/8" Sheer Ribbon' to wrap around the center of my card and tied it into a pretty bow.
The final touch was adding three 'Share What You Love Artisan Pearls' to the front of my card.
That's all it took to create this pretty little card.

Thanks for joining me today!  I'll be back tomorrow with a Tag Thursday creation to share with you ........ Hope you can make plans to stop back and join me for that share.  Keep Living Your Dream!