Happy Monday My Blogger Friends!
Today I am kicking off a NEW PLAN for my blog postings. I will have a different theme each day of the week......And begin sharing FUN NEW PRODUCT ........ GREAT PROJECTS and offering you some AMAZING TIPS and TRICK along the way. Here's how the weekly schedule is going to play out.......
Every Monday will be Mix It UP! Monday
Tuesday will be 3D Tuesday
Wednesday will be Wine-Down Wednesday
Thursday will be Tag Thursday
Friday will be Friends Friday
Saturday will be Paper Pumpkin Saturday
Sunday will be Spot Light Sunday
The actual details for each of these days will be revealed this week.......So please stay tune for more information.
My blog post for today is Mix It UP! Monday. On Monday's, I will feature a card that I've made and then share with you a second version of that same card. My mix-it-up version card will be slightly modified ........ And have additional product or additional techniques added to it. This will make the mix-up version a more detailed version of my original card ....... Thus giving you two different ways to make the same card. Now that you have the details for Mix It UP! Monday ....... Let's jump right in with my card share for today.
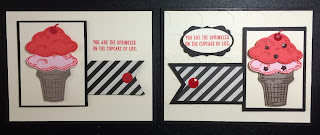
This special 'Mix It UP! Monday' card is a pretty standard card that I would make. It uses the new "Sprinkles of Life" stamp set that will be in our new 2015-2016 Stampin' UP! catalog.
I stamped my cone onto a piece of Tip Top Taupe cardstock using Tip Top Taupe ink. My two layers of topping are stamped with Watermelon Wonder ink and I used Pink Pirouette and Watermelon Wonder cardstock to create each of my layers.
My banner flag was created using the 'Typeset' Designer Series Paper........
And of course it just wouldn't be complete without a Real Red cherry on top.
So to 'Mix-It-UP!' ........ Here is the card I created on the right.
This card uses just a few extra products to create a real WOW kind of card.
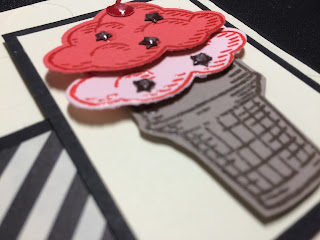
I started out by embossing my cone and toppings with clear embossing powder. A few stars were added (from the 'Star Border Punch') for sprinkles ......... And I used Crystal Effects on both the star sprinkles and the cherry on top.

I also added layers of dimensional adhesive between each layer to give my cone a real POP.
I used the 'Lots of Dots' Textured Impressions folder to give my Very Vanilla panel a little texture.
I punched out my sentiment with the Large Oval Punch and then used the "Circles Card Thinlits" to die-cut out this perfect Basic Black frame.
The only thing different I made to my 'Typeset' DSP was it was matted to a piece of Basic Black cardstock.
So there you have it my friends.........My 'Mix-It-UP! Monday' card for today. Hope you will take a couple of these ideas and incorporate them into a card creation of your very own.
Thanks for joining me today! I'll be back tomorrow to share with you my first 3D Tuesday project ........ Hope you can make plans to stop back and join me for that share. Keep Living Your Dream!


Sweet & simple. The essence of stamping!
ReplyDelete